Icecrown is the final zone of Vikstone’s Classic Expedition. This Icecrown leveling guidefor WotLK Classic covers the Alliance’s storyline quests with optimized leveling routes, gold farming hotspots, faction/reputation mastery, and rare spawn locations.
Northrend Zone Guides
Vikstone’s Classic Expedition · Northrend Leveling Series 68–80
The screenshots and quest walkthroughs throughout this guide come from Vikstone’s original Northrend run on US-Terokkar, captured back in 2008-2009 during Wrath of the Lich King. The guide itself is built and updated for WotLK Classic, with routes, coordinates, and strategies.
Icecrown is the final zone of Northrend and the seat of the Lich King’s power. The Argent Vanguard marks the entry point, and quest progression pushes deeper into Scourge territory through the Shadow Vault, the Ebon Blade’s operations, and the storylines that set up Icecrown Citadel. The Argent Tournament grounds are here as well, offering daily quests, mounts, titles, and reputation rewards that keep players returning long after hitting 80. Flying is essential. The zone is built around vertical Scourge architecture and you won’t get far without it.
What’s Inside:
Storyline Quest Routes (77-80): Step-by-step Alliance progression organized by level bracket (77-78, 78-79, 79-80) with full walkthroughs
Player Chronicles – Icecrown: The Terokkar-US players who fought alongside Vikstone
Rare Spawn Guide: Locations, respawn timers, and hunting strategies
Gold Farming & XP Grinding Spots: The zone’s best farming spots can be found in the dedicated WotLK Classic Icecrown Gold Farming Guide, every spot with coordinates, farming maps, and market timing
Faction Reputation & Rewards: Major and minor factions, what they offer, and how to get there
On The Last Line of Defense, keep sweeping the same flight path to maximize bomb coverage. The 3 Frostbrood count for a big chunk of XP. Stack Scourgeholme quests before going in so every kill and crystal click is double duty. Next stop: head up to the phased Crusaders’ Pinnacle for the Crystalsong pair and Bridenbrad setup.
CRUSADER’S PINNACLE · Stabilize the base & quick Crystalsong lap
2Pinnacle Turn-ins & Crystalsong Pair
Turn in any remaining Scourgeholme/Pinnacle quests to fully phase the Argent camp.
Fly to Crystalsong and do both on the same lap: collect the unstable stone and deal with its fallout, then return to the Pinnacle to turn in.
Make sure A Tale of Valor (Crusader Bridenbrad line) is in your log, since it’s designed to be progressed during other flights and errands.
The Crystalsong pair is a very fast XP burst tied to Pinnacle. Knock it out early while your hearth is still elsewhere.
Keep A Tale of Valor in your log long-term, weaving through multiple hubs instead of being done in one sitting. Next stop: start following Crusader Bridenbrad whenever your route naturally passes his hill.
CRUSADER BRIDENBRAD · A Tale of Valor (parallel chain)
Carry the boons tour: seek the aid of Keeper Remulos (Moonglade), Alexstrasza (Dragonblight), and A’dal (Shattrath) as each sends you on short errands.
Treat this as a “between flights” storyline : progress a step whenever you’re naturally headed to Moonglade, Wyrmrest, or Shattrath.
Turning this in near the end of your Icecrown route is a nice emotional capstone and XP bump. Next core hub: move operations onto The Skybreaker gunship over central Icecrown.
THE SKYBREAKER (Alliance Gunship) · Ymirheim loop & core dailies
Fast lap pattern: clear 20 Ymirjar around Ymirheim’s upper rim → drop down into the Saronite mines to free 10 slaves → fly back to the Skybreaker and nearby quest givers for turn-ins.
Run the “rim → mines → ship” loop whenever you want repeatable XP and rep. It’s one of the cleanest dailies circuits in Icecrown.
Stack Blood of the Chosen with Assault by Ground so all your escort kills count. Next stop: transition to The Shadow Vault to unlock Ebon Blade operations in northern Icecrown.
THE SHADOW VAULT · Seize the fortress & open Ebon Blade ops
Unlocking the Shadow Vault early gives you a second powerful daily hub to pair with the Skybreaker/Ymirheim loop.
Save the [Group] Battle at Valhalas chain for when you have 3–5 players or are overleveled. It’s punchy but rewarding. Next stop: drop south-east to Blackwatch to dismantle the Fleshwerks/Malykriss.
Stack the Malykriss quests so every Runesmith, ore node, and cauldron hit counts toward multiple objectives.
For The Flesh Giant Champion, clear the area first so Morbidus doesn’t chain-pull extra trash during the fight. Next stop: fly north-west to Death’s Rise for Scarlet Onslaught anti-air and intel.
DEATH’S RISE · Scarlet Onslaught anti-air & intel web
Run No Fly Zone, Intelligence Gathering, and From Their Corpses, Rise! in a single clockwise circuit around Death’s Rise and Onslaught Harbor.
Bring at least one partner for the Mal’Ganis group quests if you’re on-level, since they hit harder than standard Icecrown trash. Next stop: shift focus to the Approach to Icecrown Citadel pit chain on the lower plateau.
APPROACH TO ICECROWN CITADEL · Pit chain toward Matthias
Watch your fall trajectory on Set it Off! : aim for safe ground, not the densest pack in the pit.
These quests are your on-ramp to Matthias’s storyline and the First Legion Forward Camp. Next stop: follow Matthias to the First Legion Forward Camp to see the Arthas set-piece sequence.
This chain is mostly about watching key lore moments. The XP is a bonus, but don’t rush the cutscenes here . They’re some of Wrath’s best.
Finishing Tirion’s Gambit neatly ties together your Argent/Vanguard progress before you pivot back north. Next stop: wrap Icecrown by ranking up at the Argent Tournament Grounds.
Jousting basics: keep 3× Defend up at all times, use Shield-Breaker at ~20–25 yards, Charge on cooldown, and only Thrust in melee once their shields are low.
The Tournament can be your long-term Icecrown “home base” for gold, champion seals, and mounts even after you hit 80. At this point you’ve touched every major Alliance hub in Icecrown and unlocked the key daily engines for sustained farming.
Part 1: Argent Vanguard, Crusaders' Pinnacle & Bridenbrad (77-78)
Argent Vanguard
Overview & Location
Pick up Judgment Day Comes! in Dalaran (or any capital breadcrumb) and report to Highlord Tirion Fordring at the Argent Vanguard in the Valley of Echoes(~86.9, 76.5; Tirion ~87.5, 75.8).
This opens the Argent Crusade’s Icecrown entry chain, which quickly unlocks Crusaders’ Pinnacle and the Skybreaker gunship routes.
Worth knowing: once the Pinnacle event completes, Penumbrius takes up post as the new hub’s flight master, so grab the fresh flight point before you fly out.
Icecrown · Alliance Leveling Guide
Argent Vanguard: Step-by-Step Walkthrough
Tirion Fordring's foothold at the Lich King's doorstep: hold the valley, purge Scourgeholme, and plant the banner that claims the Pinnacle. Check off steps as you go. Progress saves in your browser.
0/0 steps
Hub Setup
Flight path first, then the Highlord
Push to the Breach
Chores on the way north, then the skytalon runs
The Last Line of Defense
Argent Cannon at the gate
Once More Unto the Breach
The Ebon Watcher outside the Breach, then two clears
The Pinnacle
Up the hill with the banner
Shortcuts & Tips to Save Time
Skytalon loop: grab, drop, Soar straight back, never dismounting between runs. A tight clockwise triangle finishes all three crusaders fast.
Cannon accuracy: lead your shots and hold the beam on the wyrms until the kill text fires. Tapping them wastes the pass, and the counter needs 100 ground plus all 3 wyrms.
Chain acceptance: from Fezzik's turn-in, ride straight to Entari for Once More Unto The Breach, Hero so the momentum carries into the purge.
Quartermaster stop: dungeon-spammers should buy the Argent Crusade Tabard from Veteran Crusader Aliocha Segard87.5, 75.6 now and let the rep stack passively.
The purge of Scourgeholme in full: stones, bones, three lieutenants, and the banner planted on a pile of crusader skulls. Check off steps as you go. Progress saves in your browser.
0/0 steps
Staging at the Valley of Echoes
Everything at 83, 73
The Scourgeholme Sweep
North through the Breach, three counters on one lap
The Lieutenant Triangle
Horn up per boss, Death Gate home after the third
The Crystalsong Side-Trip
Silas and Spitzpatrick at 83, 73, objectives in Unbound Thicket and the Ruins of Shandaral
The Banner & the Pinnacle
Pile of Crusader Skulls, 80.1, 72.0
Shortcuts & Tips to Save Time
Triple-stack the openers: the purge kills, the 15 stones, and the Holy Water bones all run on one lap. Three turn-ins, one circuit.
Lieutenant pathing: the two mid-tier bosses first, then Talonox up the high road, popping the horn as you engage each so the Death Knight help prevents long kites.
Crystalsong combo: take Silas and Spitzpatrick together before flying out. The objectives share ground, and separate trips waste the flight.
Banner event: plant at 80.1, 72.0, hold the platform, and let the blessing's regen carry you. The waves end when Halof dies, so never chase far from the banner.
This is the Argent Crusade’s most personal storyline: you try everything. Druidic, draconic, and Naaru magic to spare Crusader Bridenbrad from the Scourge. It unlocks after Crusaders’ Pinnacle is established
The Crusader Bridenbrad Chain: Step-by-Step Walkthrough
Tirion sends you to a dying crusader on a lonely ridge, and three of Azeroth's greatest powers answer the call. Check off steps as you go. Progress saves in your browser.
0/0 steps
The Silent Vigil
Northeast from the Pinnacle, 79.8, 30.8
The Druidic Path
Portal from the Vanguard to Moonglade
The Dragonflight Path
Wyrmrest Temple, then the Ruby Dragonshrine's edge
The Naaru Path & the Finale
Shattrath's Terrace of Light, then the Silent Vigil one last time
Shortcuts & Tips to Save Time
Bundle the flights: the Pinnacle-to-Wyrmrest hop is short with Dragonblight paths already open, so run the aspect leg while they're warm.
Dahlia's spawn logic: never hunt inside the shrine. The scorched patches outside, where the Ruby drakes strafe, are where the new growth appears.
Acorn efficiency: all three in one drift through the dream layer, then step away from Remulos to phase back instantly.
The final chest: Bridenbrad's Possessions are easy to miss if you fly off after the event. Wait for the spawn before leaving the ridge.
What it pays: the chain is narrative-heavy rather than XP-dense, but it grants solid Argent Crusade reputation and anchors Icecrown Loremaster.
Into the Wild Green Yonder
The Last Line of Defense
The Purging of Scourgeholme
The Air Stands Still
The Crusader's Pinnacle
Part 2: The Skybreaker, Shadow Vault & Blackwatch (78 to 79)
The Skybreaker — Alliance Gunship Hub
Overview & Location
After you secure Crusaders’ Pinnacle, you’re sent up to the Alliance gunship The Skybreaker, a mobile quest hub patrolling central Icecrown. On deck, you’ll meet High Captain Justin Bartlett, who kicks off the Ymirheim offensive and unlocks several fast-XP dailies you can weave into your leveling route.
The ship moves (it’s an airship), but hovers above the central valley; expect to board from around the Valley of Lost Hope/Ymirheim area.
Icecrown · Alliance Leveling Guide
The Skybreaker: Step-by-Step Walkthrough
The Alliance gunship over central Icecrown: a flying quest hub, the Ymirheim offensive below it, and the daily engine that keeps the assault turning. Check off steps as you go. Progress saves in your browser.
0/0 steps
Board the Ship
The Skybreaker patrols above the central valley
Stage at Ymirheim
Ground Commander Koup on the glacier east of town, 62.6, 51.3
The Ymirheim Loop
One clockwise lap through the city, mine entrance at 56, 56
Bartlett's Ground Assault Board
All on deck
Toward Aldur'thar & the Gate of Horror
The deep chain southwest, covered fully in its own section
The Ymirheim trio in one lap: clockwise through the city, warriors on the walkways, slaves in the mine, Mind Tricks on the way out.
Assault by Air accuracy: shoot near the spear-guns, since your shells lay smoke that disables them for about 15 seconds, and never aim at the transport. Front-left first, then swing right as the ship banks.
Assault by Ground safety: ride slightly ahead of each squad and clear the ambushers at the bends. Four delivered squads is the whole requirement, so skip extra pulls.
Finding the hub: Koup posts on the ice flat, not the ramp, and the Skybreaker itself patrols, so a short ring over the central valley finds Bartlett when the minimap doesn't.
One-swoop resupply: Bartlett, Absalan the Pious, and Knight-Captain Drosche all stand on deck. Every daily pickup is one landing.
Save the tech arc for 80:Killohertz and the Static Shock contracts are level-80 quests paying gold and emblems. Leveling players should bank them and push core progression first.
The Ebon Blade takes a Scourge fortress for its own: an ocular to blind, three minds to free, and all of Jotunheim to answer for it. Check off steps as you go. Progress saves in your browser.
0/0 steps
Phase the Hub
The Ocular above, then one rod lap around the Vault
The Jotunheim Strike Package
Ufrang's Hall west on the Savage Ledge, Vaelen's cell adjacent
Decree and key in one pass: Ufrang's hall and Vaelen's cell are adjacent. Read, kill, click, and fly home with four lines opened.
Rod lap order: Nightswood northeast, the Leaper south, Vile southwest, one glide, one channel each.
Shoot 'Em Up first: grab a harpoon at Njorndar and clear the proto-drakes overhead while riding between banner and hut targets. It completes itself while you move.
Daily check after the Baron: that hand-in gates the Jotunheim daily trio, so glance at the givers before flying off.
Then accept Blackwatch from Baron Sliver to report to Darkrider Arly at Blackwatch (≈ 35.4, 66.4). This opens the entire Fleshwerks/Malykriss sabotage arc that culminates in The Flesh Giant Champion.
Icecrown · Alliance Leveling Guide
Blackwatch & the Fleshwerks: Step-by-Step Walkthrough
The Ebon Blade's watch over the Scourge's flesh factories: altars to overload, labs to burn, a crusader in pieces, and a champion waiting in the arena. Check off steps as you go. Progress saves in your browser.
0/0 steps
Hub Setup
Blackwatch at 35.4, 66.4, ridge above the Fleshwerks
Scouting & Disruption
Glide from the ridge, never the central road
Material Denial & the Shards
Both labs, one lap
The Malykriss Combo
Lower tier, furnace and runesmiths in one pass
The Sanctum
Doctor first, fire on the way out
Setpieces & the Champion
Pens, chains, then the western arena
Optional: the Escort
Father Kamaros at 31.8, 64.8
Shortcuts & Tips to Save Time
Glide lines over roads: drop straight from the Blackwatch ridge to each lab and altar, then fly back up. The central road's patrols only cost time.
Shard efficiency: the moment the first Jagged Shard drops during Spill Their Blood, accept and let the same lap finish all 10.
Malykriss two-fer: the furnace and the runesmiths share the lower ring. A second trip is a planning failure.
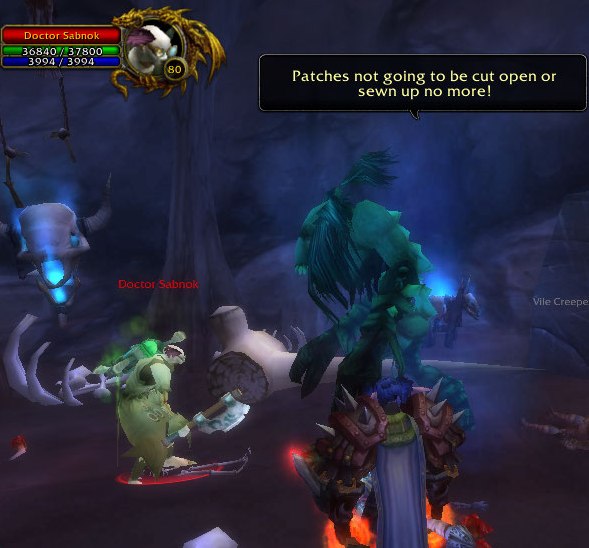
Doctor first, fire second: Patches and Sabnok, then corpses on the way out. The Sanctum never gets run twice.
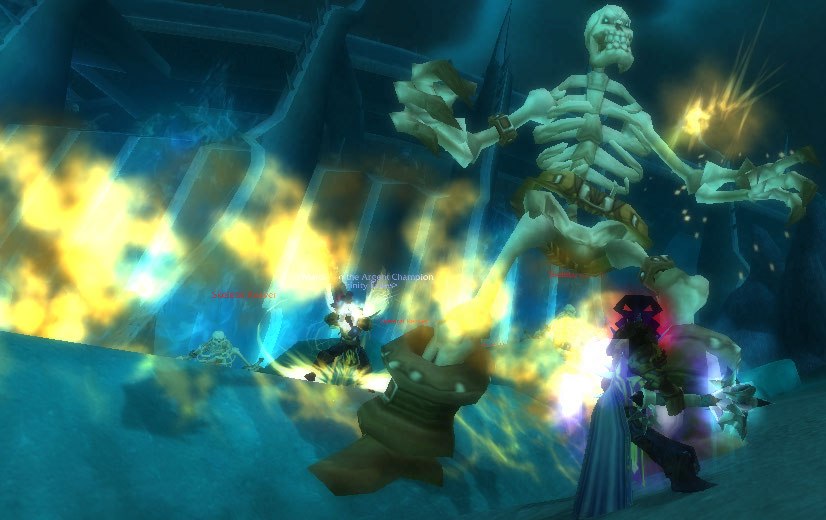
The abomination trick: detonate the skeleton in melee range of the chains, not at range, and the credit lands every time.
Morbidus prep: talk to Dhakar only after the rim is clear, since adds mid-fight are how this arena wipes people.
Before the Gate of Horror
The Guardians of Corp'rethar
Bloodspattered Banners
Banshee's Revenge
Generosity Abounds
Destroying the Altars
A Visit to the Doctor
The Flesh Giant Champion
Part 3: Death’s Rise, Matthias Lehner & Argent Tournament (79-80)
The Ebon Blade's western spur against the Scarlet Onslaught: a harbor to bleed, a gryphon to steal, and a Grand Admiral whose mask is about to come off. Check off steps as you go. Progress saves in your browser.
0/0 steps
Hub Setup
Fly in from the Shadow Vault, tag the flight path
Arete's Anti-Air Unlock
The bay northwest of the harbor, then Onslaught Harbor at 9, 41
Harbor Overlap
Docks first, then the ships
The Admiral's Secret
Crimson Cathedral, then the Hidden Hollow behind it. Bring four friends.
Shortcuts & Tips to Save Time
Flight path first: tag Dreadwind on arrival so any death is a quick taxi rather than a corpse run.
Harbor lap order: keys, trunks, and tinctures on the docks first, then the ships. The lower decks' guard density keeps targets and chests close together.
Jaws pathing: the sharks loop tight between the north quay and the mainland cliff. The open ocean holds nothing.
Gryphon riders: climb high on the bone gryphon and dive on solos that stray from the harbor's anti-air, rather than hovering over the ballista zones.
Cathedral groups: treat Second Chances and The Admiral Revealed as true 5-mans. Landgren and Westwind carry dungeon-boss health and mechanics, and the quest items (Arete's Gate, the Nullifier) are mandatory, not optional.
Approach to Icecrown Citadel
Overview & Location
After you’ve secured The Shadow Vault and reported in on The Skybreaker/Orgrim’s Hammer, pick up:
Horde:Opportunity from Koltira Deathweaver aboard Orgrim’s Hammer (Horde equivalent flow). This mirrors the Alliance steps.
This chain is your on-ramp to the Matthias Lehner storyline (the “child of Icecrown”), which reveals what’s in the hole beneath the Citadel and sets up late-Icecrown phasing.
Field note: the Pulsing Crystal at the water’s edge is, in the lore, tied to Arthas’s own heart, the piece of himself he cast aside. See more in the Icecrown lore guide.
Icecrown · Alliance Leveling Guide
Approach to Icecrown Citadel: Step-by-Step Walkthrough
A bomb with a short fuse, a fall through the dark, and a small voice in the Forgotten Depths that knows more than it should. Check off steps as you go. Progress saves in your browser.
0/0 steps
Report to the Pit Team
The circular chamber under the Citadel's front stairs, lined up off the great stair at 53, 85
Clear & Prime the Bombs
The pit's rim, then the far side of the chamber
Survive the Fall, Follow the Voice
Naz'anak: The Forgotten Depths
Hide From His Sight
The two ponds, then the portal out
Re-Arm for the Push
Surface staging area
Shortcuts & Tips to Save Time
Bomb fuse trick: angle into the pit the instant you click the stack, without trying to mount or fly. The fall is scripted, and hugging the inner edge drops you past the mobs and beside the Crystal.
Naz'anak fast loop: a tight clockwise circuit of the two ponds tags every Faceless Lurker and nerubian Time to Hide needs, without crossing the middle corridor twice.
Crystal pin: when in doubt, the Pulsing Crystal sits at 54.0, 87.3.
Matthias can appear at multiple spots in Icecrown; at this stage, he’s at the camp south of the Bombardment.
Icecrown · Alliance Leveling Guide
First Legion Forward Camp: Step-by-Step Walkthrough
The boy from the depths has more to show you: a demolisher, a hundred ghouls raised by your own hand, a duel replayed from memory, and a gambit inside the Cathedral of Darkness. Check off steps as you go. Progress saves in your browser.
0/0 steps
Camp Setup
First Legion Forward Camp at 64, 45
Do Your Worst
Valley of Lost Hope, just south
Army of the Damned
The same valley, seen through different eyes
Futility & the Flight East
Sindragosa's Fall at 70, 37
The Court of Bones
Following the phasing north
The Hunter & the Prince
The Bloodstained Stone near Matthias
Tirion's Gambit
Crusaders' Pinnacle, then the Cathedral of Darkness
Shortcuts & Tips to Save Time
Vehicle speed-clear: never stop to loot or chase stragglers in the demolisher. Kited packs die to splash damage faster than anything killed standing still.
Ghoul swarm routing: loop the densest corpse fields along the valley road edges so every raise press hits multiple bodies. A hundred minions comes in about two tight laps.
Chain the handoff: Sindragosa's Fall leaves you positioned for the Pinnacle and the Cathedral. Hearthing out costs an entire extra flight.
The Argent Tournament and the Black Knight
Overview & Location
Ride to the Argent Tournament Grounds (northeast Icecrown). Start at Justicar Mariel Trueheart inside the Argent Pavilion (west of the Coliseum; ~69.6, 22.8), then report to your race’s pavilion to begin jousting basics and the rank grind: Aspirant → Valiant → Champion.
Icecrown · Alliance Leveling Guide
The Argent Tournament & the Black Knight: Step-by-Step Walkthrough
The rank table above holds the progression math. This is the running order: the Black Knight investigation threaded through your seal grind so nothing waits on anything else. Check off steps as you go. Progress saves in your browser.
0/0 steps
The Black Knight Investigation
Crusader Rhydalla in the pavilion. Start this on day one.
The Fall & the Epilogue
Ring of Champions, after A Champion Rises
The Aspirant Loop
3 seals a day toward 15
The Valiant Loop
4 seals a day toward 25, per city
The Champion Loop
The end-state grind: seals, writs, and gold
Shortcuts & Tips to Save Time
Jousting rhythm: keep 3 stacks of Defend up, Shield-Breaker at 20-25 yards to strip theirs, then Charge on cooldown, weaving Thrusts only when close and both shields are stripped. This rhythm beats every daily and melee quickly.
Seal gating: the daily ceilings (3 at Aspirant, 4 at Valiant) mean the calendar, not the grind, sets your pace. Don't over-optimize; just don't miss a day.
Start the Black Knight immediately: Rhydalla's arc runs alongside seals from day one.
Champion vendor goals: seals buy mounts, pets, and gear. Pursue City Champions one by one for the mount unlocks while the champion dailies fund the purchases.
No Fly Zone
Second Chances
The Admiral Revealed
A Short Fuse
Do Your Worst
Army of the Damned
Where Dragons Fell
The Hunter and the Prince
Threat From Above
At the Enemy's Gates
WotLK Player Chronicles: Icecrown
Vikstone faced Northrend alone. Not alone. When elite quests required allies, these heroes from Terokkar-US answered the call. From the first steps off the boat at Valiance Keep, they stood beside me. Some were guildmates from Trinity Exiles. Others were passing strangers who stopped to help. All of them mattered.
Between November 2008 and August 2009, over 50 players are documented. Every name, every screenshot, and every shared victory is preserved in the WotLK Player Chronicles main page for Vikstone’s Classic Expedition.
Apollyn
Trinity Exiles | Human Death Knight
Joined 3 quests
Baddad
The Chosen One | Night Elf Rogue
Joined 2 quests
Bombadil
Trinity Exiles | Gnome Mage
Joined 1 quest
Brachii
Silly Latin Name
Joined 1 quest
Calvey
Trinity Exiles | Draenei Hunter
Joined 2 quests
Combatant
Crusaders of Stormwind | Human Warrior
Joined 2 quests
Cyndren
Imperium | Night Elf Druid
Joined 1 quest
Cytoplasm
Perpetually Undecided | Night Elf Death Knight
Joined 2 quests
Dagerthy
Trinity Exiles | Night Elf Druid
Joined 3 quests
Disinfekt
with a vengeance | Blood Elf Paladin
Joined 1 quest
Dryskol
Human Paladin
Joined 1 quest
Fieroth
The Crusade | Gnome Mage
Joined 1 quest
Fogo
Hurricane
Joined 1 quest
Freakuout
Unholy Wrath | Night Elf Death Knight
Joined 2 quests
Goldn
Vae Victus | Draenei Priest
Joined 1 quest
Hibiscus
Trinity Exiles | Night Elf Druid
Joined 2 quests
Hooblerlol
Resistance is Futile | Blood Elf Paladin
Joined 1 quest
Icecrown is the highest-level zone in Northrend, and the farming reflects that, dense materials, but mostly elite or tightly grouped mobs, so you’ll want level 80 gear and ideally an AoE spec. Lichbloom and Icethorn grow quickly across the zone, Titanium and Saronite veins are common, and the Scourge camps (the Converted Heroes in the Valley of Fallen Heroes especially) drop Frostweave in high volume.
Icecrown is the Scourge’s final stronghold in Northrend and contains three rares total, and all count for Northern Exposure and Frostbitten.
Putridus the Ancient‘s enormous model size creates cross-zone NPCScan detection from as far as Dalaran. This zone features the most diverse range of rare difficulties in Northrend. Putridus is a genuine challenge (~75k HP), while Jorfus and Hildana have standard rare HP (~18.9k). The zone also features unique aerial and ground pathing challenges.
Notably, all three serve the Lich King directly.
Icecrown Rares at a Glance
Three rares, all level 80, all spawn after server restarts. All three count toward Northern Exposure and Frostbitten, and all three serve the Lich King. None are tameable. Full hunting detail below.
High Thane Jorfus
Lvl 80 Elite Ymirjar
One of three spots: Court of Bones, Sindragosa's Fall, or the Fleshwerks · drops Corroded Faceguard (plate helm) · the catch: easy despite a full Death Knight kit. Just bleed off any ghoul adds first. Check all three locations.
Hildana Deathstealer
Lvl 80 Elite Val'kyr
High-altitude circuit across northern Icecrown · drops Val'kyr Vestments (mail chest) · the catch: she hovers and never lands, even when aggroed. A flying mount and ranged pull are required; melee should pull her over hills.
Putridus the Ancient
Lvl 80 Elite Flesh Giant
Huge patrol circuit through central Icecrown · drops Giant's Toewrap (leather wrists) · the catch: the zone's real fight at ~75k HP, and so enormous your scanner can ping him from Dalaran. Immune to roots and snares; bring a pet class or strong cooldowns.
Location: Huge patrol circuit across central Icecrown. He can be found patrolling an expansive area in Icecrown, located between The Broken Front and Corp’rethar. He can also be found wandering the valley that circles Ymirheim, though he is more commonly encountered slightly east of Ymirheim, near The Broken Front and the area where the zeppelins fly overhead.
Patrol Path:
Valley of Echoes → The Broken Front → Corp’rethar
Primary Spawn Area: Around The Conflagration, north of Corp’rethar (~57, 40)
Additional Spawn Areas: Near Horror Gate and Broken Front area. Has a 3-6 hour spawn time.
Movement Speed: Extremely fast, often with buggy animation
Special Abilities:
War Stomp — Inflicts normal damage plus 100% to nearby enemies, knocking them back and stunning them for 5 sec.
Putrid Punt — Punts an enemy a great distance away, inflicting normal damage.
Crowd Control Immunity: Immune to roots and snares
Unique Detection Feature:
Extreme Range: Can be targeted from Dalaran while patrolling in Icecrown
NPCScan Alerts: Multiple confirmed reports of alerts triggering from Dalaran bank/sewers
Targeting Range: Estimated 10,000+ yards due to enormous size, visible from over a mile away
Solo Strategy by Class:
Mages: Use Mirror Image and Water Elemental, blink out of stuns
Warlocks: Felguard tank works well, use health funnel
Warriors: Apply full debuff rotation, use cooldowns for survival
Not Recommended: Classes without pets/healing unless very well-geared
Camping Strategy:
Safe Positions: Camp at (66.6, 50.3) or similar clear areas
Monitor Location: Aldur’thar (54.0, 39.7) for approach visibility
Avoid: Eastern side of Aldur’thar gate due to roaming ghouls
Achievements: Required for Northern Exposure and Frostbitten. Putridus is one of only two mobs visible from distances of 10,000 yards or more; the other is the significantly larger Thrym. In the Wrath era, he was the largest and most powerful rare in the game, and NPCScan pings him from as far as Dalaran.
NPCScan/SilverDragon: Run with Icecrown cache cleared after each restart
Automatic Detection: Critical for aerial and distant spawns
Patrol Strategy:
Aerial Camping: Position at 500-yard altitude for optimal coverage
High Spawns: Vrykul and Val’kyr spawn well above ground clutter
Clear Sightlines: Avoid ground-level obstructions when possible
Server Timing:
Restart Window: Rares respawn within 10-30 minutes of maintenance
Prime Opportunity: First-come basis for tags after server maintenance
Preparation: Be ready to log in immediately after restarts
Zone-Specific Challenges:
Extreme Detection range: Putridus is visible from incredible distances
Aerial Combat: Hildana requires a flying mount and ranged capabilities
Terrain Hazards: Knockback abilities are dangerous near cliffs throughout the zone
Faction Reputation & Rewards Guide
Major Factions Overview
Icecrown is WotLK Classic’s battleground for two tabard-grind factions – Argent Crusade and Knights of the Ebon Blade – both embroiled in the war against the Lich King. Unlike other zones, Icecrown’s faction progression is driven entirely by these military-aligned forces, with tabard systems, important gear, and some of the expansion’s most efficient reputation mechanics.
Both factions use the same tabard system: reach Friendly, buy their tabard from the quartermaster, and equip it to redirect all your heroic-dungeon reputation to that faction. A full heroic clear gives roughly 1,100 to 2,300 reputation, and four level-80 normals (Halls of Lightning, the Culling of Stratholme, the Oculus, and Utgarde Pinnacle) still give reduced amounts.
This is the fastest reputation method in WotLK, and it’s how you’ll take both factions to Exalted.
Argent Crusade or Ebon Blade: Which to Focus
Both are tabard grinds, so your class decides which comes first. The full breakdowns follow below.
Tabard faction
Argent Crusade
Headline reward: Arcanum of the Stalwart Protector, the best tank helm enchant in the game
Profession prize: Brilliant Spellthread pattern (a steady tailoring earner)
Access: easy. Friendly comes from normal Icecrown questing
Focus first if: you tank, or you want the spellthread income
Tabard faction
Knights of the Ebon Blade
Headline reward: strong pre-raid gear and the Arcanum of Torment DPS enchant
Profession prize: Abyssal Bag pattern (the warlock soul-shard bag)
Access: gated. Unlock the Shadow Vault first; Death Knights start at Friendly
Focus first if: you're a Death Knight (big head start) or a warlock
You'll grind both to Exalted eventually. This is just about which tabard to wear first. Minor factions (the skyships) build passively as you go.
Knights of the Ebon Blade – Reformed death knights offering strong pre-raid items and the sought-after Abyssal Bag pattern. Both factions let you champion their cause with a tabard in dungeons, so reputation builds while you run heroics.
Each maintains major operational hubs with flight paths, quartermasters, and daily quest interfaces.
Minor Factions: Alliance Vanguard, Horde Expedition, Explorer’s League, Frostborn, and Hand of Vengeance also accrue reputation passively through zone progression. No dedicated efforts required.
Argent Crusade – The Tank’s Choice
“Holy crusaders offering the most powerful tank helm enchant in WotLK Classic, plus profitable tailoring patterns that remain in constant demand.”
The Argent Crusade represents the unified holy forces of Azeroth, formed from the merger of the Argent Dawn and reformed Knights of the Silver Hand under Highlord Tirion Fordring’s leadership. Offers Arcanum of the Stalwart Protector, the pinnacle tank helm enchant, critical for endgame PvE. Brilliant Spellthread tailoring pattern remains profitable throughout the expansion.
Most players will reach Friendly reputation simply through Icecrown introduction quests, making tabard access automatic during normal zone progression. The zone’s quest design naturally integrates Argent Crusade reputation building into storyline advancement.
Major Questlines:
Argent Vanguard Introduction – Entry-level reputation building through establishment quests
Argent Crusade Commendation Badges are worth 520 reputation each
Daily heroic dungeon completion provides faction choice for commendation badges
Choose Argent Crusade badges to supplement tabard dungeon grinding
Tabard: buy the Tabard of the Argent Crusade from Veteran Crusader Aliocha Segard at Argent Vanguard once you’re Friendly, then grind heroics as described above.
Brilliant Spellthread stays in demand all expansion; the ring/boots are strong finishers for pre-raid sets.
Knights of the Ebon Blade – The Death Knight’s Advantage
“Reformed death knights offering exceptional pre-raid gear and specialized storage solutions, with Death Knights gaining a massive head start through Friendly starting reputation.”
The Knights of the Ebon Blade represent the ultimate redemption story in WotLK Classic – former servants of the Lich King who broke free during the dramatic events at Light’s Hope Chapel. Operating under Highlord Darion Mograine, they focus on practical rewards rather than flashy collectibles.
Offers powerful DPS helm enchant Arcanum of Torment and niche professional rewards like the Abyssal Bag for Warlocks. The Death-Inured Sabotons are considered the Pre-Raid BiS boots item for Arms Warriors.
Blackwatch Operations – Extended storyline involving both Knights of the Ebon Blade and Argent Crusade segments
Tabard: buy the Tabard of the Ebon Blade from Duchess Mynx at the Shadow Vault once you’re Friendly, then grind heroics as described above.
Death Knight Advantage: Starting Friendly eliminates weeks of reputation grinding, reducing total grind by approximately 40%
Secondary Method: Zone Quest Progression
Zul’Drak Introduction (Level 74+) The Ebon Watch serves as an introduction to the Knights, accessible through breadcrumb quests from Light’s Breach or by farming Withered Trolls for Unliving Choker or Writhing Choker quest items.
Kill 10Onslaught Gryphon Rider over the harbor. Use the provided Bone Gryphon for aerial abilities, or tag riders as they land if you prefer ground combat.
250
Vehicle route is fastest; sweep in circles above docks. Time: ~6–9 min.
Daily heroic dungeon completion provides faction choice for commendation badges
Bind-on-pickup tokens for personal use only
Supplement tabard dungeon grinding with additional daily reputation boost
Knights of the Ebon Blade Key Rewards Breakdown
Tier
Item / Reward
Cost / Type
Notes
Quartermaster:Duchess Mynx — The Shadow Vault, Icecrown [43.4, 20.6]
Access Note: The Shadow Vault is phased until you complete its opening questline. For non-Death Knights, early reputation building via Zul’Drak quests is recommended.
Endgame-relevant pieces and a staple caster gem design; excellent finishers while you farm Icecrown dailies.
Minor Faction Presence
The skyship operations (The Skybreaker for Alliance, Orgrim’s Hammer for Horde) and a handful of scattered quests feed your umbrella expedition faction passively as you play. Complete them through normal questing, but none of it is worth focused farming. Keep your attention on the two major factions.
Reputation Strategy
Both factions reach Friendly through normal Icecrown questing, so you’ll usually have tabard access without trying for it. From there it’s tabard heroics plus the daily circuits, the fastest reputation in the game. When you’re tabard-farming, chaining efficient dungeon pairs speeds things up: Utgarde Keep with Utgarde Pinnacle, or Azjol-Nerub with Ahn’kahet, since each pair shares an entrance.
For class priorities: tanks want the Argent Crusade first, for the Arcanum of the Stalwart Protector, the best tank helm enchant in the game; tailors want both the Brilliant Spellthread pattern (Argent Crusade) and the Abyssal Bag pattern (Ebon Blade); warlocks specifically want that Abyssal Bag.
Death Knights start at Friendly with the Ebon Blade, which skips weeks of grinding, roughly a 40% head start on that faction. Everyone else builds Ebon Blade reputation through the Zul’Drak introduction from level 74, then the Shadow Vault questline in Icecrown.
Supplement both factions with their daily quests and Commendation Badges (520 reputation each, your faction’s choice, from Archmage Timear‘s Dalaran dungeon dailies). Budget roughly 2 to 3 weeks of combined tabard farming and dailies for dual Exalted.