Quest Giver: Lord-Commander Arete – Death’s Rise, Icecrown [19.5, 48.1]
Objective: Confront and defeat Grand Admiral Westwind in the Hidden Hollow at Onslaught Harbor. Return to Arete at Death’s Rise.
Quick Facts
- Type: One-time chain quest (Group)
- Suggested Players: 5
- Location: The Hidden Hollow, behind The Crimson Cathedral [9.2, 49.0]
- Chain Position: 4 of 4 in the Onslaught Harbor investigation chain. Preceded by Second Chances. Final quest in the Death’s Rise storyline.
Grand Admiral Westwind/Mal’Ganis – Encounter Breakdown
| Phase |
Form |
Max HP |
Key Details |
| Phase 1 |
Grand Admiral Westwind (Human) |
~228,000 |
Tank and spank. Melee + Whirlwind. Stunnable, rootable, disarmable, fearable. |
| Transition (~50% HP) |
Protection Sphere |
Immune |
Activates an immunity bubble. Use the Lord-Commander’s Nullifier immediately. |
| Phase 2 (~45% HP) |
Dreadlord Mal’Ganis |
~327,000 (scaled to current %) |
Transforms. Gains new abilities. Not stunnable. HP percentage carries over. |
| Defeat (~0.5% HP) |
Escape |
N/A |
Mal’Ganis stops fighting, opens a portal, delivers dialogue, and escapes. Quest completes. |
Mal’Ganis Abilities (Phase 2)
| Ability |
Type |
Damage |
Notes |
| Melee |
Physical |
~1,600-2,000 per hit |
Harder hitting than Phase 1. |
| Carrion Swarm |
Shadow AoE DoT |
~300 per 2 sec |
Frontal cone. Manageable damage. |
| Mind Blast |
Shadow direct |
~2,000 |
Cast on random targets (not just tank). ~10 sec cooldown. |
| Sleep |
CC |
3 sec disorient |
~10 sec cooldown. Targets random players. Breaks on damage. |
| Vampiric Touch |
Self-heal |
% of melee damage |
Heals Mal’Ganis based on his melee damage dealt. Maintain steady DPS to outpace it. |
Walkthrough
Getting to the Hidden Hollow
- The cave entrance is at [9.2, 49.0], directly behind (south of) The Crimson Cathedral at Onslaught Harbor.
- The cave contains packs of elite Onslaught Darkweavers with roughly 18-20k HP each. They cast Shadow Bolt and can transform into demons. They hit reasonably hard in groups but die fast. They also drop over 1 gold each.
- Navigate down the cave and take the tunnel leading north/northwest at the bottom. Westwind is in the northwest chamber at approximately [9.9, 48.4].
Phase 1: Grand Admiral Westwind
- Westwind is a melee fighter. He hits for 1,000-1,500 on a geared tank and uses Whirlwind periodically. Move out of Whirlwind range when he starts spinning, then re-engage.
- He is stunnable, rootable, disarmable, and fearable in this phase.
- Do not fear him toward the ramp. He can reset to full health if pulled too far from his spawn point. Keep the fight in his chamber.
Transition: Protection Sphere
- At approximately 50% HP, Westwind activates his Protection Sphere, becoming immune to all damage.
- Use the Lord-Commander’s Nullifier from your inventory to break the shield. Do this quickly to minimize downtime.
Phase 2: Dreadlord Mal’Ganis
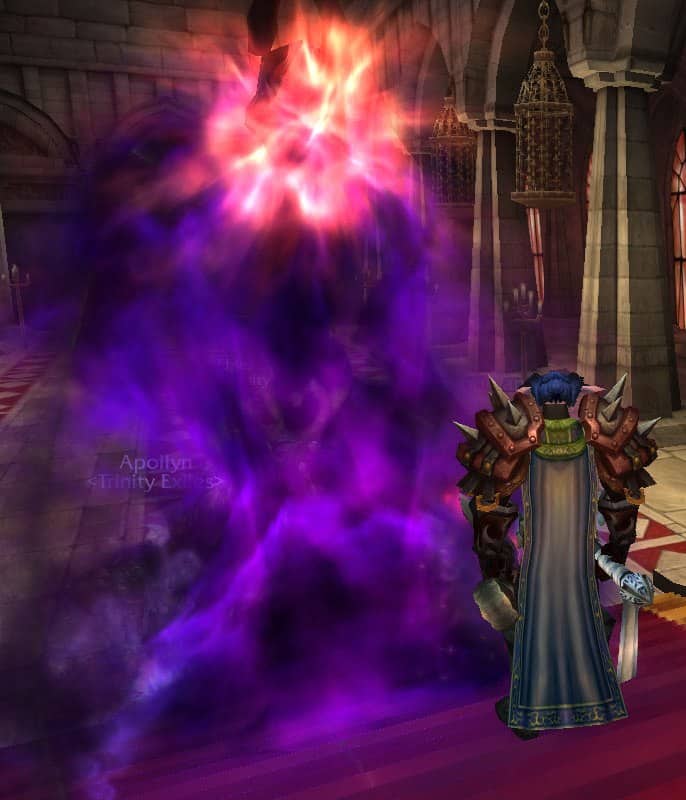
- Shortly after the shield breaks, Westwind transforms into Dreadlord Mal’Ganis. His maximum HP increases to 327,000 but his HP percentage carries over from Phase 1 (so he starts Phase 2 at roughly 40-45% of his new maximum).
- He gains Carrion Swarm, Mind Blast, Sleep, and Vampiric Touch. His melee damage increases. He is no longer stunnable.
- Maintain steady DPS to outpace his Vampiric Touch healing. If your group’s damage is low, this phase can drag.
- At approximately 0.5% HP, Mal’Ganis stops fighting and begins his escape dialogue. The encounter ends automatically. You do not need to reduce him to zero.
Return to Lord-Commander Arete
- Fly back to Death’s Rise and turn in. Arete’s reaction is priceless: he bursts out laughing at the revelation that the Scarlet Onslaught was being manipulated by a dreadlord all along.
The Stun Trick (Exploit)
If you stun, fear, or CC Westwind at exactly the moment he would transform (around 45-50% HP, just after the shield break), he will remain in human form for the rest of the fight.
This skips Phase 2 entirely, keeping him stunnable, rootable, and significantly easier. It is confirmed that this works: warriors (Concussion Blow, Revenge stuns), paladins (Hammer of Justice), rogues (Kidney Shot), druids (Bash), and warlocks (Fear). Some players have even accidentally triggered it without realizing it, reporting that the boss “never transformed” as a bug. It is almost certainly an unintended behavior, but it was never patched.
If you lost the Nullifier quest item, the stun trick can also prevent the Protection Sphere from activating, bypassing the need for the item entirely.
Solo Viability
This quest is generally considered easier to solo than Second Chances. Many who struggled with Archbishop Landgren found Westwind/Mal’Ganis straightforward by comparison. The stun trick makes it trivial for any class with a stun.
| Class/Spec |
Solo Difficulty |
Notes |
| Protection Paladin |
Easy |
Seal of Light, Sacred Shield, Shadow Resist Aura. Multiple commenters report finishing at full health. |
| Retribution Paladin |
Moderate |
Seal of Light, Art of War heals, save bubble/LoH for emergencies. Mana management matters. |
| Blood/Unholy DK |
Easy |
Death Strike sustain. AMS for Phase 2 Shadow damage. Army of the Dead for early burst. |
| BM Hunter |
Easy |
Pet tanks, Mend Pet, save cooldowns for Phase 2. Freezing Trap for regen breaks. |
| Feral Druid (Bear) |
Easy |
Bear form sustain. |
| Affliction/Demo Warlock |
Easy |
Voidwalker/Felguard tank + DoTs + Drain Life. Avoid fear (can cause reset). |
| Shadow Priest |
Moderate |
Inner Fire mandatory. Use Whirlwind windows to heal/reDoT. Dispersion for Phase 2 burst. |
| Enhancement Shaman |
Easy |
Wolves + Shamanistic Rage. Burn cooldowns on Phase 2. |
| Elemental Shaman |
Moderate |
Earth Elemental for Phase 2 tank. Bloodlust + nuke. Self-healing intensive. |
| Frost Mage |
Easy (with stun trick) |
Not kiteable normally, but Deep Freeze at transformation prevents Phase 2. Without the trick, very difficult. |
| Prot Warrior |
Moderate |
Viable in T9+ gear. Bloodthirst spec preferred. Stun trick makes it trivial. |
Efficiency Tips
- Cave mobs are good gold. Each elite drops over 1 gold. A full clear takes about 3 minutes and yields roughly 10 gold plus vendor trash. Worth farming if you’re between dailies.
- Westwind respawns in about 1 minute. If you wipe, he’s back almost immediately. But so are the cave packs, so be careful on your corpse run.
- Do not pull him near the ramp. He resets to full health if dragged too far from his spawn point. Keep the fight in his chamber.
Lore & Secrets
The Big Reveal
This is the payoff for the entire Death’s Rise storyline. Grand Admiral Barean Westwind was never actually alive.
The real Westwind died off the Frozen Coast of Northrend years before the events of WotLK, and a statue was erected in his honor in the Scarlet Monastery’s Hall of Champions. The “Westwind” who appeared at New Hearthglen was the dreadlord Mal’Ganis wearing the dead admiral’s body as a disguise.
This mirrors exactly what happened to the original Scarlet Crusade, which was secretly controlled by the dreadlord Balnazzar posing as Grand Crusader Dathrohan. The Scarlet zealots have been infiltrated and manipulated by dreadlords twice over, each time believing they served the Light while actually serving demons.
As Arete laughs in the completion text: “The fools were taken in by the demons yet again.”
Mal’Ganis’s History
Mal’Ganis is one of the most significant recurring villains in Warcraft lore. He was the dreadlord who orchestrated the plague of undeath in Lordaeron, manipulated Prince Arthas into pursuing him to Northrend, and was the first being killed by Frostmourne.
As a nathrezim, his death was not permanent. His goal with the Scarlet Onslaught was to build an army capable of destroying the Lich King, allowing Mal’Ganis to take personal revenge on Arthas for that first defeat.
His parting words are loaded with irony: “You’ll never defeat the Lich King without my forces.” Players, of course, go on to do exactly that in Icecrown Citadel.
Cross-Expansion Connections
- Legion: Mal’Ganis returns as a significant figure in the death knight class campaign, where nathrezim infiltration of multiple organizations is revealed.
- Shadowlands: The Sepulcher of the First Ones raid reveals that all nathrezim, including Mal’Ganis, were secretly agents of Sire Denathrius of Revendreth. This recontextualizes every dreadlord scheme in Warcraft history as part of a cosmic conspiracy predating even the Burning Legion.
- “Kirel narak” is Eredun (the demonic language). Though the exact translation isn’t given in-game, Mal’Ganis uses it as a declaration of power before announcing his identity.
Arete’s Quest Text Detail
Arete’s description of himself as “particularly adept at nullifying magic” is a callback to his character as established throughout this chain. He’s been the tactical mind behind every step of the investigation, and here he provides the one tool you need for the fight.
His closing line about wishing he “could be there to see the look on his face” is a rare moment of personality from an NPC who is usually all business.
Explore Icecrown’s hidden easter eggs, lore mysteries, and connections across Warcraft history in Vikstone’s Icecrown Chronicles, along with the complete quest storyline.




 Vikstone's War Journal







