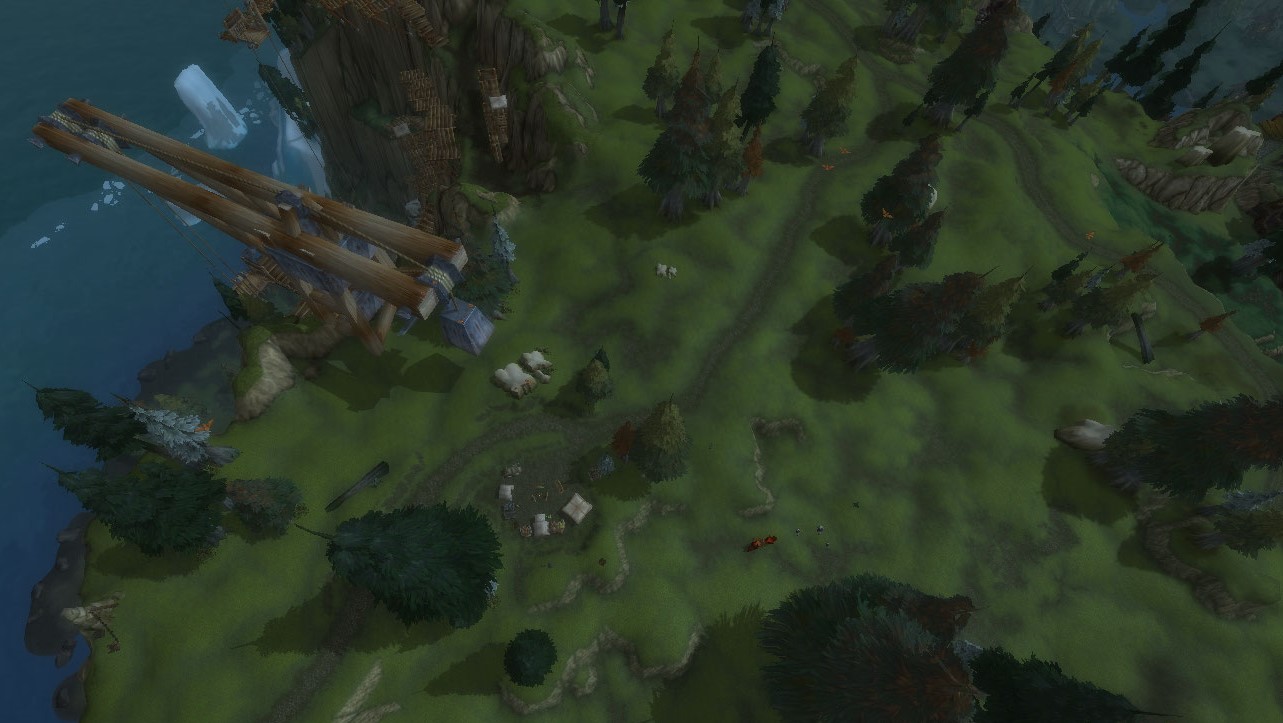
The screenshots and quest walkthroughs throughout this guide come from Vikstone’s original Northrend run on US-Terokkar, captured back in 2008-2009 during Wrath of the Lich King. The guide itself is built and updated for WotLK Classic, with routes, coordinates, and strategies.
Howling Fjord is one of Northrend’s two starter zones (the other being Borean Tundra). The Alliance arrives at Valgarde, a foothold carved into towering coastal cliffs where ancient vrykul clans are awakening and Utgarde Keep casts its shadow over the entire region.
The Echo of Ymiron
What’s Inside:
Storyline Quest Routes (68-80): Step-by-step Alliance progression organized by level bracket (68-70, 70-71, 71-72) with full walkthroughs
WotLK Player Chronicles – Howling Fjord: The Terokkar-US players who fought alongside Vikstone
Rare Spawn Guide: Locations, respawn timers, and hunting strategies
Gold Farming and XP Grinding Spots: The zone’s best farming spots can be found on the dedicated WotLK Classic Howling Fjord Gold Farming Guide, every spot with coordinates, farming maps, and market timing
Gathering Routes: Mining, Herbalism, and Skinning paths through the zone
Faction Reputation & Rewards: Major and minor factions, what they offer, and how to get there
Alliance sail in from Menethil Harbor in the Wetlands; Horde take the zeppelin from outside Undercity. Both drop you right at your faction’s home base, Valgarde or Vengeance Landing, with the flight point already unlocked. Come in at level 68 with decent Outland gear and you’ll be fine, though the zone reads a touch smoother once you’ve got a level or two of Northrend questing behind you.
Howling Fjord · Leveling Guide
Flight Paths: What to Grab, and When
Howling Fjord has seven flight points but each faction only touches four, and the two sides never cross paths. Pick your faction below for the exact pickup order; every stop lines up with where questing takes you anyway.
Grab it when the Valgarde chain sends you west; Westguard is your second quest hub, so you'll ride straight to it. Greer stands by the flight tower inside the keep.
Grab it when your questing moves to the northern half of the zone; Wildervar is the northernmost Alliance base and your last hub before leaving the Fjord.
Grab it when quests take you to the tuskarr village in the far west. Kamagua sits on its own island: ride the lift down from the shore, and grab the flight point the moment you land so you never take the lift again.
Grab it when the Forsaken storyline moves you south to the plague-development hub; it's your second quest hub, so the ride there is on your route anyway.
Grab it when quests take you to the tuskarr village in the far west. Kamagua sits on its own island: ride the lift down from the shore, and grab the flight point the moment you land so you never take the lift again.
The factions never cross in Howling Fjord. Kamagua is the only shared flight point, and it sits on its own western island reached by a lift, so don't wait for a quest reason if you're passing nearby: linking it early saves the longest rides in the zone.
Rescue cages and hit harpoons as you move. Don’t fully clear every pack.
Always grab the Valgarde flight path from Pricilla Winterwind once it appears. Before leaving hub: stack the “spirit/human/payback” quests and Daggercap dive.
Ride to Daggercap Bay and do Daggercap Divin’: grab the Reagent Pouch and 10 crates in one swim.
Loop back through Wyrmskull & Utgarde Catacombs, completing all objectives for the stacked quests.
Turn everything in at Valgarde.
Use the harpoon cannon quest Let’s Go Surfing Now for an instant hop back when offered.
In the bay, prioritize pouch + crate clicks over killing. The mobs are low threat.
Do Wyrmskull/Utgarde in a single sweep to avoid multiple corpse runs. Next stop: sail/ride to the Explorers’ League Outpost or fly directly once nearby hubs are unlocked.
EXPLORERS’ LEAGUE OUTPOST (~75, 66) · Eastern dig site & iron rune arc
Start the Iron Rune Constructs and You trilogy, then finish all three training quests.
Hit Nifflevar and Baleheim in one clockwise loop so you’re not doubling back.
Do bird quests while traveling between tool objectives. They share the same territory. Next: finish the rune storyline and ride/fly toward Westguard.
Combine SE quests in a single circuit. Drake-wanding is fast if you tag from max range.
Do Mission: Eternal Flame on your way between Westguard and Skorn to avoid an extra ride. Later from Westguard: you’ll also clear the Gjalerbron tranche in one go when it opens.
Complete all three around Iskaal and the nearby coast.
At the Ancient Lift, pick up Orfus of Kamagua to seed the relic/Isuldof arc.
Kill while you travel instead of grinding in place. Objectives are spread but light. Next stop: follow Orfus south into the pirate/relic loop via Scalawag Point.
8Pirate Relics & Lost Shield Chain
At Scalawag, grab the flight path when you see it.
Run the relics in one big circle so you only sail/ride the coast once.
Sorlof’s Booty is easiest with the cannon. Stay on the ship and aim ahead of his path. Next stop: fly to Fort Wildervar to start the northern runs.
Always keep Wildervar FP. This is your northern launch point for multiple arcs.
Steelfeather is easy XP if you use the vision item correctly and avoid unneeded pulls. Next stop: begin the The Book of Runes → Giants’ Run chain.
Do all rune steps while you’re already pathing through Giants’ Run instead of bouncing back to the fort between each quest.
Use the controlled giant to stomp packs instead of soloing every pull. Next stop: hop to Steel Gate and the flying-machine line, then swing down to Frozen Glade.
Steel Gate Patrol is fast XP if queues are long or you’re waiting on dungeon pops.
Trident of the Son is optional but easy if you’re already flying over the water. Next stop: move south toward the Frozen Glade to finish the Lurielle chain.
FROZEN GLADE (south of Caldemere Lake) · Lurielle’s Winter Nymph chain
Knock this out while already using Fort Wildervar as your FP, a short ride from the fort.
Chain gives solid XP and ties up the northern storyline nicely. Next zone: either transition into Dragonblight via Valgarde/boat or continue dungeon grinding (Utgarde Keep, Nexus), depending on level.
Part 1: Valgarde & Explorers’ League (68–69)
Valgarde
Overview & Location
Sail to Valgarde in Howling Fjord (the Menethil Harbor boat docks right in town).
Completing Rescuing the Rescuers is the key that makes the other Valgarde quest givers light up.
Howling Fjord · Alliance Leveling Guide
Valgarde: Step-by-Step Walkthrough
Off the boat and into the fjord: the siege at the gates, the Wyrmskull sweep, the Utgarde Catacombs package, and the harpoon chain that shoots you home. Check off steps as you go; progress saves in your browser.
0/0 steps
Hub Setup
Straight off the boat
Town Pickup Lap
Stack these before leaving; all unlock after the rescue
Bay Quickies
One minute underwater
Wyrmskull Village Sweep
Prisoners, the missing dig team, and the battle plans in one pass
Utgarde Catacombs Package
Upper ramp entrance, one clockwise clear
Spirit Lap & the Harpoon Chain
Back in town, three lines close at once
Shortcuts & Tips to Save Time
Stack town pickups: don't leave Valgarde until you've grabbed Thoralius, Zorek, McSorf, and Harold. You'll complete all four lines in the same Wyrmskull loop.
One-and-done Catacombs: tablet clicks respawn fast, so clear clockwise and click on the way out to reduce backtracking. The Harpoon Operation Manual is on an early side table.
Harpoon launch = free hearth: save Let's Go Surfing Now for when you're ready to turn in, so the cannon shot puts you back in Valgarde instantly.
Flight path first: grab the Valgarde flight master immediately so you can fly back after side trips.
Rescuing the Rescuers: the harpoon clicks are the objective, so tag and move; the limiting reagent is the run between poles, not the killing.
Explorers’ League Outpost
Overview & Location
You reach the Outpost after Valgarde’s opening chain → The Human League mini-arc → The Explorers’ League Outpost (deliver McSorf’s Bundle to Stanwad) or via Donny’s breadcrumb Outpost Over Yonder… from Ivald’s Ruin. This unlocks Walt’s Iron-Rune construct arc and Hidalgo’s falconry arc. Both are fast, compact XP with very little travel.
The camp sits just west of Baelgun’s Excavation/Stonewall Lift, east of Nifflevar. There’s no flight path here; you arrive by ground/quest travel and later fly out to Westguard during News From the East.
Field note: Walt’s rune-tech lessons rope in three camp regulars, Lebronski (the rug you bluff on), Needlemeyer, and Gwendolyn.
Howling Fjord · Alliance Leveling Guide
Explorers' League Outpost: Step-by-Step Walkthrough
Walt's Trojan construct, Hidalgo's falcons, and the strangest quest hub in the fjord, threaded so both chains finish in the same loops. Check off steps as you go; progress saves in your browser.
0/0 steps
Hub Setup
Three pickups in one cluster
Prime Both Chains
One grub, one toolbox
Walt's Build Phase
One clockwise materials loop
Iron Rune Construct Lessons
All three in camp
Baelgun's Run & the Send-Off
The construct earns its keep
Hidalgo's Falcon Arc
Slot this between the build phase and the lessons
Shortcuts & Tips to Save Time
Grab extra grubs at the start: the Loose Rock by Hidalgo~75, 66 can be clicked several times; pocket 5 to 10 to avoid a second stop during the falcon steps.
Skin as you go: shoveltusks are everywhere between Nifflevar and Baleheim; keep killing while running Walt's materials to free-roll the Pristine Shoveltusk Hide.
Materials loop order: Nifflevar (barrel) → Baleheim (rope) → McGoyver in Valgarde (ingots) → auto-flight back to Walt. You'll pass shoveltusks and vrykul for the next step the whole way.
Construct etiquette: after any Iron Rune lesson, dismiss the construct from your pet frame. Skipping this causes weird targeting and wasted seconds mounting.
Hawk macro: a mouseover macro speeds Falcon Versus Hawk. Work around 73, 59 and look for pairs you can chain-aggro at maximum range.
Baelgun's cave: for The Delicate Sound of Thunder, head straight to the titan statue. Don't clear extra dwarves; the construct objective is just the investigate ping.
Zedd's Probably Dead
Dragonflayer Battle Plans
Anguish of Nifflevar
The Explorers' League Outpost
We Have the Technology
Part 2: Westguard, Kamagua & Scalawag Point (70–71)
Westguard Keep
Overview & Location
Westguard Keep (~30, 42) becomes your pivotal western foothold in Howling Fjord. Perched on the cliffs, it’s an Alliance stronghold blending human and dwarven forces.
Turn in To Westguard Keep! to Captain Adams upstairs in the keep to start the Westguard arc and unlock multiple side chains (Ember Clutch, Whisper Gulch, pirate daily). Captain Adams stands at (28.9, 44.1).
This hub offers fast, clustered objectives plus the repeatable daily Break the Blockade for ~20k XP, great while queues pop or between loops.
Howling Fjord · Alliance Leveling Guide
Westguard Keep: Step-by-Step Walkthrough
The fjord's Alliance stronghold: the zeppelin daily, the Ember Clutch, Whisper Gulch, the burning of Skorn, and the drop that opens Gjalerbron. Check off steps as you go. Progress saves in your browser.
0/0 steps
Courtyard Opener & the Pirate Daily
Quick XP burst on arrival
East Gate Cannonballs
It's on your path out
Ember Clutch Loop
The southeast rocky bowl, three quests in one visit
Scout Knowles Fork
Forsaken munitions, already in the southeast
Whisper Gulch Combo
North of the keep, one clockwise sweep
The Burning of Skorn
West ridge vrykul town, one dense push
Gjalerbron Push
The north-coast tranche, laddering the platforms saves elevator time
Shortcuts & Tips to Save Time
Daily first: do Break the Blockade on arrival, since the zeppelin loops continuously and the XP is chunky. Don't move on the deck. Stand at the prow and just aim bombs, and the cannons die with the pirates.
Two-for-ones at Ember Clutch: tag eggs and whelps en route to Skeld Drakeson so The Clutches of Evil finishes during Root Causes, then wand the drakes for Two Wrongs... before riding back.
Whisper Gulch pathing: run Danger! Explosives! and Send Them Packing together, dynamiting nodes while moving between mule spawns. Both complete in a single clockwise lap.
Skorn safety: torch interiors and get out, since the fire ticks are high inside. Pull vrykul to doorways, then re-enter to click objectives. The quest text itself warns not to tarry.
Vendor cadence: turn in One Size Does Not Fit All when you pass the east gate to keep bag space free before the Whisper Gulch and Skorn loops.
Kamagua & Scalawag Point
Overview & Location
Kamagua on the Isle of Spears (~25.9, 57.9) offers Kalu’ak reputation chains. Nearby Scalawag Point (~35.5, 81.5) hosts the pirate-themed quests that tie directly into these reputation gains.
Worth knowing: when you’re ready to leave the Fjord, Anuniaq [24.6, 58.8] also holds the Travel to Moa’ki Harbor breadcrumb, the natural hand-off into Dragonblight.
The Kalu'ak island, the pirate port you can only reach by a smuggler's boat, and the four stolen vrykul relics that need to go back in the ground. Check off steps as you go. Progress saves in your browser.
0/0 steps
Kamagua Setup
Three Atuik quests, compact loops
The Road to Scalawag
You can't just walk in. The chain is the door.
Scoodles & the Four-Relic Fork
Three one-step relics plus the four-step shield line, one clockwise lap
Return the Relics
The arc closes where it opened
Scalawag Side Money
Fast fillers while you're in port
Shortcuts & Tips to Save Time
Do Kamagua first. The shoveltusk and chimaera loops are compact and warm you up for the longer pirate swing.
Relics lap order: cave (Heart) → Iskaal ship (Staff) → coast cache (Armor) → ghost ship (Shield chain). This minimizes cross-water backtracking and syncs with the Sister Mercy docking cycle.
Sorlof timing: don't wander off, since the Sister Mercy loops every few minutes. Park on the tiny islet, hop on when it docks, spam the Big Gun as Sorlof comes broadside, and jump for the chest. Re-board on the next pass if you miss.
Jig Is Up safety: blow cooldowns on Jonah, then kite Hozzer the bear if he joins. Most classes solo this at 71 using line of sight and the cave ramps.
This outpost is the Alliance’s northern staging point below Frostblade Peak and opens three efficient lines at once: the aviary chores, the Wildervar Mine (yeti) pair, and the Giants’ Run rune chain. Turn-in spot is roughly (62.6, 16.8).
Hub services: flight point (James Ormsby) and an inn at the services platform [60.0, 16.0]. Rest here between laps, since it’s your northern base for Giants’ Run and the Frozen Glade.
Howling Fjord · Alliance Leveling Guide
Fort Wildervar: Step-by-Step Walkthrough
The northern dwarf fort: hippogryph down, the yeti next door, and the iron dwarves' rune secret at Giants' Run. Check off steps as you go. Progress saves in your browser.
0/0 steps
Hub Pickup
Four givers in one courtyard
Aviary Sweep
Two-for-one on the snowy ridges, then the falcon show
Wildervar Mine
Wake the neighbor, then put him down
Belvar's Rune Line
Giants' Run, northeast of the fort
Aderan's Giant Line
Unlocked by I'll Try Anything! Group tags are nominal with the giant trick.
Where This Hands Off
Finishing the rune and giant arc closes the Wildervar cluster. If the Gjalerbron push is still open from the Westguard chapter, it sits west of here. Otherwise wrap the Frozen Glade nymph arc on your way out.
Shortcuts & Tips to Save Time
Do the aviary before the mine: the ram meats for Shatterhorn drop in the same ring you farm for Down to the Wire. No extra loop.
Steelfeather targeting: stand on the ridge above the mine entrance, target him, and wait 10 to 20 seconds. Don't chase. The charm works at range while he passes.
Frozen Glade pickup: take the nymph arc only if you're underleveled or want the extra gold. It's on-path and the tight clustering makes it 10 to 12 minutes, with Keeper Witherleaf the only step that pulls you slightly aside.
Lodestone click: the Broken Tablet event has an RP pause. Start it, then position for your next pull while it plays to overlap the time.
Steel Gate & Chillmere Coast
Overview & Location
Located just east of the Apothecary Camp and north of Westguard Keep lies Steel Gate (approx. 30.2, 24.9). It’s an excavation zone with optional side content.
Though not a formal quest hub, it hosts repeatable patrol quests. Nearby Chillmere Coast includes neutral quest arcs (e.g., ancestry, artifacts).
The dig site, the daily patrol, and the missing explorer down on the Scourge-crawling coast. Check off steps as you go. Progress saves in your browser.
0/0 steps
Steel Gate Setup
Deliver the letter, then the dig's own errands
Down to the Chillmere Coast
Irena's worry becomes your route
Old Icefin's Trident
The small island offshore
Shortcuts & Tips to Save Time
Patrol on the fly: if heading north or east, swing through Steel Gate, pick up Steel Gate Patrol, cruise the path, and complete it in passing.
Shield timing: on Bring Down Those Shields, the crystal is only vulnerable while the shield is down, so clear the Scourge around it first and save your burst for the window.
No return trip needed: Jaren's farewell about giving Irena his love is flavor text only. The chain ends at the coast, so don't ride back to Steel Gate for it.
Minimize downtime: these are fast callbacks. Keep them as side bonuses picked up and completed en route, not full detours.
The Frozen Glade – Frost Nymph Side-Hub
Overview & Location
Hidden just south of Caldemere Lake lies the Frozen Glade, a rare sanctuary where uncorrupted frost nymphs reside and need your aid. Lurielle is the only uncorrupted nymph left in the glade, and her short chain is easy XP and one of the faster questlines in the zone.
Howling Fjord · Alliance Leveling Guide
The Frozen Glade: Step-by-Step Walkthrough
The frost nymphs' last untouched glade, ringed by the ice elementals that were once their companions. Three glades, one arc. Check off steps as you go. Progress saves in your browser.
0/0 steps
Meeting Lurielle
The glade sits directly south of Fort Wildervar
Spirits of the Ice
The elementals ringing the glade
The Vibrant Glade
Southwest. Vines and sisters in one trip.
The Twisted Glade
The corrupted heart of the arc
Shortcuts & Tips to Save Time
One-sweep loop: do Spirits of the Ice in the clearing first, then swing southwest and run Wild Vines and The Fallen Sisters together, since the ivy and the nymphs share the same ground.
Pendant discipline: clicking a fresh Chill Nymph wastes the attempt. Get her low, then free her.
Flora and fauna: the elementals and vine targets are tightly clustered, so crowd-clearing and AoE pulls pay off here.
On-path from Wildervar: this whole arc slots between Fort Wildervar and Giants' Run in 10 to 12 minutes, with Keeper Witherleaf the only step that pulls you slightly aside.
Preying Upon the Weak
We Call Him Steelfeather
Demolishing Megalith
My Daughter
I've Got a Flying Machine
Steel Gate Patrol
The Fallen Sisters
Spawn of the Twisted Glade
Keeper Witherleaf
WotLK Player Chronicles: Howling Fjord
Vikstone faced Northrend alone. Not alone. When elite quests required allies, these heroes from Terokkar-US answered the call. From the first steps off the boat at Valiance Keep, they stood beside me. Some were guildmates from Trinity Exiles. Others were passing strangers who stopped to help. All of them mattered.
Between November 2008 and August 2009, over 50 players are documented. Every name, every screenshot, and every shared victory is preserved in the WotLK Player Chronicles main page for Vikstone’s Classic Expedition.
Celrinn
Soul Sovereignty | Night Elf Hunter
Joined 1 quest
Howling Fjord quietly rivals Borean Tundra for early gold, the same starter-zone materials, but with fewer farmers competing for them, so prices tend to hold better. Shoveltusk herds give meat, Borean Leather, and Arctic Fur, the Thornvine Creepers near Camp Winterhoof drop Eternal Life, and Cobalt veins run throughout the zone with less mining pressure than Borean.
These are the rare spawns in Howling Fjord, and unlike Borean Tundra’s trio, each operates on independent spawn timers; typically 3-6 hours (though some sources report up to 12 hours for King Ping).
All three spawn immediately after server restarts, making maintenance days prime hunting time. Howling Fjord’s rares don’t share spawns with each other, so multiple can be up simultaneously. None of these rares are tameable by Hunters.
Howling Fjord Rares at a Glance
Three rares, independent timers, so more than one can be up at once. All spawn after server restarts, making maintenance days prime hunting. None are tameable. All three count toward Northern Exposure and Frostbitten. Full hunting detail below.
Perobas the Bloodthirster
Lvl 71 Elite Worgen
Between Camp Winterhoof and Fort Wildervar · drops Worgen-Scored Shackles (mail wrists) · the catch: swims and patrols between water and land, so check the water south of Wildervar. Skinnable for Borean Leather.
King Ping
Lvl 71 Elite Giant Penguin
Islands southwest of Kamagua (Isle of Spears) · drops Egg-Warming Blanket (cloth chest) · the catch: none, really. His absurd size makes him easy to spot, and he's a very easy solo kill.
Vigdis the War Maiden
Lvl 71 Elite Vrykul
East of Nifflevar, north of Explorers' League Outpost · drops Soul-Sealed Belt (plate waist) · the catch: serpentine patrol with a wide radius, can spawn among other Vrykul. Use /target Vigdis the War Maiden.
Combat Style: Straightforward melee combat with no special abilities.
Special Abilities:
Broken Bone (reduces chance to hit by 10% for 8 sec). The hit reduction can stack, so finish him quickly
Gnaw Bone (inflicts Physical damage and reduces chance to hit by 10% for 8 sec)
Killing Rage (increases attack speed by 100% for 6 sec)
Patrol Behavior:
Mobile Spawn that moves between different areas.
Unique Trait: Can swim and patrol between water and land. One of the last glimpses of the original menacing worgen design before Cataclysm turned them into playable good guys
Common Areas: Among rams near camps, east of Camp Winterhoof, south side of the lake across from Fort Wildervar docks.
Pro Tip: Check water areas south of Wildervar – he swims then patrols back to land.
Belly Flop (charges the unit, inflicting Physical Damage)
Flipper Thwack (a strong attack that increases melee damage)
Spawn Information:
Spawn Locations: Northeast shore of Isle of Spears, southern peak of Isle of Spears.
Spawn Timing: Appears within minutes after server restarts.
Visibility: The large model makes him easy to spot as he patrols past Scalawag Point. The most absurdly oversized penguin in Azeroth, and proof that Blizzard’s creature designers had a sense of humor
Enchant variations: -of the Beast and -of the Soldier.
Abandoned Adventurer’s Satchel.
Combat Details:
Health: ~13,900 HP
Difficulty: Easy solo for level 71+ characters.
Combat Style: Straightforward melee encounter with no special mechanics.
Patrol Pattern:
Route: Serpentine path with a large pathing radius, but only one spawn location. She can also spawn around other Vrykul, so you can use the macro /target Vigdis the War Maiden
Search Areas: North of Nifflevar and around Ivald’s Ruin.
Hunting Tip: Start from the Vengeance Landing elevators and work outward.
More Features:
Lore Connection: Despite the proto-drake association, she appears on foot in battle.
Howling Fjord offers a distinct entry into Northrend, setting up major faction paths that diverge early based on your allegiance. It also gives access to cross-zone reputations. Four factions matter in this zone, and knowing which one to feed saves weeks at level 80.
Minor Interactions – Taunka tribal ties and additional reputation sources.
How to Grind Howling Fjord's Factions
No tabard factions here, unlike some zones. You earn it through dailies and questing. Full breakdowns follow below.
Dailies & quest chains
Unlock the daily through a quest chain, then repeat it.
The Kalu'ak (tri-zone daily network)
Passive & dungeon spillover
Builds as you quest, plus no-tabard heroic runs at 80.
Explorers' League → Alliance Vanguard
Hand of Vengeance → Horde Expedition
Note: Steel Gate Patrol is the zone's only Explorers' League daily. Break the Blockade (Westguard) and The Way to His Heart… (Kamagua, once unlocked) round out the zone's three.
Explorers’ League (Alliance Archaeological Expedition)
“Dwarf-led archaeological mission uncovering Vrykul secrets and Titan mysteries.”
The Explorers’ League represents the Alliance’s scientific approach to Northrend exploration, feeding directly into the larger Alliance Vanguard reputation system. It offers a daily quest, making it good for steady reputation gain.
Engineers only can craft/learn the Chopper; materials are the main expense. Titanium Plating is a high-value BS tanking mod pattern.
Hand of Vengeance (Horde Forsaken Forces)
“Sylvanas’s plague research division expanding Forsaken influence in Northrend.”
Hand of Vengeance is the Forsaken’s aggressive expansion into Northrend, featuring plague development and Scourge warfare tactics. This subfaction advances Horde Expedition reputation.
Taunka questlines around Camp Winterhoof also feed Horde Expedition reputation as you complete them, so there’s nothing separate to grind.
Engineers only can learn/craft the Mechano-hog; mats are the main expense. Titanium Plating is a valuable BS tanking mod recipe.
The Kalu’ak(Howling Fjord Hub)
“Kamagua island settlement serves as central hub for tri-zone tuskarr daily network.”
Howling Fjord hosts Kamagua, the most accessible Kalu’ak settlement and central hub for the famous turtle boat transportation network. Completing Kamagua’s questlines unlocks The Way to His Heart…, part of the Tuskarr tri-zone daily cycle, a powerful daily reputation engine.
Daily Quest: The Way to His Heart…is picked up here from Anuniaq (~24, 58), though you complete it out at the Isle of Spears.
Turtle Boat: Green Island
Route: Kamagua ↔ Moa’ki Harbor (eastern dock)
Travel Time: 3 minutes each direction
Docking Time: 1 minute at each location
Speed Advantage: Actually 15 seconds faster than flying between locations
Reliability: Less reliable than flight paths due to scheduling
Camp Winterhoof Integration
Camp Winterhoof quests often tie Hand of Vengeance reputation with Taunka tribal missions.
Contribution flows into your umbrella expedition progression.
Naturally complete Taunka-related tasks while leveling through the zone.
Reputation Strategy
Priorities: The Kalu’ak is the one to prioritize, since its tri-zone daily network (1,500 reputation per day across three zones once unlocked) is the fastest path to Exalted and the only place to earn the Mastercraft Kalu’ak Fishing Pole. Your expedition faction (Alliance Vanguard or Horde Expedition) builds passively through nearly all zone questing, so it needs no special attention.
For Alliance, Steel Gate Patrol is the a daily quest in the zone, a 5-minute gyrocopter circuit with an excellent reputation-to-time ratio once you unlock it.
Key mechanics: Unlocking the Kalu’ak daily requires finishing the Kamagua quest chain through Scalawag Point, so don’t skip that progression. At level 80, running Heroic dungeons without a competing tabard equipped feeds reputation to your expedition faction through spillover. The Human racial Diplomacy adds a 10% bonus to all reputation gains.
Shortcuts, Hidden Vendors & Tricks
Hidden Shortcuts & Pathing Tricks
Wyrmskull Cliff Bypass – (61.8, 59.4) Hug the ridge west of Shield Hill to drop directly onto the prison cages. You’ll skip most front-gate Vrykul when working on Prisoners of Wyrmskull/Rescuing the Rescuers. Great time-saver for melee classes that prefer fewer caster pulls.
Utgarde Keep Exterior Pull – (58.2, 48.3) Behind the fallen pillar at the dungeon door is a LOS pocket; tag Dragonflayers, step back, and the other patrols reset. Ideal for hunters or frost mages farming the Disarmament weapon racks without accidental adds.
Water travel: Death Knights can use Path of Frost and Druids aquatic form to cut straight across the fjord’s water rather than going around.
Steel Gate Patrol Daily – Unlocked after the Wildervar dig-site series; mounts you in a gyrocopter with rockets to strafe gargoyles. Awards Explorers’ League rep, over 20,000 XP while leveling. Worth the 5-minute loop every day.
A goblin general goods and trade supplies vendor located at (58.6, 62.8). Wink’s presence is somewhat unusual in the mostly Vrykul and Forsaken-dominated Howling Fjord.
Gathering & Profession Leveling
Howling Fjord is dense enough in Cobalt (Mining 350+), Goldclover (Herbalism 350+), and Tiger Lily (Herbalism 375+) to push a gathering profession well into the 400-415 range by the time you finish the zone, setting up Grand Master (450) training.
Riding a gathering loop alongside your quests lets you cap two professions during the 68-72 stretch. For the full farming routes, coordinates, and circuits, see the Howling Fjord Gold Making Guide.
Skinning & Leather
Shoveltusk herds on the Isle of Spears and Caldros areas are a primary Borean Leather source, and they drop Shoveltusk Flank and Chilled Meat for Northern Cooking.
Crafting While You Level
If you’re leveling a crafting profession alongside gathering, a few combinations pay off in this zone:
Mining + Engineering: Craft Handful of Cobalt Bolts on the go; useful for the rifle and goggle recipes around levels 72-75.
Herbalism + Inscription: Mill Goldclover and Tiger Lily into Azure Pigment for Ink of the Sea, then craft the Darkmoon Card of the North while you level.
Cooking + Fishing: Glacial Salmon makes Firecracker Salmon (+46 Spell Power, +40 Stamina); Fangtooth Herring makes Pickled Fangtooth (+MP5, +Stamina). Good dungeon-prep food.