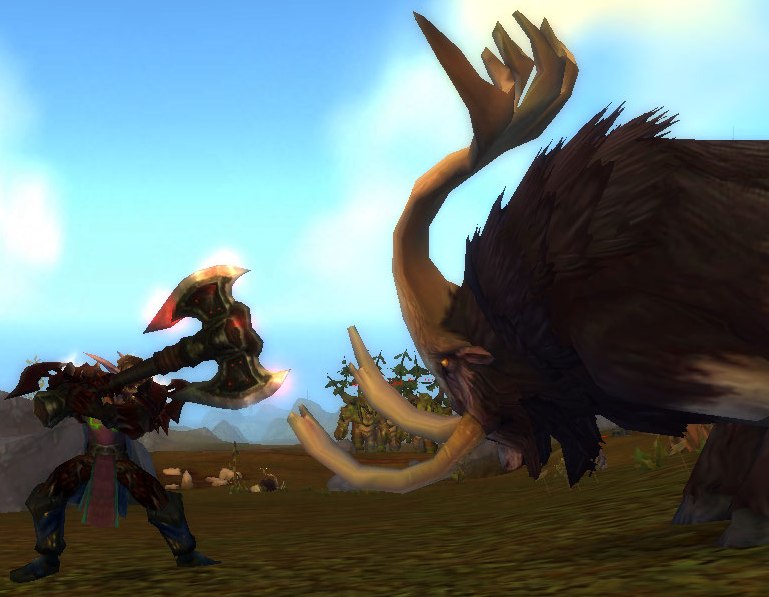
The screenshots and quest walkthroughs throughout this guide come from Vikstone’s original Northrend run on US-Terokkar, captured back in 2008-2009 during Wrath of the Lich King. The guide itself is built and updated for WotLK Classic, with routes, coordinates, and strategies.
Grizzly Hills is Northrend’s dense forest zone and one of the most fondly remembered areas in WotLK. The Alliance operates out of Amberpine Lodge, caught between the Horde at Conquest Hold, the PvP conflict at Venture Bay, and a corruption spreading through the local furbolg tribes. The Drakuru troll questline begins here and carries into Zul’Drak.
Escape from Silverbrook
What’s Inside:
Storyline Quest Routes (73-75): Step-by-step Alliance progression with full walkthroughs
WotLK Player Chronicles – Grizzly Hills: The Terokkar-US players who fought alongside Vikstone
Rare Spawn Guide: Locations, respawn timers, and hunting strategies
Gold Farming & XP Grinding Spots: The zone’s best farming spots live in the dedicated WotLK Classic Grizzly Hills Gold Farming Guide, every spot with coordinates, farming maps, and market timing
Faction Reputation & Rewards: Major and minor factions, what they offer, and how to get there
Ride northwest to Silverbrook and start their early errands when available.
Let “passive” lodge quests finish while doing your main sweeps. Don’t grind mobs in place.
In Silverbrook, grab Wolfsbane Root from Katjabefore the later Escape from Silverbrook phase to avoid phasing issues. Next stop: push out to Voldrune, then continue the wolfcult → Vordrassil/Ursoc chain.
Optional but strong XP: do the Ruuna the Blind chain out to the northeast, culminating in [3p] Hour of the Worg. If you pass Heartwood, grab the [Escort] Mr. Floppy quest for bonus XP.
Plan your mustang route around camp so you complete Mounting Up in one smooth circuit.
Treat this Thor Modan visit as “prep only”: the giant arc finishes later at Kurun/Gavrock. Next stop: follow Check Up on Raegar north-east to Prospector’s Point.
PROSPECTOR’S POINT (77, 48.7) · Dun Argol disguise + golem + finales
3Dun Argol Lower, Mid & Upper Tiers
From Prospector’s Point, move into Dun Argol’s lower tier: The Captive Prospectors (one key opens all cages) + The Perfect Plan (collect blueprint sections).
Work Dun Argol in a clean upward spiral: do all lower quests, then mid, then upper so you never backtrack.
Remember: one cage key works on all cages, so don’t waste time farming extras. Next stop: head west across the zone to Granite Springs for the Drakuru/DTK setup.
While near logging/ruins, grab Heart of the Ancients at the Blue Sky Logging control hut and Voices From the Dust in the Drakil’jin ruins for future Zul’Drak steps.
Use Budd’s stun to tag trolls fast, then move on. Don’t stay in one spot farming endlessly. Heart of the Ancients and Voices From the Dust are “future-proofing”. Grabbing them now saves a trip later in Zul’Drak. Next stop: ride south-west to Venture Bay and Blue Sky Logging Grounds for daily-heavy XP.
On your way back north, finish [Daily] Blackriver Skirmish at the Blackriver crossing.
Keep [Daily] Smoke ’Em Out active while farming kills, and tag houses as you move between objectives.
Do Solvent on the barge first, then Captain Zorna, then Rocket if it’s available to avoid flying back and forth. Next stop: ride east toward Harkor’s Camp and the Drakil’jin ruins.
Try to pick up all Drakkari and meat quests before diving deep into Drakil’jin so every kill is doing double duty.
For Jin’arrak’s End, place the Infused Offering and let the event do the killing. No need to brute-force the boss. Next stop: return to the Thor Modan ridge and then down to Gavrock to finish the giant storyline.
THOR MODAN → GAVROCK · Kurun push, then free the giants
Use Kurun’s boulders to soften large packs. Don’t try to solo everything without his help if you’re on-level.
At Gavrock, clear small packs around runes and stones before interacting, since freed giants can pull extra mobs if you’re careless. Next zone: with Drakuru hooks, Heart of the Ancients, and Voices From the Dust ready, you’re perfectly set to move into Zul’Drak.
Contents
Part 1: Amberpine Lodge, Westfall Brigade & Dun Argol (73 to 74)
Amberpine Lodge
Overview & Location
Amberpine Lodge is the primary Alliance outpost in western Grizzly Hills at (~32, 60). It’s where the Valiance Expedition consolidates local hunters/trappers and kicks off several arcs.
The Alliance's timbered foothold in the hills: cider and outhouses, trapper diplomacy, a drake you get to fly, and the failed world tree at the zone's heart. Check off steps as you go. Progress saves in your browser.
0/0 steps
Lodge Warm-Up Loop
Everything within 200 yards of the inn
Aspen Grove Diplomacy
Dumont's string, north of the lodge
Silverbrook Tap-In
Northwest, before the reveal
Voldrune Strike
One southbound sweep, ending on a drake
Vordrassil & Ursoc
The zone's story crescendo, opened by Descent into Darkness
Shortcuts & Tips to Save Time
One-building opener: set your hearth, grab the Amberseeds trio and Anderhol's lodge tasks plus Dumont's Local Support in a single inn stop, and hit the outhouse on your way out.
Voldrune triangle: kill huscarl packs on the approach, farm the Flamebinders for talismans, then mount Flamebringer for the Thane. No backtracking.
Ursoc helper: tell Tur Ragepaw to fill your weak role, tank, healer, or damage, and the Group 3 tag becomes manageable even undergeared.
Westfall Brigade Encampment
Overview & Location
Finish the Amberpine → Silverbrook line through Descent into Darkness, which gives Report to Gryan Stoutmantle… Again. Turn it in at the Westfall Brigade Encampment (≈ 59, 27), your Alliance forward base in eastern Grizzly Hills.
This hub then fans you into three efficient legs: Hollowstone Mine (north-west), Mounting Up (around the camp), and Thor Modan (north-east), with a later hand-off to Prospector’s Point near Dun Argol.
Worth knowing: once your Grizzly Hills business wraps, Captain Gryan Stoutmantle also holds Reallocating Resources, the breadcrumb that hands you off to Zul’Drak.
Stoutmantle's brigade, a haunted mine, a blind seer whose story ends face to face with a name from Shadowfang Keep, and the dwarves digging too deep at Thor Modan. Check off steps as you go. Progress saves in your browser.
0/0 steps
Turn-In & Setup
An old friend from Westfall
Quick XP Around Camp
Carrots, mustangs, and one very brave rabbit
Hollowstone Mine Mini-Chain
Northwest of camp, one clockwise lantern lap
Ruuna & Sasha's Hunt for Arugal
The worg cult arc, in exactly this order
Thor Modan & the Brann Trail
Northeast, dwarves digging too deep
Hand-Off to Prospector's Point
The Dun Argol infiltration, slotted while you're already east
Shortcuts & Tips to Save Time
Mounting Up batching: grab all 5 carrots first, then stick-pull a mustang, ride straight to Percy, hand over, repeat. No re-looting between rides, and no manual dismounts, ever.
Hollowstone sprint: ride directly to Petrov, then lantern the eight corpses along one clockwise path. No reason to full clear.
Thor Modan stacking: grab The Damaged Journal first, then every dwarf you kill for Brugar pays keystone fragments passively.
Orlond and the seismograph: Orlond is deep, so follow the tunnel to the marked east end and take the seismograph readings before leaving. One trip, no backtrack.
Hour of the Worg pulls: the Shade of Arugal is the hardest of the four targets, so clear his lieutenants first and save cooldowns for the Shade.
Prospector’s Point
Overview and Location
From Westfall Brigade Encampment, Brugar Stoneshear sends you on Check Up on Raegar to the Explorers’ League camp, Prospector’s Point at (77.0, 48.7). This unlocks two parallel lines: Raegar’s “build a golem, break their war-machine” arc and Kilian’s undercover arc that steals Loken’s orders. Do both together for minimal backtracking.
Grizzly Hills · Alliance Leveling Guide
Prospector's Point: Step-by-Step Walkthrough
Raegar Breakbrow's plan to bring down Dun Argol: free the prospectors, steal the parts, wear the uniform, and walk a homemade war golem straight into the thane's hall. Check off steps as you go. Progress saves in your browser.
0/0 steps
Camp Setup
One standing order the whole time: kill Rune-Smiths on sight
Lower Tier: The Captives
Three cages on a climbing path
Middle Tier: Parts & Disguise
Steal the golem, become the overseer
Upper Tier: Power & the Pedestal
Two named smiths, a stolen message, and a charging golem
Finale: The Thane & the Blackout
Raegar, you, and some hunk o' junk golem
Shortcuts & Tips to Save Time
One key, three cages: keys drop fast. Free Gann first indoors, then Torgan and Varana on the higher tiers during your climb, so you're always moving upward.
Blueprint uptime: don't farm in place. Kill every Rune-Smith you pass between objective buildings and the three sections arrive on their own.
Power cell beeline: hit Durar first, ride straight to Kathorn, and click Loken's Pedestal on the same lap. One loop, two quests advanced.
Golem charge fast: tag the Lightning Sentries on the snowy slope under Dun Argol and let them die near your golem. No deep pulls needed for the 10 charges.
The Failed World Tree
Escape from Silverbrook
A Dark Influence
Ursoc, the Bear God
Mounting Up
Anatoly Will Talk
Hour of the Worg
Put On Your Best Face for Loken
The Iron Thane and His Anvil
Part 2: Granite Springs, Drakuru & Venture Bay (74 to 75)
A caged troll with a silver tongue and a favor to ask. The Drakuru arc winds through every troll ruin in the hills and ends inside Drak'Tharon Keep. Check off steps as you go. Progress saves in your browser.
0/0 steps
Camp Pickup & Prep
Four quests and one purchase before you ride
Ruins of Drak'Zin Loop
Budd, bounties, and the first brazier
Zeb'Halak Triangle
One sweep, no second climb
Blue Sky Insert & the Heart
The logging grounds, and the hand-off your log needs next
Drakil'jin Ruins Leg
East side, tablets and mojo
Mack's Line & Drak'Tharon Prep
Dailies and dungeon pickups back at camp
Drak'Tharon Finale
The reveal inside the keep
Shortcuts & Tips to Save Time
Buy before you fly: the Imbued Vial from Ameenah at the start means Vial of Visions finishes on your first camp return instead of a second trip.
Cage with Budd, don't brute-force: credit only comes from caging a Budd-stunned troll. If he de-syncs or wanders, talk to him again.
Zeb'Halak in one sweep: Zim'bo, then the Eye atop the ziggurat, then the brazier. That order avoids a second climb.
Blue Sky piggyback: take the Heart while you're already near the logging grounds for other Grizzly loops. The control room sits at the platform's top.
The dungeon stack: queueing Drak'Tharon with Seared Scourge, Search and Rescue, and Head Games means you burn on the doorstep, finish inside, and close the Drakuru story in one visit.
Venture Bay (Alliance) – World PvP Hub
Overview and Location
Venture Bay on the SW coast of Grizzly Hills is a world-PvP hotspot where Alliance and Horde fight over the lighthouse – the dailies are valuable. These quests award Venture Coins plus gold/XP and can be chained with the Blue Sky Logging Grounds and Blackriver Logging Camp dailies for a tight, efficient loop.
Grizzly Hills · Alliance Leveling Guide
Venture Bay: Step-by-Step Walkthrough
The contested south coast, where the war is live: every quest in this circuit flags you for PvP, so ride in ready. Check off steps as you go. Progress saves in your browser.
0/0 steps
Blue Sky Logging Grounds
Four in one sweep, all of them PvP-flagged
Down to the Bay
Ride the log if you're on foot
The Bay in One Clockwise Lap
Smoke, kills, the captain, and Element 115
The Lighthouse & the Red Rocket
Only when your faction holds the point
Blackriver on the Way North
Ten kills you were passing anyway
Shortcuts & Tips to Save Time
Stack objectives: always be smoking a building on pull, then kite the packs out so Smoke 'Em Out ticks while Keep Them at Bay! farms itself.
Zorna in one pull: approach from the water side, tag her under the dock canopy, and burst. The dock patrols are a trap for the greedy.
Solvent safety: carrying Element 115 slows you and mounting doesn't help, so just run a clean line back. And keyboard-steer the rocket: the mouse camera turns faster than the warhead and will throw you off line.
Blue Sky pairing: hunt Pieces Parts sprockets while bandaging for Life or Death. The little things blend into the ground, so circle tree bases and saws.
Low-conflict windows: if the other faction is heavy at the lighthouse, skip the Red Rocket for now, turn in your other dailies, and come back when control flips. Howser only spawns when your side holds it.
Part 3: Drakil’jin Ruins, Thor Modan & Gavrock (75+)
Harkor’s Camp & Drakil’jin Ruins
Overview and Location
Head to Harkor’s Camp on the NE coast of Grizzly Hills (73.8, 34.0). This tiny camp fans you into two efficient legs: Kraz’s five-part Drakil’jin rite (inside/around the ruins) and Harkor’s pair of outside kills/foraging quests. If you swing past Redwood Trading Post (69, 40) first, grab A Bear of an Appetite as a quick side objective you can finish while circling the shoreline.
Drakil’jin Ruins: burial complex (~71, 27) with catacombs entrance around (71.5, 23); you’ll bounce between the gongs at the front and the crypts below.
Field note: A Bear of an Appetite comes from Hugh Glass, named for the real frontiersman famously mauled by a grizzly in 1823 and left for dead. A bear-attack survivor handing out fishing quests in Grizzly Hills. Read more in the Grizzly Hills lore page.
A tiny camp on the northeast coast, a crypt full of restless Drakkari, and a death rite that asks you to die once, on purpose, to finish it. Check off steps as you go. Progress saves in your browser.
0/0 steps
Camp Pickup
Kraz's rite and Harkor's appetite
Into the Crypts
Jars first, mallet on the way back
See You on the Other Side
The rite begins at the gongs, and it begins with your death
Chill Out, Mon
The snow works from either side of the veil. The spirits don't.
Jin'arrak's End
No fight. Save your cooldowns.
Parallel Clears While You Move
Harkor's list, an archaeologist, and a fisherman with a story
Shortcuts & Tips to Save Time
Stack everything: keep Therapy in your log and tag Oracles and Protectors on every trip between the gongs and the crypt. Both lists finish passively by the finale.
Ghost logistics: loot the Snow while ghosted if you like, but return to life at Gan'jo before hunting spirits. The dead can't see them, which the game seems to find as funny as we do.
No boss burn needed: the Infused Offering at the gongs handles Jin'arrak's End entirely on its own.
Mallet timing: kill Drak'aguul immediately after the jars turn-in. His patrol sits on your path back to the ruins, so no extra lap.
Escort sanity: if Harrison isn't up, finish the Kraz and Harkor turn-ins and swing back. The respawn is short and so is the walk.
Thor Modan
Overview and Location
In the plaza of Thor Modan you’ll find a Fallen Earthen Warrior who starts Find Kurun!. He points you to the stone giant Kurun on the hill overlooking the city. There’s also a Battered Journal on the ground nearby that begins a separate (optional) Prospector line. Thor Modan itself sits around (62.0, 26.4) in northern Grizzly Hills.
Kurun then runs a three-quest push that breaks the siege, after which he sends you south to the colossus Gavrock at the Ruins of Tethys to free runed giants, the natural hand-off into the coastal half of the zone. Kurun stands at (65.8, 17.8); Gavrock is on the islands at roughly (80.3, 35.5).
Grizzly Hills · Alliance Leveling Guide
Thor Modan: Step-by-Step Walkthrough
The giant chain: Kurun's assault on the iron dwarves, then Gavrock's work freeing the enslaved giants along the coast. Check off steps as you go. Progress saves in your browser.
0/0 steps
Hub Setup
Thor Modan plaza, then the north slope
Kurun's Push
Ridge, battlefield, then the trench
Hand-Off to Gavrock
Ruins of Tethys, southeast on the coast
Latent Power
Three ancient stones, south to north
Free at Last
Eastwind Shore, patrol path south of the islands
Optional Exit to Zul'Drak
If you haven't taken Into the Breach! yet (the Zul'Drak breadcrumb, a different quest from Kurun's trench assault), this is a natural slot for it. It lines up with where the zone sends you next.
Shortcuts & Tips to Save Time
One-trip Kurun: from the Thor Modan plaza, the north-northwest slope goes straight up to Kurun. No wide detour needed.
Boulder efficiency: stand near the ridge edge to shorten throw travel, and your next boulder can be readied before the previous dwarf dies. The count still ticks.
Shard targeting: only giants in the melee field count for Rallying the Troops. Don't spend the shard on the boulder-throwers perched on the rim.
Thane skip: the pillar-to-water swim reaches Argrum without clearing the trench twice.
Overseer loop: each overseer appears the moment his rune-weavers die, so tag groups aggressively and the four fall in one clean arc.
Latent triangle: southern island stone first, then cut northwest, then north. You end facing the coast road back to Gavrock.
See You on the Other Side
Chill Out, Mon
Jin'arrak's End
Therapy
Nice to Meat You
Dun-da-Dun-tah!
Rallying the Troops
Free at Last
WotLK Player Chronicles: Grizzly Hills
Vikstone faced Northrend alone. Not alone. When elite quests required allies, these heroes from Terokkar-US answered the call. From the first steps off the boat at Valiance Keep, they stood beside me. Some were guildmates from Trinity Exiles. Others were passing strangers who stopped to help. All of them mattered.
Between November 2008 and August 2009, over 50 players are documented. Every name, every screenshot, and every shared victory is preserved in the WotLK Player Chronicles main page for Vikstone’s Classic Expedition.
Biggiet
Gypsies | Human Mage
Joined 1 quest
Entrei
Trinity Exiles | Draenei Death Knight
Joined 1 quest
Most max-level players blow past Grizzly Hills for the higher zones, which keeps the competition light here while the materials still sell. The Highland Mustang packs in the north are strong AoE skinning targets for Arctic Fur and Borean Leather, the inland rivers are the best Glacial Salmon fishing in Northrend, and Cobalt veins and Deadnettle-bonus herbs round out the zone.
These are the rare spawns in Grizzly Hills, a zone with arguably the most diverse rare spawn roster in Northrend. You’ll find a coveted Spirit Beast, a corrupted fleshbeast, an undead vrykul huntress, and one of the toughest rares in all of Northrend. All operate on independent spawn timers (typically 3-6 hours, except Arcturis at 8-24 hours) and spawn immediately after server restarts.
Grizzly Hills Rares at a Glance
The most varied roster in Northrend: four rares, independent timers, all spawn after server restarts. Three count toward Northern Exposure and Frostbitten. Arcturis does not, he's a Spirit Beast for hunters to tame. Full hunting detail below.
Arcturis
Lvl 74 Spirit Beast
Single spawn north of Amberpine Lodge · spectral bear, BM hunters tame it as an exotic pet · the catch: does NOT count for the achievements, and competition from hunters is fierce. Long, variable timer. A tamer's prize, not an achievement tick.
Seething Hate
Lvl 73 Elite Fleshbeast
Three Vordrassil cave sites (Heart, Limb, Tears) · drops Ichor-Stained Wraps (cloth wrists) · the catch: easiest of the four, low competition. Shares the Shadowfiend model, so he stands out among the cave slimes. Check all three spots.
Syreian the Bonecarver
Lvl 73 Elite Vrykul
Triangular patrol in eastern Grizzly Hills · drops Syreian's Leggings (leather legs) · the catch: wide patrol area, so use /target Syreian while questing the logger camps. Easy fight, just have a dispel ready for her Frost Arrow.
Grocklar
Lvl 74 Elite Stone Giant
Multiple spawns across western Grizzly Hills · drops Rock-Giant's Pinky Cover (mail gloves) · the catch: the zone's most dangerous rare. ~41k HP, crits for 4-5k, moves fast and can despawn mid-fight. Bring cooldowns. One of the hardest Frostbitten rares.
Zone Characteristics:
Arcturis: NOT an achievement rare – doesn’t count for Northern Exposure/Frostbitten. Extremely high Hunter competition.
Grocklar: Most dangerous Grizzly Hills rare; 41k HP, can crit for 4-5k damage. May despawn if not killed.
Seething Hate: Shares the priest’s Shadowfiend model, easy to spot among cave slimes.
Requirements:Beast Mastery talent tree required to tame (exotic pet)
Special Abilities:
Frozen Bite (inflicts Frost damage every 3 sec for 6 sec, movement speed reduced by 10% for 6 sec)
Pounce (leaps to the enemy’s location, Physical damage increased by 150% for 8 sec)
Visual Identification:
Appearance: Spectral white/blue bear with visible heartbeat effect every 5 seconds
Spawn Location: Look on the hill between the lodge and the waterfall
Single Spawn Point: Only one location, unlike other rares
Spawn Patterns:
Respawn Timer: 8-24 hours (highly variable)
Timing Pattern: Many spawns observed around the top of the hour (within 5 minutes before/after)
High Competition: Extremely contested by Beast Mastery hunters
Hunter Taming Strategy:
Health: ~15,000-16,000 HP
Setup: Drop Freezing Trap at max range before starting tame
Aggro Timing: Arcturis is a neutral mob that does not attack first; you can easily tame him using a Freezing Trap, which only requires you to initiate the taming process without striking him first.
Escape Plan: May break Freezing Trap quickly (3-5 seconds) – have backup ready
Support Items: Use Concussive Shot with bandages and healing items on standby
Combat Warnings:
Pounce Attack: Will leap at hunters immediately upon engagement
High Damage: Deals significant damage for his level, especially to level 74 hunters
Type: Aberration formed from Vordrassil corruption
Appearance: Small fleshbeast model that stands out among area slimes
Spawn Behavior: He can spawn both outside and inside the caves
Hunting Strategy:
Health: ~15,000 HP
Special Ability:
Seething Evil (attacks have a chance to inflict Shadow damage)
Check Multiple Locations: Unlike some rares, check all three spawn points
Easy Identification: Same model as the priest’s Shadowfiend.
Low Competition: Generally less contested than other Grizzly Hills rares
Lore Background:
Origin: Created from the corruption of the failed World-Tree Vordrassil. Represents the lasting damage from Vordrassil’s failure. The concept of negative emotions taking physical form through the influence of an Old God was a theme later developed and expanded upon with the introduction of the sha in Mists of Pandaria.
Lore: “The Lich King promised that more prey would eventually make their way to Northrend. How lucky for me.” Her dialogue suggests she volunteered to serve the Lich King.
NPCScan or SilverDragon cache rares and alarms instantly
Automatic targeting saves time when scanning multiple locations
Macro Strategy:
Targeting macro: /target [rareName] plus targeting sound helps while questing
Efficiency: Allows rare detection while completing other activities
Zone-Specific Notes:
Arcturis competition: Extremely high due to Hunter demand
Grocklar difficulty: Requires serious preparation and strategy
Multiple spawn points: Check all locations for Seething Hate and Grocklar
Faction Reputation & Rewards Guide
Major Factions Overview
Grizzly Hills is the PvP daily-quest capital of Northrend, offering the most comprehensive faction-versus-faction daily quest network in WotLK Classic. This forested zone is a key battleground for giving Alliance Vanguard and Horde Expedition reputation while giving substantial gold rewards and a prestigious PvP achievement.
Both sides run the same number of dailies for roughly equal reputation; only the names and the hub differ.
Grizzled Veteran Achievement: Earned by completing the full PvP daily set, which spans both Grizzly Hills and the adjacent Venture Bay. The Grizzly Hills dailies here are most of it, but you’ll need the Venture Bay PvP dailies to finish the achievement.
Valiance Expedition – Alliance PvP Operations
“Five daily PvP quests make Grizzly Hills a powerhouse for Alliance Vanguard reputation.”
Grizzly Hills has the most Alliance Vanguard daily quests. Alliance players can rapidly advance their Valiance Expedition reputation through five convenient daily PvP quests, offering one of the fastest reputation gain methods in the game.
Reputation Sources
Category
Details
Reputation
Notes
Reputation Source
Amberpine Lodge — Primary Alliance PvP Daily Hub [32.0, 60.2] Flight Master:Vana Grey [31.2, 59.2] Strategic Position: NW Grizzly Hills, opposite Conquest Hold Level Requirement: 74+ for daily access
—
Central pickup for all five Alliance PvP dailies.
Daily Quest
Pieces Parts Objective: Collect Horde vehicle parts from destroyed siege engines. Location: Battlefield lanes between Alliance/Horde lines.
~250 Valiance Expedition → Alliance Vanguard/day
Prioritize freshly destroyed siege engines for faster spawns.
Daily Quest
Life or Death Objective: Rescue wounded Alliance soldiers and escort to safety. Mechanics: Heal/protect vulnerable NPCs during escort.
~250 Valiance Expedition → Alliance Vanguard/day
Clear nearby mobs first; escorts complete faster and safer.
Fast completion; minimal combat—great filler between other dailies.
Daily Quest
Kick ’Em While They’re Down Objective: Defeat weakened Horde forces & strategic targets. Focus: Direct PvP-style combat vs. Horde NPCs.
~250 Valiance Expedition → Alliance Vanguard/day
Burst priority targets; chain pulls near guards for speed.
Daily Quest
Blackriver Skirmish Objective: Participate in the river-crossing battle operations. Scale: Large, multi-objective fight along the Blackriver.
~250 Valiance Expedition → Alliance Vanguard/day
Most involved of the five; do last to avoid desync with other pickups.
Warsong Offensive – Horde PvP Dominance
“Four daily PvP quests plus Blackriver Brawl create the ultimate Horde reputation engine.”
Grizzly Hills represents Garrosh Hellscream‘s most aggressive expansion, with four dedicated PvP daily quests for fast Horde Expedition reputation building.
Reputation Sources
Category
Details
Reputation
Notes
Reputation Source
Conquest Hold — Horde PvP Command Center [20.9, 64.7] Flight Master:Kragh [22.0, 64.6] Command Structure: Major Horde military installation Daily Quest Hub: Central pickup for all Horde PvP dailies
—
Strategic position grants fast access to battlefield lanes.
Daily Quest
Making Repairs Objective: Maintain/repair Horde siege equipment & fortifications. Location: Conquest Hold and nearby Horde posts.
~250 Warsong Offensive → Horde Expedition/day
Minimal travel; quick turn-in between other dailies.
Daily Quest
Shred the Alliance Objective: Eliminate Alliance forces & destroy their equipment. Focus: Direct assaults on Alliance positions/personnel.
~250 Warsong Offensive → Horde Expedition/day
Prioritize high-value targets to finish faster.
Daily Quest
Keep ‘Em on Their Heels Objective: Maintain offensive pressure on Alliance defenses. Strategy: Continuous harassment/disruption ops.
~250 Warsong Offensive → Horde Expedition/day
Hit-and-run tactics work best; chain objectives along the lane.
Daily Quest
Overwhelmed Objective: Coordinate large-scale assault operations vs. Alliance strongholds. Scale: Major battle requiring tactical coordination.
~250 Warsong Offensive → Horde Expedition/day
Most complex of the four—do last if objectives are contested.
Both factions run their circuit the same way: pick up all five dailies at your hub (Amberpine Lodge for Alliance, Conquest Hold for Horde) and run them in one loop, since the quest areas overlap. Expect roughly 1,250 expedition reputation per day from the full set, with the whole circuit taking about 45 to 60 minutes.
This is one of the fastest expedition-faction reputation methods in the game, so it’s worth folding into your leveling plan from 74 onward. Across a week that’s 8,000-plus reputation toward Exalted, and finishing the circuit (plus the Venture Bay dailies) earns the Grizzled Veteran achievement. Since these are PvP quests, set up your PvP abilities and trinkets before you head into the contested areas.