The Storm Peaks WotLK Classic Leveling Guide | Quest Routes, Gold Farming, & Rare Discoveries
This Storm Peaks leveling guidefor WotLK Classic covers the Alliance’s storyline quests with optimized leveling routes, gold farming hotspots, faction/reputation mastery, and rare spawn locations.
Northrend Zone Guides
Vikstone’s Classic Expedition · Northrend Leveling Series 68–80
The screenshots and quest walkthroughs throughout this guide come from Vikstone’s original Northrend run on US-Terokkar, captured back in 2008-2009 during Wrath of the Lich King. The guide itself is built and updated for WotLK Classic, with routes, coordinates, and strategies.
Storm Peaks is Northrend’s Titan heartland, home to Ulduar, the Halls of Lightning, and the questlines that uncover what the Titans left behind. K3 and Frosthold serve as the main quest hubs. The Sons of Hodir reputation grind starts here and is mandatory for endgame shoulder enchants. Flying is close to required. The zone is built vertically and most quest areas are inaccessible on foot.
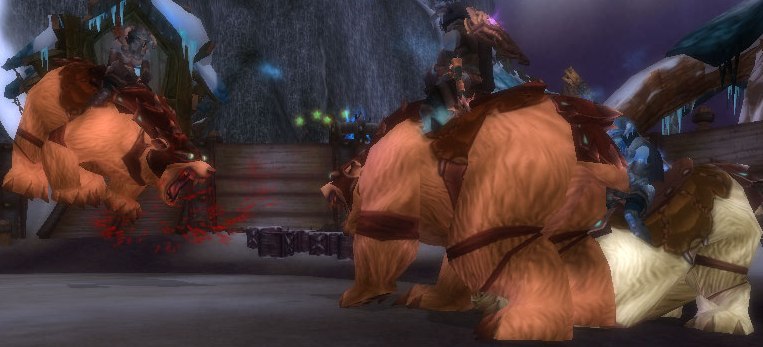
The Reckoning
What’s Inside:
Storyline Quest Routes (77-80): Step-by-step Alliance progression organized by level bracket with full walkthroughs
WotLK Player Chronicles – The Storm Peaks: The Terokkar-US players who fought alongside Vikstone
Rare Spawn Guide: Locations, respawn timers, and hunting strategies
Gold Farming & XP Grinding Spots: The zone’s best farming spots can be found on the dedicated WotLK Classic Storm Peaks Gold Farming Guide, every spot with coordinates, farming maps, and market timing
Faction Reputation & Rewards: Major and minor factions, what they offer, and how to get there
[Daily] Overstock unlocks later when you return to K3.
Use the teleporter pad aggressively: it makes K3 ↔ Garm’s Rise basically instant for turn-ins.
Make one clean sweep of Crystalweb Cavern so all three quests + [Escort] Bitter Departure finish together. Next stop: use your new vrykul disguise to walk into Brunnhildar Village.
For The Drakkensryd, stay calm: always harpoon the next drake before you fall. You don’t need to kill every rider you see, only 10 total.
Hyldnir dailies become a solid gold/XP loop while you’re still leveling or farming Sons of Hodir rep nearby. Next stop: follow up with Thorim at the Temple of Storms.
TEMPLE OF STORMS (Thorim) · Fjorn’s Anvil → Veranus → The Reckoning
For Mending Fences, let your charmed giants do the heavy lifting. Don’t over-pull solo.
Keep the egg run and Territorial Trespass together so you don’t visit Veranus’s roost twice. Next stop: with Thorim satisfied, commit fully to the Sons of Hodir at Dun Niffelem.
Farm the initial Hodir chain to at least Honored so your dailies are efficient before you deep-dive into Icecrown or raids. Hot and Cold + A Viscous Cleaning share a lot of terrain. Always stack them when possible. Next stop: ride or fly to Frosthold to begin Brann’s Library chain toward Bouldercrag.
FROSTHOLD & BRANN BRONZEBEARD CHAIN · Inventor’s Library run → breadcrumb to Bouldercrag
Treat the Library chain as a single focused run so you don’t have to revisit the consoles multiple times.
Save Ancient Relics turn-ins until you’re closer to the rep breakpoints you care about for gear or achievements. Next stop: follow The Exiles of Ulduar to Bouldercrag’s Refuge.
Start with: Rare Earth (mine ore on the ridge, then hearth or ride back) → then Fighting Back/Relief for the Fallen in the Snowdrift Plains (pull mobs near fallen earthen so they count efficiently).
Pull mobs onto fallen earthen to double-dip credit for Fighting Back and Relief for the Fallen at once.
In The Iron Colossus, the fight is all about rhythm: stack to 5, dodge slam with Submerge, repeat until it drops.
After this chain, Storm Peaks is essentially “complete,” and you’re perfectly set to roll into Icecrown with full context and reps rolling.
Part 1: K3, Brunnhildar Village & The Drakkensryd (77 to 78)
K3
Overview & Location
Fly north from Dalaran to K3 at the southern edge of Storm Peaks (≈ 40.6, 85.6). This neutral goblin camp is your first foothold, giving you repairs, an inn, and a flight path (Skizzle Slickslide, 41.0, 85.0) plus the loaned flying mount if you haven’t bought Cold Weather Flying (talk to “Honest” Max just outside K3).
Worth knowing: the innkeeper is Smilin’ Slirk Brassknob [41.1, 86.0], and hunters get a stable master too (Heksi, [40.8, 86.0]). One caveat on “Honest” Max‘s loaned mounts: they only fly in Storm Peaks, Sholazar Basin, and Icecrown, so don’t count on them anywhere else.
Also, there’s a Firefly/Serenity reference here. Browncoats would know.
The Storm Peaks · Alliance Leveling Guide
K3: Step-by-Step Walkthrough
The goblins' mountain foothold: minefields, mammoth demolition, a spider cave, and the crone in the Forlorn Mine whose bargain changes everything. Check off steps as you go. Progress saves in your browser.
0/0 steps
Hub Setup & Services Lap
Set hearth, then the vendors by the flight path
Jeer's Openers
Wreckage west, then the Minefield. No flying over the mines.
Crystalweb Cavern Bundle
Tore at 41.7, 80.1, cave mouth at 40.7, 78.8
Ricket's Demolition Arc
Mammoths west, Garm's Bane east, teleporter above
Sifreldar & the Forlorn Mine
Village northwest at 41-44, 63-70, mine entrance at 42.8, 68.9
Minefield drift: don't fight the mines. Angle your camera and let the bumps push you toward the toolbox, faster than tiptoeing the maze.
Double-stack mines: two per spot in short overlapping rows deletes patrol waves instantly.
U.D.E.D. first-cast: mount before grabbing the explosive and throw at the first mammoth you see, before despawns eat the charge.
Cavern bundle: spiders, ore, the miner's quest, and the escort all run on one pass through Crystalweb.
Teleporter loop: once the pad is powered, shuttle K3 to Garm's Rise between every turn-in. It erases most of the arc's flight time.
Honest Max's loaners: free at 77+ if you haven't trained Cold Weather Flying, and they're vehicle mounts, immune to daze dismounts and mountable mid-fall. They fly only in Storm Peaks, Sholazar, and Icecrown, which is exactly where you're going.
This begins the Hyldnir trials that culminate in The Drakkensryd and hand you off to Thorim for the Sons of Hodir path.
Brunnhildar Village sits east of Sifreldar; Lok’lira appears here after her Forlorn Mine sequence.
Worth knowing: Gretta’s daily rotation pays out Hyldnir Spoils, which carry a small chance (about 1-3%) at the Reins of the White Polar Bear. That bag is the reason regulars never skip this daily. And during The Drakkensryd, you can land on the column ornaments mid-event to pause and regenerate between drakes.
The Storm Peaks · Alliance Leveling Guide
Brunnhildar Village: Step-by-Step Walkthrough
Disguised among the Hyldnir: prison work, bear trials, and a harpoon ride between proto-drakes that ends at Thorim's feet. Check off steps as you go. Progress saves in your browser.
0/0 steps
Mildred's Enforcer
Forlorn Mine, everything around Mildred
Freeing the Crone
Rear cells, then the walk out
Proving Yourself
The village ring
The Bear & the Drake
Brijana east of the village, then the skies over Dun Niffelem
Astrid's Trials
Astrid Bjornrittar at 49.8, 71.8, Hibernal Cave at 55, 64
The Drakkensryd
Gretta the Arbiter at 50.9, 65.6, Thorim at 33.4, 58.0
What Thorim Opens
The turn-in unlocks Sibling Rivalry→Mending Fences and the whole Sons of Hodir line beyond, covered in its own section.
Shortcuts & Tips to Save Time
Cave pairing: jormungar first, matriarch last. Mounting her before the count is done means a second full run.
Kirgaraak bear tech: stun and charge to open, then alternate knockback and stun to pin him along the ridge. One clean cooldown cycle ends it without resets.
Pit control: run into whoever knocks you back to deny the follow-up charge. It shaves seconds off every duel.
Drakkensryd safety: low on health, harpoon to a Column Ornament and regen before resuming. Never freefall, or the chain is lost with you.
Gretta's dailies: after Thorim, she rotates one daily per day (Back to the Pit, Defending Your Title, Maintaining Discipline, The Aberrations Must Die). One check per day is all it takes.
Just Around the Corner
A Delicate Touch
Moving In
Ore Repossession
A Flawless Plan
When All Else Fails
Bearly Hanging On
Into the Pit
The Drakkensryd
Part 2: Temple of Storms, Thorim & Dun Niffelem (78 to 79)
Thorim's road back: a fallen keeper, a stolen drake, a brother's betrayal, and the hammer that decides all of it. Check off steps as you go. Progress saves in your browser.
0/0 steps
At Thorim's Feet
Temple of Storms, 33.4, 58.0
Fjorn's Anvil
East at 77, 63. Everything here finishes in one visit.
Forging an Alliance
Dun Niffelem at 64, 65, then the Anvil once more
Veranus
Egg ridges south and southeast of Brunnhildar, nest southeast of the temple
Krolmir & the Terrace
Jokkum, then the Terrace of the Makers at 56.3, 51.4
The Reckoning
Temple of Wisdom bridge, then Dun Niffelem
Shortcuts & Tips to Save Time
Double-dip at the Anvil: loot the Slag Covered Metal and finish The Refiner's Fire on the spot. Flying back first costs a full round-trip.
Snorri control: stay at max throw range while cooling so elemental aggro never interrupts the job.
Boulder timing: always grab a Granite Boulder before tagging a giant, and re-boulder if Fjorn outlives the first earthen wave.
Egg run pathing: loop the south ridge, then the east ridge. The nests sit on clifftops, so searching the valley floor wastes the trip.
Lackeys in one lap:Eisenfaust first in the northern hall, then west to northwest for the other two, and the stairs never get climbed twice.
Reckoning logistics: the finale is phased and purely cinematic, so fly light and hearth or ride straight to Dun Niffelem afterward.
Terrace timing: save the Terrace leg for when you're already flying over from Uldis or Frosthold rather than making a dedicated trip.
The city of the frost giants and the Sons of Hodir: a horn to rebuild, a helm to raise, and the daily circuit behind the best shoulder enchants in the game. Check off steps as you go. Progress saves in your browser.
0/0 steps
Jokkum & the Anvil
The king at 65, 60, Fjorn's Anvil at 76-77, 63
The Horn & the Scraps
Jokkum, Frostfield Lake at 75, 63, Thunderfall at 70, 49
The Helm Chain
Njormeld, helm tablet at 64.2, 59.2
Hibernal Cavern
Cave mouth at 55, 64, crater at the back
The Thorim Tie-In
Terrace of the Makers at 56, 51
The Daily Circuit & Why It's Worth It
Honored, five dailies:Hot and Cold (Fjorn's Anvil), Hodir's Call (formerly Blowing Hodir's Horn, raising spirits at Thunderfall), A Viscous Cleaning (Hibernal Cavern), Spy Hunter (an ethereal worg reveals the infiltrators), and How to Slay Your Dragon (formerly Thrusting Hodir's Spear, the wyrm harpoon event).
The payoff: the Greater Inscriptions of the Storm, Crag, Axe, and Pinnacle, the shoulder enchants every raider needs, sold by Lillehoff 66.2, 61.4 at Exalted.
Essence discipline: farm the Essence of Ice at Frostfield before running the scrap line, never after.
Gold on the side: Frostfield Lake is an excellent eternal-element farming spot. See the Best Gold Farming Spots for the full breakdown.
Cave efficiency: hug the right wall to the crater, tag oozes on the way, flank and kill Jorcuttar, then clean up oils on the exit path.
Free rep on sight: Everfrost Chips are small pale-blue rocks tucked against ice spires and cliff bases. Grab every one you pass.
Mending Fences
Territorial Trespass
Krolmir, Hammer of Storms
Placing Hodir's Helm
The Earthen Oath
Loken's Lackeys
How to Slay Your Dragon
Part 3: Frosthold, Bronzebeard & Bouldercrag’s Refuge (79 to 80)
Frosthold & Brann Bronzebeard’s Expedition
Overview & Location
From K3, take When All Else Fails (Ricket’s rocket) straight up to Frosthold; grab the FP on landing. This gives Alliance a safe alpine base plus the Brann breadcrumb chain that unlocks the Inventors’ Library and hands off to Bouldercrag’s Refuge for the Ulduar-approach finale.
Route-wise, treat this as your bridge from “early Storm Peaks” to the Bouldercrag/Ulduar push.
Hub services: grab the flight point from Faldorf Bitterchill on the pit rim as soon as you land. Rork Sharpchin also sells novelty items like the Iron Boot Flask (turns you into an iron dwarf) alongside his relic turn-ins.
The Frostborn dwarves, their exiled king, and the Explorers' League trail that leads through the Inventor's Library to the truth about the titans. Check off steps as you go. Progress saves in your browser.
0/0 steps
Hub Setup
Set hearth, grab everything, meet the king
The Frosthold Circle
Foot Steppes rhinos, eagle ridge southeast, harpy ledges northwest
On Brann's Trail
Abandoned Camp, then the library slope
The Library Run
Inventor's Library, console at 37.4, 46.8. One lap, no town trips.
The Watcher & the Tablets
Creteus in the Foot Steppes, then four temples in a loop
The Keystone & the Brothers
Console, Terrace of the Makers, then the flight home
Dailies Worth the Detour
Pushed Too Far (Fjorlin Frostbrow): ride a Stormcrest Eagle and take down 16 Stormpeak Wyrms over the Foot Steppes, watching the mountainsides when you gouge eyes.
Ancient Relics (Rork Sharpchin): 10 Relics of Ulduar, farmed fastest at the Stormforged camps north of town, double-dipping with Unwelcome Guests or any iron dwarf camp on the Brann route.
When the arc ends, The Exiles of Ulduar carries you to Bouldercrag's Refuge and the earthen war against the iron dwarves, covered in its own section.
Shortcuts & Tips to Save Time
Relic banking: Relics of Ulduar drop steadily all over the zone. Keep a stack of 10 ready so the turn-in is free every time you pass Frosthold.
Eagle loop efficiency: meat first, then one feeding pass on the ridge. Chasing spawns with an empty bag wastes the loop.
Sirana pull: tag her as she crests the ridge, and if solo, drag her toward the ledge at 31, 73 to reset adds. Interrupts and one defensive cooldown make the Group 3 tag comfortable for a duo.
Library one-shot: the chain is tight, so never bounce to town mid-run, and leave with both of Brann's follow-ups in the log.
Set hearth here early: Frosthold stages K3 and Brunnhildar work cleanly, then swap to Bouldercrag's Refuge when the Ulduar approach begins.
Hub services: Breck Rockbrow keeps a neutral flight point here, your anchor for the Terrace of the Makers and Ulduar side loops.
The Storm Peaks · Alliance Leveling Guide
Bouldercrag's Refuge & the Ulduar Approach: Step-by-Step Walkthrough
The earthen's last stand against the iron dwarves, ending with you riding a worm against a walking siege engine. Check off steps as you go. Progress saves in your browser.
0/0 steps
Hub Setup & Rare Earth
Refuge at 30.9, 37.1. Hearth here.
Two-For-One on the Plains
Snowdrift Plains, directly below the ledge
The Frozen Mine Combo
West of the refuge
The Nidavelir Triangle
North, foundry huts in a tight loop
Valduran & the Forges
South of Nidavelir, then one aerial pass over the forges
Specs & the Sphere
Forge crates, then the Temple of Wisdom's south opening
The Iron Colossus
Control Orbs at the plains' north edge, ~27, 36
Shortcuts & Tips to Save Time
Hearth and FP first: the refuge hearth saves two long climbs, and hearthing after Rare Earth skips one immediately.
Counter-pairing: pull raiders toward the downed earthen so every pack feeds a poultice target. No backtracking lanes.
Nidavelir clockwise: Fury, Power, Favor in order, treating the Dark Armor Plate as a free drop on the route rather than a return trip.
Horn before pull: the quest supplies Bouldercrag's War Horn for exactly this fight. Sound it first and let the earthen absorb the opening wave.
Colossus resets: if acid stacks fall off, don't salvage the attempt. A fresh worm restacks faster than fighting through, and it dodges the evade bugs around Narvir's pathing.
Sirana Iceshriek
Sniffing Out the Perpetrator
The Frostborn King
Fervor of the Frostborn
The Master Explorer
The Brothers Bronzebeard
Pushed Too Far
The Heart of the Storm
The Iron Colossus
WotLK Player Chronicles: The Storm Peaks
Vikstone faced Northrend alone. Not alone. When elite quests required allies, these heroes from Terokkar-US answered the call. From the first steps off the boat at Valiance Keep, they stood beside me. Some were guildmates from Trinity Exiles. Others were passing strangers who stopped to help. All of them mattered.
Between November 2008 and August 2009, over 50 players are documented. Every name, every screenshot, and every shared victory is preserved in the WotLK Player Chronicles main page for Vikstone’s Classic Expedition.
Storm Peaks farming takes flying and gear that can handle elite mobs, but with both, it’s one of the richest zones in Northrend. Titanium veins (the most valuable ore in WotLK) spawn here alongside dense Saronite, Lichbloom and Icethorn are the endgame herbs, the Jormungar caves supply Arctic Fur and Worm Meat, and nearly every Eternal element type is farmable somewhere in the zone. The 77-80 range keeps casual gatherers out, so nodes last longer.
This zone contains the most coveted rare spawn in WotLK: the Time-Lost Proto-Drake, whose guaranteed mount drop created a legendary camping culture. Four rares total: three count for Northern Exposure/Frostbitten (Vyragosa, Dirkee, Skoll), one does not (Time-Lost Proto-Drake, excluded due to extreme rarity).
Unique zone mechanics include aerial combat at extreme altitudes, shared spawn timers between TLPD/Vyragosa, and phasing from the Sons of Hodir questline. The prevailing theory suggests the Time-Lost Proto-Drake is a rare variant of Vyragosa. It’s speculated that the Time-Lost Proto-Drake has a small chance to spawn in Vyragosa’s place whenever Vyragosa’s spawn condition is met.
Blizzard liked the design enough to repeat it: Aeonaxx in Cataclysm works the same way, a rare spawn of a rare spawn.
The Storm Peaks Rares at a Glance
Four rares, all level 80, all spawn after server restarts. Three count toward Northern Exposure and Frostbitten. The Time-Lost Proto-Drake does not, it's the legendary mount spawn. Note: it shares its spawn with Vyragosa, so the two can never be up at once. Full hunting detail below.
Time-Lost Proto-Drake
Lvl 80 · the mount spawn
Patrols four spawn points across the zone · drops the Reins of the Time-Lost Proto-Drake (a 310% mount) · the catch: trivial to kill, near-impossible to find. Does NOT count for the achievements. Shares its spawn with Vyragosa, so the campers get the mount, not casual flyers.
Vyragosa
Lvl 80 Elite Blue Drake
Same spawn points and routes as the Proto-Drake · drops Azure Dragonleather Helm (leather) · the catch: counts for the achievements, and she spawns far more often than the drake. An aerial frost caster who won't land, so melee struggle. Every Vyragosa is a "not the mount" for drake hunters.
Dirkee
Lvl 80 Elite Mechagnome
Ground spawns near the Engine of the Makers · drops Titanium Brain-Gear (ring) and Dirkee's Superstructure (2H mace) · the catch: a real fight. ~50k HP, knocks you back (mind the cliffs), and his rockets make kiting hard. Ground-bound, so at least easy to tag.
Skoll
Lvl 80 Spirit Beast
Three static spawn points (Brunnhildar, Snowdrift, Bor's Breath) · drops Skoll's Fang (dagger) · the catch: a spectral worg that BM hunters tame, but unlike most Spirit Beasts it DOES count for the achievements. Static spawns make camping easier than patrolling.
Difficulty Spectrum:
Easiest – Time-Lost Proto-Drake (trivial combat, impossible to find). This mob created lasting camping traditions and etiquette, including uniting Alliance and Horde players
Spawn Timer: The reliable rule is that neither Vyragosa nor the Time-Lost Proto-Drake can spawn within 6 hours of the other being killed. Beyond that 6-hour minimum, the actual respawn happens randomly within a window that can last up to 22+ hours.
Time Lapse — Stuns an enemy for 2 sec, inflicting Nature damage and clearing threat.
Time Shift — Teleports the caster to a nearby random location, removing all negative effects from the caster.
Class Advantage: Much easier for melee classes than Vyragosa
Flight Behavior:
While Vyragosa and the Time-Lost Proto-Drake can fly in either direction from their spawn points, they do have preferred routes. The spawn overlooking the Frozen Lake typically flies clockwise, while the spawns from the large waterfall, Brunnhildar, and Ulduar Ravine usually travel counter-clockwise.
Altitude Variation: Ground level to 60+ yards, depending on location, often flies high over Valkyrion
Lower Altitude Areas: Near Bor’s Breath (20-40 yards)
Tracking: Can be tracked by Hunter’s “Track Dragonkin” ability
Hunting Strategy:
Camping Location: Bor’s Breath intersection – optimal spot where three patrol routes converge
Positioning: Western end near Valkyrion for maximum coverage
Dual-character Setup: Station alts at Frozen Lake and Brunnhildar simultaneously
Competition Reality: “The campers get the mount” – casual flying rarely succeeds
Combat Preparation:
Pulling strategy: Use Snowfall Lager (2 Relics of Ulduar) for safe engagement
Safety measures: Slow Fall abilities are essential when fighting at altitude
Engagement: Tag immediately with ranged attack, then descend together
Response time: Be prepared for a 10+ second response when NPCScan triggers
Essential Tools:
Addons: NPCScan and NPCScan Overlay for patrol route visualization
Audio alerts: Set loud enough to wake you from sleep
Location: Three static spawn locations in Storm Peaks. Skoll is a large worg spirit beast and, along with Hati, serves as one of the two pet wolves belonging to the character Thorim.
Static Spawn Locations:
Above Brunnhildar Village:(46, 65) – Most common location, near spirit disc landmark
South of Snowdrift Plains:(28, 49) – Near cave entrance
Bor’s Breath Frozen Lake:(30, 64) – Southeast of Valkyrion, near the tallest tree
Spirit Beast Classification: Requires 51-point Beast Mastery talent to tame (exotic pet)
Size Retention: Larger than standard saber worgs, doesn’t shrink much when tamed
Special Abilities:
Frozen Bite — Inflicts Frost damage every 3 to 6 sec. Movement speed is reduced by 10% for 6 secs.
Pounce — Leaps to the enemy’s location. In addition, Physical damage is increased by 150% for 8 sec.
Taming Challenge: Has a pounce attack that can bypass poorly placed traps.
Community Dynamics:
Strong Hunter Etiquette: Extensive discussions about taming protocol
Don’t Be a Karen: Killing a rare Skoll during another’s taming has created forever-wars
Cross-faction Cooperation: Has a history of bringing Alliance and Horde together
Kill Discretion: “Kill at your own discretion” – community preference for taming
Hunting Strategy:
Triangle Route: Fly between Bor’s Breath → Snowdrift → Brunnhildar every 10 minutes
Camping Effectiveness: Static locations make camping more effective than patrol hunting
Lore Background: He is one of Thorim’s two pet wolves, with Hati. This explains why Skoll wanders Storm Peaks — he got separated from Thorim.
Norse Mythology: In Norse mythology, Sköll (meaning “Treachery” or “Mockery” in Old Norse) is a wolf foretold in Snorri Sturluson’s Prose Edda to perpetually chase the sun goddess Sól as she rides her chariot across the sky.
Ragnarok Connection: Sköll and Hati are the offspring of the wolf Fenrir and an unnamed giantess. According to prophecy, the two wolves will endlessly pursue the Sun and Moon through the skies until the events of Ragnarök, when they will finally catch and consume the celestial bodies.
Japanese Influence: Design may also be inspired by Raijū (“thunder beast”) from Japanese mythology
Achievements: Skoll was not at WotLK launch — added in Patch 3.2 (Call of the Crusade). Counts toward Northern Exposure and Frostbitten
Rare‑Hunting Review
Essential Macro:
/tar Dirkee
/tar Vyragosa
/tar Time-Lost Proto-Drake
/tar Skoll
Keep bound to a key while traveling for constant scanning.
Audio Setup:
NPCScan alerts: Use sound alerts – Storm Peaks blizzards make visual spotting harder
Popular sounds:
Illidan’s “You are not prepared!” for attention-grabbing alerts
Fel Reaver pre-aggro sound for maximum wake-up potential
Requires special preparation for aerial engagement
Cliff knockbacks and fall damage are major concerns
Faction Reputation & Rewards Guide
Major Factions Overview
Storm Peaks is dominated by a single critical faction, Sons of Hodir, whose questline is not optional. Other factions, such as Valiance Expedition, Warsong Offensive, Explorer’s League, and Frostborn, contribute additional rep via normal questing, but are secondary. Completing the Sons of Hodir storyline grants mandatory shoulder enchants and the rare Grand Ice Mammoth mount.
The Essential Factions
Sons of Hodir – Frost giant clan offering vital shoulder enchants and unique multi-passenger ground mounts.
Starting Reputation: Hated (requires extensive questline to reach usable status)
No tabard mechanics. Reputation is gained through quests, dailies, and turn-ins.
Every non-Inscriptionist requires their shoulder enchants for serious PvE content.
“Frost giant guardians demanding the most elaborate reputation journey in Northrend while offering rewards every player absolutely needs.”
The Sons of Hodir provides the only shoulder enchants available to players without the Inscription profession. This makes them mandatory for anyone participating in serious PvE content. They also offer some of the most impressive ground mounts in the game, including the only three-passenger mount available to all players.
Where players transition from Hated to Neutral reputation
Brunnhildar Village – Hyldnir Staging Area (48.1, 69.8)
Faction: Hyldnir (neutral faction for quest progression)
Location: Southeastern Storm Peaks
Critical midpoint in Sons of Hodir unlock questline
From Hated to Honored
Prerequisites: Nearly 60 Storm Peaks Quests
Your Sons of Hodir journey requires completing almost the entire Storm Peaks zone quest experience before accessing the faction storyline. This prep includes quest hubs at K3 (41.0, 85.9), Frosthold/Grom’arsh Crash Site, and Bouldercrag’s Refuge.
Jump from Hated directly to Neutral (massive gain)
Sons of Hodir become accessible for further reputation building
Neutral to Honored (Critical Follow-Up Quests)
The Mending Fences Chain – DO NOT SKIP. This often-missed sequence provides a massive reputation boost, jumping players from Neutral directly to Honored:
Passenger Capacity: Three total passengers (driver + 2 passengers)
No level restrictions on passengers
Ideal for guild activities and helping lower-level players
Only three-passenger mount available to all players regardless of class
Helps with group activities, dungeon runs, and guild events
Minor Faction Presence
Everything else in Storm Peaks builds passively as you quest. Alliance players will accrue Explorers’ League and Frostborn reputation (the Frostborn hub is at Frosthold, with a Pushed Too Far daily that unlocks late in the zone chain); Horde players build Warsong Offensive and a little Hand of Vengeance.
All of it feeds your umbrella expedition faction at standard rates. None of it needs focused farming, so complete it through normal zone progression and keep your attention on Sons of Hodir.
Reputation Strategy
Storm Peaks reputation is almost entirely about Sons of Hodir, and the path is unusually long: you start Hated and have to clear roughly 60 zone quests before the faction storyline even opens.
Work through the K3, Frosthold, and Bouldercrag’s Refuge hubs, then the Hyldnir questline at Brunnhildar, and the Thorim revelation at the Temple of Storms jumps you from Hated to Neutral.
The one thing not to miss: the Mending Fences chain, especially The Refiner’s Fire. It’s easy to skip and it’s worth about 12,000 reputation, jumping you straight from Neutral to Honored. Miss it and you add weeks to the grind. Once you’re Honored, the five dailies open (about 1,250 rep/day, rising to ~1,600 at Revered once Hodir’s Tribute unlocks).