A complete WotLK Classic Warrior leveling guide covering Arms optimization, talent builds, gear progression from 68 to 80, and the combat fundamentals that make the class work. Built alongside Vikstone’s Classic Expedition, the full Northrend quest and leveling guide.
Every answer has a "why" further down. That's the part worth reading.
Leveling SpecArms (55/8/8)Reliable and less gear-hungry than Fury. Protection as your dungeon backup.
Best RaceDraenei / OrcDraenei for Alliance, Orc for Horde. Both bring real combat perks.
WeaponSlow two-handersHigh top-end damage beats raw DPS. The speed matters, and the guide explains why.
Glyphs at 68Rending + Victory RushTwo major slots while leveling. Mortal Strike joins at 80.
Stats While LevelingStrength, Hit, CritHit rules at 80, but never skip a big upgrade chasing it early. Every cap is a level 80 problem.
Core SkillRage & stance controlSpend before you swap stances. The whole class lives here.
What Makes It ClickThe proc engineKeep Rend up, react to Overpower procs. Reactive, not memorized.
ProfessionsMining + SkinningGold and stats while you level. Swap to crafting at 80.
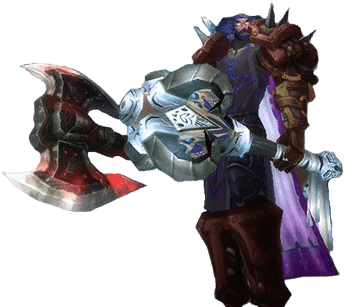
Vikstone's Weapon PickDe-Raged WaraxeThe Zul'Drak workhorse of the back half. It carried Vikstone to 80.
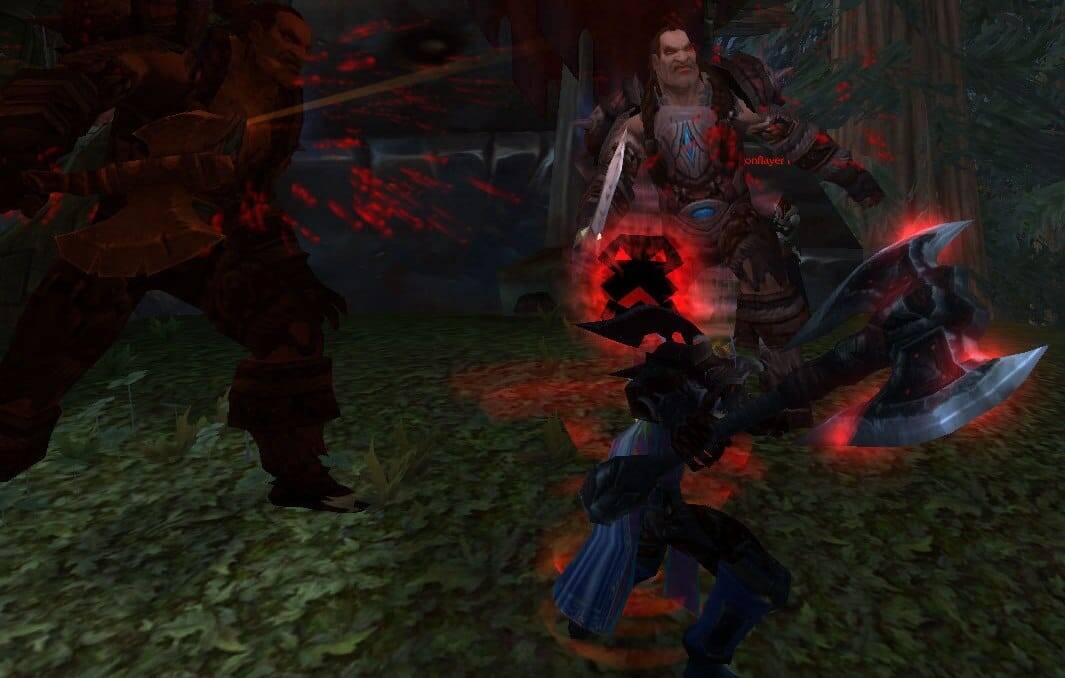
The screenshots come from Vikstone's original 2008 to 2009 playthrough. The advice is current, sharpened through WotLK Classic and modern theorycrafting.
Most Warrior guides hand you a talent build and a rotation. This one teaches the reasoning behind the mechanics: stance timing, rage management, and combat decision-making that make you a better Warrior player in any version of WoW, not just WotLK Classic.
New Warrior players deserve to learn the sweet science of how the class works.
Inside you’ll find the full Arms leveling build with glyphs, a level-by-level weapon timeline from 68 to 80, leveling gear and profession planning, and the macros and addons that support the journey. Fresh 80 gearing, the Phase 1 pre-raid list, Phase 5 BiS, and the catch-up systems continue in the Endgame Gear Guide, and the complete combat playbook lives in the Advanced Strategies & Macros Guide.
Fury and Protection builds are included for dungeon runners and future tanks.
Continue the Series
Dinged 80?
The leveling mission ends here. Pre-raid BiS, Phase 5 loadouts, gems, enchants, and the Defiler's Scourgestone catch-up system continue in the WotLK Classic Arms Warrior Endgame Gear Guide→
Warriors in WotLK scale harder with gear than most classes. A freshly-dinged 80 Warrior feels sluggish compared to a geared one, but once stat thresholds are hit (particularly Armor Penetration at endgame), the class pulls ahead in both sustained and burst damage. Execute phase alone makes Warriors dangerous in any content where bosses have health pools to burn through.
In group content, Warriors bring Sunder Armor and Battle Shout for the entire party, and Protection Warriors are the strongest dungeon tanks in the expansion with Shockwave, high threat generation, and Shield Wall for emergencies when they need to be an effective meatshield. The class rewards players who learn rage management and stance dancing, because those mechanics multiply the value of every piece of gear you equip.
Learning how to maintain rage, optimize stances, and use cooldowns adds to the Warrior’s visceral charm.
Illustrated by Christian DiBari and Simon Gough.
Weaknesses
These are real and worth understanding before you commit to the class:
Steep leveling curve: Warriors have more downtime between pulls than most classes, especially before key talent thresholds. The early 68-70 stretch in Northrend can feel slow until gear catches up.
Gear dependency: A Warrior in quest greens hits noticeably harder in dungeon blues. The class relies on weapon upgrades more than almost any other – a bad weapon drags your entire performance down.
Limited self-healing: No healing spells, no HoTs. You survive through bandages, food, and consumables. Victory Rush is a free attack in Wrath, not a heal, which is why First Aid isn’t optional on this class.
Complex stance management: Defensive Stance, Battle Stance, Berserker Stance each unlock different abilities. Knowing when to swap and what you lose in each stance is a skill the guide covers in depth.
Dungeons & Group Content
Warriors have three talent specializations, each suited to different roles:
Arms: Two-handed weapon spec built around hard-hitting instant strikes and bleed pressure (Mortal Strike, Overpower, Bladestorm). It’s the reliable all-around leveling spec, smooth from the early levels and forgiving of mediocre gear, with AoE attacks like Bladestorm and Cleave coming online as a bonus at higher levels. The go-to choice if it’s your first Warrior or you just want consistency.
Fury: Dual-wield spec using two one-handed or, via the signature talent Titan’s Grip, two two-handed weapons. It eventually scales into the highest raw DPS of the three, but it’s heavily gear-dependent; weak weapons leave it rage-starved and sluggish, which is why it shines later rather than as a starting spec. Pick it once you have two solid weapons and want maximum damage.
Protection: The premier tank spec. Shockwave provides a frontal cone AoE stun (4 seconds), threat generation is strong, and defensive cooldowns like Shield Wall handle spike damage. An exceptional dungeon tank with snap threat and control, and fully raid-viable, though Protection Paladins hold the edge in later-tier raid progression (to my chagrin).
Stance Dancing
Stance dancing (switching stances mid-combat) separates the great Warriors from the good. The rage loss penalty for switching stances is reduced in WotLK Classic, and Berserker Ragecan now be used in all three stances.
Battle Stance – Forms your base stance for most encounters. The 10% armor piercing lets you cut through enemy defenses quickly. Enables key Arms abilities.
Defensive Stance – Makes you harder to kill. You’ll take 10% less damage but deal slightly reduced damage in return (by 5%). Enemies focus on you more in this stance due to increased threat generation (x1.3 threat modifier).
Berserker Stance– Favors risk-taking fighters. Increased critical strikes by 3% but increases damage taken by 5%. Use this stance when you need burst damage and can handle taking extra hits.
Battle Stancehome base · 10% armor pen Overpower when mob dodges
pulled too manyneed burst / gap-close
Defensive Stance−10% dmg taken · +threat −5% dmg dealt
Swap here whenyou pull too many mobs (Shield Block / Shield Wall) Disarm in PvP
Berserker Stance+3% crit · +5% dmg taken for burst and mobility
Swap here whena target flees (Intercept) a caster kites you you want burst damage
Berserker Rage · any stancebreaks Fear, Sap, incapacitates
The most important rule: Switch stances after you’ve spent most of your rage, not while sitting on a full bar. Every stance swap costs rage, and switching with 60 rage banked is gold thrown away.
Macros solve this by putting you in the correct stance automatically when you press the ability. The essentials live in the Macros section below, and the complete arsenal lives in the Advanced Strategies and Macros page.
When to Switch
Overpower (Battle Stance): When a mob dodges, swap to Battle Stance and hit Overpower before the proc window expires. This comes up constantly against high-dodge enemies such as Rogues.
Defensive Stance for survival: Pull too many mobs? Swap to Defensive, pop Shield Block or Shield Wall if you have a shield, and stabilize before going back on offense.
Berserker Rage (any stance): Breaks Fear, Sap, and other incapacitating effects. Previously required Berserker Stance, but in WotLK Classic you can use it from any stance.
Intercept (Berserker Stance): Your gap-closer for fleeing targets (eg, Warsong Gulch flag-bearer) or distant casters. Swap to Berserker, Intercept, then swap back.
Disarm (Defensive Stance): Useful in PvP against melee classes, especially other Warriors and godforsaken ret Paladins.
Will of the Forsaken shuts down Fear-heavy opponents in PvP. Cannibalize trims downtime while questing, in the most Forsaken way possible.
Racial values shown are from the WotLK Classic era. Tiers reflect Arms leveling and PvE first. Hover any racial for the Wowhead tooltip.
I use Vikstone’s Shadowmeld religiously in PvP, opening with Charge attacks on unsuspecting Horde. It’s a nice perk Night Elves have to gain the element of surprise against Rogue players and Warsong Gulch flag bearers.
What is the Best Race for Arms Warriors?
Draenei is #1: The +1% hit bonus from Heroic Presence scales well throughout the entire expansion and benefits group play, while the healing racial provides crucial self-sustain that Warriors otherwise lack (before obtaining Enraged Regeneration). Human expertise is more situational, based on weapon availability.
Some consider Humans to be #1 due to Will to Survive, which is great for PvP. Ultimately, choose the race that best suits your play style and what you enjoy most.
Builds and Talent Specialization Overview
Specialization Overview
Three Trees, Three Jobs
Tap a spec to see where the points go, what it does well, and what it costs you.
Lower durability while leveling. You kite or lean on cooldowns.
The dungeon leveler's spec, and the top DPS pick at 80. With two solid weapons, Fury outpaces Arms in group content, but it punishes weak gear harder than Arms does.
ProtectionYour Second Build
Talent points: 15 / 5 / 51
ArmsFuryProtection
Why it works
Strongest dungeon tank in the expansion, with Shockwave and huge threat.
Solos elite and group quests the other specs can't touch.
Slower questing speed than Arms against single targets.
Poor mobility and burst in PvP.
Slower on quest mobs, unbeatable in dungeons. With Dual Talent Specialization, keep it as your second build. No one likes a Warrior who can't tank.
Point splits shown are this guide's leveling builds. Full trees, glyphs, and talent order follow below.
Arms
The Arms specialization is considered the best overall for PvE leveling and pre-endgame content in WotLK Classic. Therefore, this will be this page’s main focus. Here’s a breakdown of the most optimal Arms build and its ideal applications.
Arms is versatile, producing strong burst damage with slow 2-handed weapons, and talents that enhance critical strikes, good for handling high mob density. Key moves include Mortal Strike, a staple high DPS move that reduces healing effects on enemies. Arms Warriors benefit from Sweeping Strikes and Bladestorm, allowing efficient crowd control and AoE damage projection. For PvP-focused players, adding points in Improved Hamstring and Second Wind helps crowd control and self-sustaining health regeneration.
Best Arms PvE Leveling Build (55/8/8)
This build uses the Poleaxe specialization for critical strike and critical damage bonus. The sword specialization that we knew and loved from TBC is nerfed.
One of the biggest changes to the class in WotLK is the buff to the Deep Wounds talent. Every time you crit, a new weapon damage dot is added (damage over time). This ends up being a major source of damage in extended fights, if played correctly. It is also why a slower (higher damage weapon) is preferred.
Build Verification: If your current build is tuned for raid DPS rather than solo efficiency, respec before heading into Northrend. Talents that improve rage generation and handle multi-mob pulls pay for themselves on the road.
WotLK introduced Dual Talent Specialization. It’s helpful to have a Protection specialization build and good tanking gear on hand when needed. No one likes a Warrior player who doesn’t know how to tank.
Fury
Fury Warriors maximize damage output with dual-wielding weapons, ideal for PvE. This guide will briefly cover Fury since it is inferior to Arms for leveling in most cases.
Bloodthirst and Flurry talents maintain high attack speeds and generate rage. The Titan’s Grip talent allows you to wield dual two-handed weapons, giving a massive boost in stats.
Fury can be challenging for solo leveling due to its reliance on high-end gear. Fury players have more potential in dungeons/raids. It is best left for the endgame when you have acquired the necessary high-end gear to truly make the specialization shine.
Dual-wielding has lower survivability than Arms or Protection. You have to kite or rely on cooldowns like Enraged Regeneration and Intimidating Shout, with the latter not ideal due to the risk of unsolicited mob aggro.
Fury is still a strong choice for players focused on dungeon-running and passionate about the discipline.
The Protection specialization is critical for dungeons and as an adjunct spec to support group parties.
High survivability and crowd control make it excellent for elite enemies and dungeons. Shield Slam and Revenge talents generate massive threat (and actually do decent dps) while mitigating damage. Improved Defensive Stance and Last Stand are useful against end-game bosses.
Protection is slower than Arms for pure questing speed, but it shines for dungeon-heavy leveling, dangerous group quests, and multi-mob Revenge pulls. Its speed varies with gear and enemy type more than the other two specs.
Wrath Classic brought major improvements to Arms Warriors, with nearly every change strengthening the spec’s viability. Arms is transformed from a PvP-focused spec into a competitive PvE option. The Deep Wounds changes alone make crit stacking far more rewarding, while the Battle Stance ArP bonus and the Slam swing timer fix remove major obstacles from earlier expansions.
Changes to Arms in WotLK
What Wrath Rewrote
Twelve changes that turned a predictable rotation into a proc-driven playstyle. Each card: what changed, and why it matters to you.
Duration cut from 12 to 6 seconds, ticks every 1 second instead of every 3, and remaining damage now rolls forward when a new crit refreshes it.
Transforms Deep Wounds from padding into a core DPS source. Frequent crits no longer overwrite the bleed, they feed it, which is why crit-heavy Arms scales so well.
Booming Voice
Talent cost reduced from 5 points to 2 for the same benefit.
Frees 3 talent points for stronger DPS or utility talents.
Blood Frenzy
Now also grants 5% increased attack speed per point, on top of its bleed damage effect.
More white swings mean more rage and higher sustained DPS, and it synergizes strongly with Deep Wounds and other bleeds.
Poleaxe Specialization
Now increases the critical damage multiplier by 5%.
A massive boost with two-handed axes and polearms, further rewarding crit-focused gearing. It's why this guide's weapon roadmap leans toward axes.
Mace Specialization
Completely redesigned: the random stuns are gone, replaced by a moderate percentage of Armor Penetration.
Maces become a competitive PvE choice through reliable ArP, shifting the talent from PvP stun luck to sustained damage.
Sword Specialization
The extra attack proc now has a 6-second internal cooldown.
Prevents abusive proc chains while keeping the talent useful. Burst potential is slightly toned down from earlier expansions.
The new Wrath additions, Bladestorm, Taste for Blood, Sudden Death, and the proc engine they form, are covered in the next section.
New Abilities & Talents
Wrath rebuilt Arms Warriors. What was once a predictable rotation became a reactive, proc-driven playstyle where split-second decisions matter more than memorized sequences.
Rendkeep it ticking
→
OverpowerTaste for Blood proc
→
Critical hitsthe engine
↗↘
Deep Woundsrolling bleed
Wrecking Crew+10% damage
↺ Wrecking Crew's bonus damage loops back into more crits, so the engine keeps itself running
When Rend damages your target, there’s a chance Overpower becomes instantly usable, regardless of whether your enemy dodged.
In TBC, you applied Rend once and forgot about it. In Wrath, each Rend tick can proc Overpower every 6 seconds. Combined with Improved Overpower‘s 50% bonus crit rate, you’re suddenly spamming one of your hardest-hitting attacks multiple times per fight.
Taste for Blood can only occur once every six seconds, so you don’t have to use Overpower immediately once it procs. The proc lasts 9 seconds, giving you a window to finish your current ability before responding. However, be sure to use Overpower as often as possible to prevent a Taste for Blood proc from going to waste.
Why does this matter for leveling? Keep Rend active, react to Overpower procs, and you’ll tear through them. This single talent defines whether Arms feels smooth or clunky while questing.
Bad players forget to reapply Rend. Good players maintain it religiously. Use the Glyph of Rending to extend Rend’s duration by 6 seconds, giving you three guaranteed Overpower windows per application instead of constantly refreshing.
Channel Whirlwind every second for 6 seconds while immune to movement impairment and loss-of-control effects.
Round up 5 enemies, pop Sweeping Strikes, then Bladestorm. You’re immune to movement impairment and loss of control effects during Bladestorm. You can only be stopped if killed.
Bladestorm does stack with warrior buffs and abilities such as Recklessness. However, you must trigger Recklessness before using Bladestorm since you can’t activate other abilities during the channel.
Use Bladestorm when you’re already low on rage; you will generate a lot of rage either way.
Applications: Turn group quests into solo content, delete dungeon trash, escape snares in PvP, and ignore raid mechanics that would interrupt your rotation. This is ideally used with your trinket procs, as they have a 45-second cooldown, meaning every 90 seconds, both Bladestorm and your trinket procs will line up perfectly.
Charge works in combat now. Your next Mortal Strike or Slam after charging hits 25% harder.
Warriors historically had zero gap closers in combat. Now you can Charge → Intercept → Charge again with stance dancing.
Due to our Juggernaut talent, we can use Charge even in combat. This will greatly aid you when facing foes that abuse line of sight. Remember that you can instantly apply a slow (Hamstring) or a daze (Piercing Howl) to the target since the cooldown of Charge is still relatively high.
Leveling impact: Quest completion speeds up 20-30% from eliminating downtime between pulls. Chain three or four mobs together that you’d normally have to approach one at a time.
Your melee hits have a chance to allow Execute regardless of the target’s health. You keep at least 10 rage after using Execute.
Your melee hits have a 6% chance of allowing the use of Execute regardless of the target’s health. This transforms Execute from a finishing move into a regular rotation ability. At 6% proc rate, you’ll see this trigger multiple times during any extended fight.
That “keep at least 10 rage” clause is critical. It ensures you always have enough rage for an Overpower when Taste for Blood procs.
Priority clarification: When Sudden Death procs, use it immediately, but only if Overpower isn’t also available. The proc only lasts until you use Execute, or it gets overwritten, so don’t sit on it.
Every crit grants 10% increased damage for 12 seconds (refreshes, doesn’t stack).
Causes your melee crits to Enrage you, increasing all damage you cause by 10%. This will basically have 100% uptime whenever you are attacking. With high crit from Improved Overpower and frequent Taste for Blood procs, this buff is almost always active by the endgame.
The trade-off:Enraged Regeneration consumes this buff (and all enrage effects) to heal you. Only sacrifice Wrecking Crew when death is imminent in endgame content. Losing 10% damage for 12 seconds to heal 30% HP is a real cost.
Your critical strikes cause the opponent to bleed, dealing 48% of your melee weapon’s average damage over 6 sec.
The mechanic most players misunderstand: The damage used is the average of the min and max damage you see on your character sheet under the Melee tab. Successive crits stack the damage up. Nothing is actually lost. This means consecutive crits don’t overwrite each other; they roll together into increasingly devastating ticks.
This is why crit stacking is valuable for Arms. Deep Wounds scales with your weapon damage (which scales with Attack Power), and frequent crits keep rolling the damage higher. A well-geared Arms Warrior can see Deep Wounds contribute 10-15% of total damage on long fights.
Slower 2-handed weapons make more sense for Arms now.
Leveling note: Deep Wounds is less impactful while leveling because mobs die before the full tick duration plays out. It becomes more noticeable in dungeons against bosses and elite mobs.
As item levels increase, your armor naturally rises. This converts to AP automatically. By ICC phase, this represents 200-400 extra AP just from your armor value, no gem or enchant changes needed.
2% more Strength and Stamina per point. 2 Expertise per point.
This isn’t flat Strength; it’s percentage-based. 100 Strength becomes 104 with this talent. But all your other multipliers (Blessing of Kings, flask buffs, raid buffs) stack multiplicatively with this. By the endgame, this talent is worth a ton of Strength.
The Expertise component matters too. Boss dodges are DPS killers. Expertise reduces dodge chance, making your damage more reliable. You’ll want to hit mobs from behind to remove parry chance, so that leaves you to account for dodging.
Throws your weapon at an enemy up to 30 yards away, dealing damage based on Attack Power. Generates a high amount of threat. 1-minute cooldown.
Before WotLK, Warriors had no baseline ranged attack. Heroic Throw is one of the warrior’s only ranged attacks, available even when rooted. This makes it useful in PvP against kiting classes and for pulling mobs when Charge isn’t appropriate.
The Charge combo:Heroic Throw can be used regularly when soloing. By using it during the initial Charge, the throw will complete while in transit, dealing bonus damage to the target without wasting a global cooldown. Since Charge is off the GCD, you can queue Heroic Throw immediately after hitting Charge.
Practical applications:
Pull casters around corners without needing a bow/gun
Finish low-health enemies fleeing at range
Tag mobs in contested farming areas
Deal damage while rooted or snared in PvP
Generate snap threat on distant adds during raid encounters
The raid application rarely mentioned: This should be used as a raid DPS cooldown and coordinated with other raid DPS cooldowns, such as Heroism/Bloodlust. The 20% Armor reduction stacks with other Armor reduction debuffs, such as Sunder Armor.
One Arms Warrior using Shattering Throw increases ALL physical DPS by 8-12% for 10 seconds. This makes you valuable beyond your personal meters.
Don’t use this on cooldown. Save it for execute phases, Heroism/Bloodlust windows, or when your Rogue, Feral, and Hunter have their cooldowns ready. In a raid with multiple Warriors, this is typically coordinated to keep the debuff up.
Consumes all enrage effects (including Wrecking Crew) to heal 30% max HP over 10 seconds.
You pulled 4 mobs instead of 3 (“Oh Shit!” moments). You’re at 20% health. Your healthstone is on cooldown. You’re out of bandages. This button saves you.
The cost: You lose your 10% damage buff from Wrecking Crew. That’s the tax you pay for survival. If you’re not legitimately about to die, don’t press it. The 30% heal is substantial (often 6,000+ HP at level 80), but the Wrecking Crew trade-off means you only use it when necessary.
What Changed from TBC
TBC Arms was formulaic. Wrath Arms is dynamic. You’re now tracking:
Charge opportunities (gap closing and damage bonus)
AoE vs single-target priorities
Arms Priority Rotations & Essential Abilities
Here are the priority abilities and rotations for the Arms Warrior and tips for max DPS against single targets vs AoE groups of enemies. Your rotation will change depending on the situation and what procs first.
Fury Warrior’s priority rotation is described as well (and important to learn for Warrior mastery), but this guide’s focus is on Arms. Fury is generally the superior spec for endgame dungeons and raiding DPS, especially once you acquire sufficient gear and make better use of AoE rotations.
Arms secures a raid spot primarily for its unique Blood Frenzy debuff, which increases all physical damage taken by the target. If your raid already has this debuff covered by another Arms warrior or a Feral Druid, bringing additional Arms warriors offers less overall raid value than a high-DPS Fury warrior.
If you see some mechanics mentioned more than once, it’s because they’re important.
Arms Warrior PvE Priority Rotation
One Loop, Three Situations
Arms is proc-driven, so the rotation is a priority loop. Run these questions in order every global, and the right button answers itself. The full teaching for every ability follows below.
Taste for Blood keeps working while the rest of the pack dies around it.
2
Sweeping Strikes
Sweeping Strikes is off the global cooldown and copies your next attacks onto a second target.
3
Thunder Clap
Thunder Clap damages the pack and slows every enemy's attack speed, cutting the incoming pressure before you commit.
4
Bladestorm while Rend still ticks
Six seconds of Whirlwinds, immune to snares and control. Sweeping Strikes consumes one charge per second during it, not one per hit.
5
Spend procs, then clean up
Overpower and Mortal Strike stay valuable. Cleave replaces Heroic Strike as the rage dump. Slam and Heroic Strike only if rage is truly to spare.
The Order at a Glance
1Execute2Rend up3Overpower (proc)4Mortal Strike
1
Execute becomes the rage spender
It replaces Slam and Heroic Strike entirely below 20% health.
2
Keep Rend running
You still want Taste for Blood procs. The engine doesn't stop for the kill window.
3
Overpower procs stay high priority
Guaranteed hits are worth interrupting Execute spam for.
4
Mortal Strike fills the gaps
When nothing else is ready, the core button still is.
Don't tunnel on Execute. Sudden Death keeps 10 rage in reserve precisely so the procs stay in play.
Mechanic distinction worth engraving: Bladestorm crits apply Deep Wounds, but they do not create Taste for Blood procs. Only Rend damage does.
Preparation
Always activate Battle Shout for a large boost to attack power unless an allied Paladin buffs you with a stronger Blessing of Mightspell. If so, you can use Commanding Shout to raise your total hit points.
To help maintain uptime, cast Battle Shout at the end of every fight before rage decays, ensuring a refresh before the next pull without costing combat rage.
Opening Moves
Start the fight with Charge, which generates a burst of rage and briefly stuns the target.
Bloodrage (Optional): Use immediately after Charge to generate 20 rage instantly plus 10 over 10 seconds. The health cost is negligible while leveling (16% of base health, easily healed through normal combat). This ensures you have enough rage for your full opener.
For elite mobs, dungeon bosses, or group content, apply Sunder Armor to reduce enemy armor by 4% per stack (stacks 5 times for 20% total reduction). Skip Sunder for solo questing against normal mobs—it’s not worth the rage cost for short fights.
Priority Attack Rotation (Single Target)
These are the key abilities, why they are effective, and how to make the most of the Deep Wounds talent.
[Charge]: To quickly close the distance and stun your target.
The Juggernaut talent allows you to use this while in combat.
[Rend]: Causes target to bleed (and trigger Overpower).
Base Rend lasts 15 seconds (5 ticks, 3 seconds each).
With the mandatory Glyph of Rending, this extends to 21 seconds (7 ticks), giving you an extra Taste for Blood proc per application
[Sunder Armor] (*if fighting elite mobs): By increasing armor penetration, you can drastically increase DPS.
An underrated ability. Applying up to a few sunders can make a difference when leveling.
This is prioritized less if another Warrior or Rogue is using abilities that reduce armor.
Sudden Death proc (level 54) allows you to use it even if the enemy is >20% HP.
It has no internal cooldown (ICD) and can proc off itself.
When both Sudden Death (Execute) and Taste for Blood (Overpower) proc simultaneously, use Execute first – it deals more damage, and Sudden Death ensures you keep at least 10 rage afterward for your next ability, enough to use Overpower.
[Overpower] (on proc):With the Taste for Blood talent, your Rend ticks trigger Overpower availability automatically – you no longer need the enemy to dodge, so use it promptly.
It helps with dodge-prone enemies (eg, Rogue archetypes).
Overpower cannot be dodged, parried, or blocked.
Overpower has a high chance of giving a crit due to the Improved Overpower talent by up to 50%.
[Bladestorm]:For max clearing, but works well against single targets for 6 seconds.
Bladestorm can proc Deep Wounds on every critical hit, which makes up a huge chunk of your DPS (successive crits stack), rolling all remaining damage into refreshed ticks
You’re unable to use other abilities during Bladestorm.
Make sure the Rend effect doesn’t expire during the Bladestorm cycle, so that an Overpower isn’t wasted during a Taste for Blood cycle(6-second window).
Bladestorm Timing: At level 80 with proc trinkets (45-second ICDs), your trinket procs and Bladestorm (90-second cooldown) align perfectly every other Bladestorm. Watch for trinket proc notifications before committing this move.
For AoE: Best to time it after using Sweeping Strikes. Despite common belief, Sweeping Strikes only consumes one charge per second of Bladestorm (not per hit). Against 4 targets, this adds roughly 25% more damage
[Mortal Strike]: The core ability in an Arms Warrior’s arsenal.
Deals strong single-target damage and reduces healing effects by 50%.
Use it now that all procs have been managed.
Glyph of Mortal Strike adds +10% damage.
[Slam]: Filler cast ability for decent damage when not moving and when higher priority moves are spent
Slam in WotLKpauses your auto-attack swing timer rather than resetting it. With 2/2 Improved Slam (0.5 sec cast), this is a minor DPS loss but manageable.
Avoid spamming Slam right before your auto-attack lands – instead, cast it immediately after a white hit to minimize swing timer delays. A swing timer addon (like Quartz) helps visualize this
[Heroic Strike] to spend excess rage (40+ for well-geared raiders, 60+ when leveling or in lower gear to avoid rage starvation) orCleave for AoE damage situations.
Priority Attack Rotation When Fighting Multiple Targets (AoE)
The rotation begins the same, with the addition of Rend (on the target that will live the longest), then Sweeping Strikes. Rend takes advantage of the Taste for Blood talent (helps you proc Overpower more). You don’t waste a weapon swing timer either.
Then useThunder Clap, which reduces enemy attack speed (heavily mitigating damage) and can help proc Deep Wounds. Follow it up with Bladestorm to clear multiple targets at once. Pop Overpower whenever you can and burn them down with Cleave and Mortal Strike. Only use Slam and Heroic Strike if you have rage to spare.
Execute Phase Rotation
Execute Phase (<20% HP) When targets drop below 20% health, your rotation shifts dramatically:
Stack Sunder Armor to increase all Physical damage taken. Skip it if another player reliably keeps up Expose Armor or an equivalent armor reduction.
1
Whirlwind on cooldown
With two two-handers and Improved Whirlwind, Whirlwind is your hardest-hitting ability. Each cast can also trigger Bloodsurge, setting up instant Slam procs.
2
Bloodthirst every time it's available
Bloodthirst is the core rotational button on a very short cooldown, with its own Bloodsurge chance. Missing casts here is a direct DPS loss.
3
Slam the instant Bloodsurge procs
The proc makes Slam instant, so it never delays your swing timer. Never hard-cast Slam without the proc, it pauses your auto-attacks and is a large DPS loss.
4
Fillers, only when nothing else is coming
Rend, if talented and glyphed, is a small but real gain as a true "nothing else to press" filler. Execute below 20% is a luxury finisher in Wrath, used only when rage allows without starving the core buttons.
HS
Heroic Strike above 40 rage
Queue Heroic Strike on your autos to avoid rage capping. It's a major slice of your damage, but it must never starve Whirlwind and Bloodthirst.
The Order at a Glance
1Whirlwind2Thunder Clap (big packs)3Cleave as the dump4Resume single target
1
Whirlwind stays the anchor
On cooldown, always. It cleaves up to 4 targets, and your normal single-target priorities keep running around it.
2
Thunder Clap when the pack outgrows Whirlwind
Thunder Clap spreads damage beyond the 4-target limit. Weave it in after Whirlwind on big grouped pulls.
3
Cleave replaces Heroic Strike
Cleave turns your autos multi-target and gets even stronger with Glyph of Cleaving. Queue it on excess rage.
4
Then go back to the loop
Once the AoE buttons are spent, resume the single-target rotation on a main target until they come off cooldown again.
Fury shines with two solid weapons and shared enemies. For solo questing, Arms remains this guide's recommendation, and its full loop lives in the rotation section above.
Special Abilities by Level Milestone (70-80)
Your core Arms rotation is complete by level 68, but three new special abilities unlock as you progress through Northrend.
Leveling Note: Continue carrying a ranged weapon until 80, then Heroic Throw becomes your default pull tool.
Heroic Throw covers most ranged pulls by level 80. Keep a ranged stat stick equipped for the raw stats. You can also combine this with a macro as part of your rotation (with Charge).
Cooldown: 3 minutes | Healing: 30% max health over 10 seconds
Hit Rating is very important for Warriors. Hits that don’t land over a prolonged period of time lead to a significant loss of DPS and wasted rage. Not landing the initial hits can cost you the fight. This is why Draenei is the best overall race for our class for the Heroic Presence perk (+1% chance to hit for melee and spells for you and party within 30 yards).
A Reminder for Early Leveling: Focus on maintaining your Strength, Hit Rating, and Critical Strike (the big three). Hit stats on gear can be hard to come by during the leveling process.
If you can’t hit, you can’t generate rage. Remember, though, that Expertise rating reduces the risk of being dodged or parried. Hit Rating reduces the risk of missing. For melee DPS, standing behind a boss eliminates the chance for them to parry, so the Expertise cap is focused on removing dodge chance (typically around 6.5% against a raid boss).
Best Arms Gear & Weapons for Leveling (68-80)
Gear is important during leveling, but don’t stress out about chasing specific items. Focus on maintaining your Strength, Hit Rating, and Critical Strike (the big three) stats for early leveling.
Keep an eye out for slower two-handed weaponswith high damage ranges (to maximize ability burst and crit damage), and replace gear as needed through quest rewards, dungeon drops, or auction house finds.
Vikstone’s Merciless Gladiator battlegear set from the TBC era was useful deep into the starter zones for questing before I obtained more valuable rewards. A gold standard 2-handed BiS pre-raid weapon for Arms Warriors that’s easily accessible is the Titansteel Destroyer. It was one of my favorite weapons.
The Claymore of the Prophet is another solid, easy-to-obtain welfare epic weapon I won from the Argent Tournament and can be obtained in less than two weeks through the daily quests. However, it is faster (with less weapon damage), requires level 80, and involves significant daily grinding.
Notable Weapon Upgrade Timeline (Leveling 68-80)
Between the Amphitheater of Anguish at 75 and Heroic dungeons at 80, there’s a five-level gap where Blizzard expected you to use the De-Raged Waraxe. And they were right – that axe is THAT good. Don’t waste time farming normal dungeons for 2H upgrades that barely exist. Push to 80, then farm Heroic Halls of Lightning for Colossal Skull-Clad Cleaver or buy Titansteel Destroyer off the AH.
Remember, you often find the best gear along the way during the leveling process.
Weapon Speed Priority:
Choose slower weapons (3.5+ speed) over faster ones
Weapon damage range matters more than DPS for instant attacks
BUT a 3.2 speed weapon with great stats (Strength, Hit, Crit) beats a 3.6 speed weapon with poor stats
Top-end damage matters more than DPS for Arms abilities, especially with the Deep Wounds talent.
Available the moment you land. Alliance earns it through Last Rites in Borean Tundra, Horde through Hellscream's Champion. Retire your Outland weapon only for a real upgrade like this one.
Then Ingvar's Monolithic Cleaver from Utgarde Keep at 70. Its 3.20 speed is below the ideal, but the Strength and Hit Rating make it the best dungeon drop of the bracket.
The Drought · Levels 72-74
Don't derail the expedition here
Normal dungeons offer almost no two-handed upgrades in this band. Troll Butcherer from Trollgore in Drak'Tharon Keep (33% drop) is the exception at 74: fast at 3.10, but +85 Crit and +120 Attack Power is a real stat jump if it falls in your lap. Otherwise, keep marching.
The final reward of The Champion of Anguish arena chain in Zul'Drak, this era's Ring of Blood. Bring a group, win the Amphitheater, and this axe carries you to 80. Blizzard built the 75-80 stretch around it, and they were right.
Mal'Ganis in normal Culling of Stratholme. Worth equipping if it drops during a run, never worth farming while the Waraxe still swings.
The Conversion · Level 80
Craft it, farm it, or buy it
Titansteel Destroyer · The accessible gold standard. Crafted, BoE, buy it straight off the auction house.
Colossal Skull-Clad Cleaver · Loken in Heroic Halls of Lightning, 21% drop. Arguably the true pre-raid BiS thanks to Poleaxe Specialization. Spam HoL until it falls.
The weapon timeline handles what’s in your hands. The rest of your first level 80 loadout is a different kind of problem, because most of it can’t be farmed in a single evening. Reputations take weeks, trinkets take luck or gold, and the smart Warrior starts paying those debts down while still leveling. None of this requires a detour. It only requires knowing, around level 75, which of the things you’re already doing will still matter at 80.
The Head Start
Gear to Start Chasing Before 80
Half of a fresh 80's first loadout is earned on the road, if you know to start early. Five preparations that pay off the day you ding.
Reputation · Storm Peaks
Sons of Hodir
The Storm Peaks quest chain opens their dailies during your final levels. Revered buys the Spaulders of the Giant Lords, and they're the only source of shoulder enchants at 80. Start the grind at 77, thank yourself at 80.
Reputation · Icecrown
Knights of the Ebon Blade
Icecrown's quest lines pour reputation into this faction before you ever queue a heroic. Exalted buys the Death-Inured Sabatons, and quest rep now means less tabard grinding later.
Gold Targets
The crafted and BoE pieces
The Spiked Titansteel Helm, both Titanium Impact jewelry pieces, and the Cloak of Bloodied Waters can all simply be bought. Every stack of ore and leather you sell on the road is a down payment on day-one upgrades.
The Nobles Deck trinket is good enough to carry into Icecrown Citadel, and the cards take time or gold to assemble. Watch the auction house for underpriced cards the whole way up.
Your first Emblems of Heroism have assigned jobs: the Mirror of Truth and the tier chest and gloves. Hold them until the full list tells you the order.
Best Arms Enchants, Gems, & Consumables for Leveling
While leveling, enchants and consumables are about value per gold, since gear turns over every few levels. These are the picks worth the coin on the road. The full endgame shopping list, gems, top-tier enchants, flasks, and raid consumables, lives in the Arms Warrior Endgame guide page.
High-Value Leveling Picks
The information here is about high-value enchants and consumables more closely aligned with the leveling process, since gear has a high turnover rate. Smart use of affordable enchants and consumables dramatically improves leveling efficiency without breaking the bank.
Enchant 2H Weapon – Mongoose (Agility/Haste proc) – TBC enchant that works on any melee weapon. Proc-based, so less reliable than static AP for leveling. Consider only if prices drop significantly below Massacre.
Heavy Frostweave Bandages – Level First Aid for emergency healing
Budget Buffs:
Scroll of Strength VIII (+30 Strength for 30 min, very cheap)
Scrolls of Strength do not stack with Horn of Winter (DK buff) or Strength of Earth Totems.
This is critical for group content – the scroll buff gets overwritten by class buffs affecting the same stat
Elixir of Mighty Strength (+50 Strength) if not using flasks
Dense Sharpening Stone/Dense Weightstone – Only usable on weapons with an item level of 165 or below. Works on starter Northrend quest weapons (level 68-70 range) but NOT on dungeon drops or later quest rewards. Skip this once you upgrade past iLvl 165 weapons.
Elite Quest/Dungeon Buffs:
Flask of Endless Rage (+180 Attack Power, 1 hour, persists through death) – Requires level 75
Swiftness Potions – Emergency escape or faster zone travel
Cost-Effective Strategy
You need weapon enchants + speed boots + food buffs if you’re serious about this.
Add scrolls and weapon stones for constant uptime
Splurge on flasks for challenging content or the final push to 80
Always maintain First Aid for emergency healing
Budget Rule: Basic consumables cost only silver per hour but provide significant DPS/survivability gains throughout the leveling process.
Best Professions
Leveling vs. Endgame Professions
For leveling, take Mining and Skinning. Mining gives Stamina through Toughness (useful for surviving pulls) and the ore sells well, especially Cobalt early on. Skinning gives critical strike rating through Master of Anatomy, and the leather funds your mount costs and consumables. Both professions generate gold passively while you quest without any extra effort.
For endgame raiding, the strongest Warrior professions are Engineering (Hyperspeed Accelerators on gloves for a haste burst on use) and Jewelcrafting (three Prismatic Dragon’s Eye gems that exceed normal gem stats). Both are expensive to level. Don’t try to level them while you’re still questing through Northrend unless you’re already sitting on a bankroll from a main character.
The practical path: level 68-80 with Mining and Skinning, build up your gold, then drop one or both for Engineering and Jewelcrafting once you can afford the training and materials at 80. Mining pairs with Engineering if you want to keep one gathering profession longer to supply your own materials.
Best Gathering Combinations for Leveling
Mining + Skinning (Recommended)
Mining gives +60 Stamina at max skill through the Toughness passive, which is a meaningful survivability boost for a class with no self-healing. Saronite and Titanium ore sell well all expansion.
Skinning gives +40 critical strike rating (~1% crit) through Master of Anatomy, and leather sells steadily on the auction house. Both professions level naturally while you quest, and there’s no tracking conflict since Skinning doesn’t use tracking.
Mining + Herbalism (Alternative)
Herbalism gives Lifeblood, a self-heal on a 3-minute cooldown that scales with your max health. It functions like an extra Health Potion or a weaker Enraged Regeneration, which is genuinely useful on a Warrior. Herbs sell well, especially to Alchemists and Scribes.
The drawback: you can’t track herbs and mineral nodes at the same time. You have to toggle between them, which means you’ll miss nodes of whichever type you aren’t currently tracking.
Skinning + Herbalism (Best Budgeting Option for Poors)
Crit bonus from Skinning, healing from Herbalism, no mining income. Take this if you already have an alt supplying ore or you don’t want to deal with mining competition in popular zones.
Blacksmithing: Grants extra gem sockets (Socket Bracer/Gloves) + Titansteel Destroyer (one of the best pre-raid weapons for Arms in WotLK)
Enchanting: Ring enchants for both rings, plus disenchanting as a passive income source.
Leveling-Friendly Crafting Options
All crafting professions cost significant gold and time to level. If you take one while leveling, expect it to eat into your income rather than supplement it. The practical approach for all three options below: gather materials while leveling, then power-level the crafting profession at 80 when you can afford it.
Mining + Blacksmithing
The self-sufficient route. Blacksmithing gives you gear upgrades during the leveling process that other crafting professions don’t:
Cobalt Armor set (low 70s), loaded with Strength
Savage Saronite set (level 78), blue-quality PvP gear that’s viable for entering level 80 content
Weapon chains that reduce Disarm duration (useful against other Warriors)
Sharpening stones for weapon damage buffs
Mining + Engineering
The utility route. Engineering’s leveling benefits are tools rather than gear:
Bombs for AoE damage and pulling packs
Target dummies for distraction while bandaging or escaping bad pulls
Nitro Boosts (level 72), a speed burst on your boots
Engineering is expensive to level. Either commit with gold reserves from another character or wait until 80.
Herbalism + Alchemy (Consumable Route)
The consumable route and the cheapest crafting option to level:
Craft your own healing potions and buff elixirs throughout leveling
Alchemist’s Stone trinkets become available at 76
Lifeblood healing from Herbalism plus an endless potion supply gives Warriors unusual sustain
Mixology bonus (stronger flask effects) only kicks in at max Alchemy with self-crafted flasks
Professions to Skip While Leveling
Leatherworking, Enchanting, Inscription, and Jewelcrafting are all endgame professions with minimal leveling benefit. Leatherworking’s leg armor kits and fur linings, Enchanting’s ring enchants, Inscription’s shoulder enchant, and Jewelcrafting’s Dragon’s Eye gems all require max or near-max skill to matter. Level them on an alt or pick them up at 80 if you want them.
Essential Secondary Professions
First Aid (Must Have for Warriors) in WotLK Classic
In original Wrath, ranks past Artisan came from trainer books and, in earlier expansions, the Triage quest. WotLK Classic streamlined all of it: every rank now comes straight from the trainers listed above. Train as ranks unlock and keep your bandage rank current on the road. Heavy Frostweave Bandages are the only rank that matters at 80.
Other Secondary Skills
Cooking earns its slot: Dragonfin Filet is a real combat buff, and the Northern Spices come from the same daily circuit you’ll run anyway. Fishing feeds Cooking and makes quiet gold, take it if the loading-screen life appeals to you. Neither is mandatory. First Aid is.
Recommended Progression While Leveling
While leveling (68–80)the swap happens at 80Endgame raid setup
Path 3 · Budgetdouble gathering max gold, swap slowly
one at a time
Why gather first, craft later
Crafting professions cost gold and time to level — they drain income while questing. Gather to 80, bank the gold, then power-level the craft when you can afford it.
Path 1: For Those Who Want Maximum Leveling Efficiency
68-80: Mining + Skinning (stat bonuses + gold)
At 80: Drop Skinning → Engineering (using stockpiled gold)
Later: Drop Mining → Jewelcrafting (full endgame setup)
Path 2: For Those Who Want Early Utility Focus
68-80: Mining + Engineering (if you have gold reserves)
At 80: Drop Mining → Jewelcrafting
Path 3: For Those Who Are Budget Conscious
68-80: Double gathering professions for maximum gold income
At 80: Evaluate the server economy and personal wealth. Inflation tends to occur, and certain items become more valuable
Transition gradually: One profession at a time
Gold Farming and Gathering Locations
See the Northrend Gold Making Guidefor more detailed info on the best gold farms, such as elemental and cloud farming locations
Saronite Ore: Sholazar Basin, Icecrown
Titanium Veins: Icecrown peaks
Herbs: Use tracking AddOns for efficiency
One more thing: keep First Aid maxed throughout leveling. Warriors have no self-healing outside of Enraged Regeneration and consumables. Heavy Frostweave Bandages are your cheapest and most reliable way to top off between pulls without burning potions.
Macros for Leveling
Macros aren’t about playing lazy. They’re about removing the half-second gaps between deciding and doing, which on a rage-driven class is real damage. These five cover the road to 80. Test each on a training dummy before trusting it in a pull.
Copy a macro, paste it into the in-game macro window (Esc, then Macros), and drag the icon to your bar.
Overpower with Auto-Attack
White damage is a bigger share of your DPS than most players realize. Waiting even half a second to start swinging costs rage and raw damage.
#showtooltip
/startattack
/cast Overpower
Autos begin the instant you press Overpower, even if the proc window has closed.
Mortal Strike with Auto-Attack
Same principle on your core button. No half-second gap between the press and the swings that feed it.
#showtooltip
/startattack
/cast Mortal Strike
Put /startattack on every core ability, starting with Mortal Strike.
Instant Rend (Battle Stance Auto-Switch)
If you're in Berserker Stance when you try to Rend, this switches you to Battle automatically. No clicking stance bars, no wasted GCDs.
#showtooltip Rend
/startattack
/cast [stance:3] Battle Stance
/cast Rend
Rend works in Battle and Defensive Stance, so the swap only triggers from Berserker.
Vikstone's Warning
Do Not Combine Charge and Intercept
A macro that picks Charge or Intercept based on your current stance sounds clever. In practice it wastes time switching stances, and while locked in combat it defaults you into Intercept when you may want to drop combat and Charge instead. Keep them on separate buttons.
Charge with Battle Stance
Forces Battle Stance so Charge goes off instantly, no matter where you were standing.
Stance swaps are off the global cooldown, so this fires in a single press.
Charge + Overpower Combo
Overpower is the best follow-up to Charge, contrary to the Hamstring habit, since Overpower only works in Battle Stance anyway. This saves you a keybind.
Hamstring works in Battle and Berserker, so it never needs the forced swap this button provides.
Stance numbers: 1 is Battle, 2 is Defensive, 3 is Berserker. The full 14-macro arsenal, including the emergency defense swaps, shout macros, and the AoE burst button, lives in the WotLK Classic Warrior Advanced Strategies & Macros Guide.
Best AddOns
Addons can significantly speed up gameplay, improving personal performance and group support. These are the top addons to enhance your WotLK experience:
Questie – WotLK Classic has no built-in quest objective markers on the map. Questie adds them. Without it, you’re Alt-Tabbing to Wowhead for every quest. Install this before entering Northrend.
WeakAuras – For Warriors specifically, set up trackers for Taste for Blood procs, Sudden Death procs, Rend duration, and Wrecking Crew uptime. User-created Warrior packs on Wago.io handle most of this out of the box. This single addon replaces the need for separate proc trackers and cooldown monitors.
Details! Damage Meter – Tracks your damage breakdown by ability. Use it to check whether your Overpower usage, Deep Wounds uptime, and Execute procs are where they should be. Also useful for comparing your performance against other DPS in dungeons.
Leatrix Plus – Auto-sells junk, auto-repairs gear, speeds up quest text, and adds minimap enhancements. Handles the quality-of-life automation so you can focus on combat instead of inventory management.
Deadly Boss Mods(DBM) – Timers and alerts for every dungeon and raid boss mechanic. Not critical while leveling, but install it before your first heroic dungeon at 80. As a Warrior, pay attention to the Spell Reflection prompts — DBM can help you time these against specific boss casts.
Perfect for roleplayers, this addon adds character profiles, backstories, and other immersive features to enhance in-game roleplaying.
FAQ
Is Arms or Fury better for leveling in WotLK Classic?
Arms.
Taste for Blood keeps your rotation smooth and rage-efficient with any weapon you find, while Victory Rush speeds up chain pulling. Fury only pulls ahead once you have two strong two-handers, which rarely drop before 80.
Can you level as Protection in WotLK Classic?
Yes, and faster than most players expect if you run dungeons the whole way, since instant groups plus Shockwave AoE add up. Solo questing is slower than Arms.
What level should you go to Northrend as a Warrior?
You can sail at 68, and Northrend quest greens replace most Outland gear immediately, so leaving at 68 beats finishing Outland to 70.
How long does 70 to 80 take as a Warrior?
It actually goes quite fast and most players will hit level 80 well before the end-game zones, typically by Zul’Drak or Sholazar Basin when doing questing. This is why you can earn a lot of gold simply by finishing the main storyline quests and having alts do the same. More on that in the Northrend Gold Making guide.
Do Warriors need Hit Rating while leveling?
Leveling mobs need less than the level 83 boss cap, so some Hit Rating helps smooth rotations but chasing the full cap before 80 wastes stat budget. It becomes more important for the end-game than during the leveling process.
What's the best Warrior leveling weapon in WotLK Classic?
The De-Raged Waraxe has the highest value in terms of time/effort required and when you can obtain it. I recommend wrapping up the Amphitheater of Anguish questline in Zul’Drak with a group as early as you can. The Dreadlord’s Blade is arguably better but is an uncommon drop from Culling of Stratholme and requires level 78.
About the Author
Vikstone has been my only character since Vanilla. I spent years playing Arms, Fury, and Protection for Trinity Exiles. I studied the Warrior legends of that era: Zinwrath’s machinima, Laintime’s PvP dominance, and the theorycrafters who proved skill mattered more than gear.
This guide draws on that foundation, including documentation of the Northrend storyline quests from my original WotLK run and the strategies that followed. Whether you’re leveling your first Warrior or returning after years away, these are the fundamentals that don’t change.