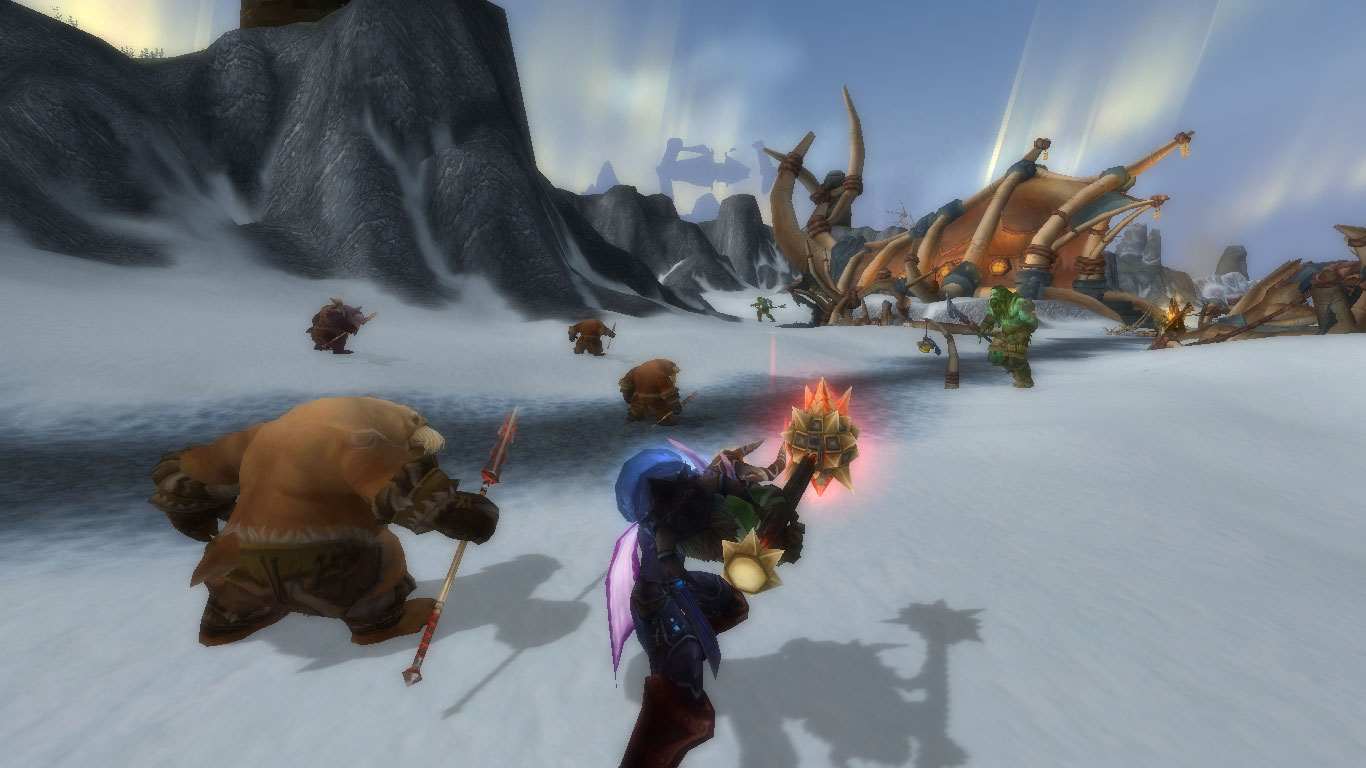
The frozen shores of Borean Tundra mark the beginning of Vikstone’s Classic Expedition into WotLK Classic. This Borean Tundra leveling guidefor WotLK Classic covers the Alliance’s storyline quests with optimized leveling routes, gold farming hotspots, faction/reputation mastery, and rare spawn locations.
Northrend Zone Guides
Vikstone’s Classic Expedition · Northrend Leveling Series 68–80
The screenshots and quest walkthroughs throughout this guide come from Vikstone’s original Northrend run on US-Terokkar, captured back in 2008-2009 during Wrath of the Lich King. The guide itself is built and updated for WotLK Classic, with routes, coordinates, and strategies.
Borean Tundra is one of Northrend’s two starter zones (the other being Howling Fjord) and the recommended Alliance leveling path. This is where the Alliance establishes Valiance Keep and launches the war against the Scourge.
What’s Inside:
Storyline Quest Routes (68-80): Step-by-step Alliance progression organized by level bracket (68-70, 70-71, 71-72) with full walkthroughs
WotLK Player Chronicles – Borean Tundra: The Terokkar-US players who fought alongside Vikstone
Rare Spawn Guide: Locations, respawn timers, and hunting strategies
Gold Farming and XP Grinding Spots: The zone’s best farming spots are found on the dedicated WotLK Classic Borean Tundra Gold Farming Guide, every spot with coordinates, farming maps, and market timing
Faction Reputation & Rewards: Major and minor factions, what they offer, and how to get there
Build one habit when you land: grab every flight point you pass, even the out-of-the-way ones. Northrend is huge, and a short detour now saves hours of overland riding later. The diagram shows how it all connects.
Your capital is free, Valiance Keep or Warsong Hold unlocks the moment you arrive. After that, follow the A1–A4 or H1–H4 order in the diagram.
The one that matters most is Amber Ledge, dead center. It’s your only way into Coldarra, so you can’t reach Transitus Shield, the Nexus, or anything tied to Malygos until you’ve discovered it and spoken to Surristrasz. Get it early.
Two things the table won’t tell you: Unu’pe’s flight master, Bilko Driftspark, serves both factions, so grab it if you’re Horde questing the east coast. And Warsong Hold’s flight master sits at the top of the hold up the elevator, so look up before you assume she’s missing.
Everything else unlocks as the zone’s quests move you around. These are just the eight worth a small detour on day one.
Borean Tundra · Leveling Guide
Flight Paths: What to Grab, and When
Borean Tundra has seven flight points but you only need four. Pick your faction below for the exact pickup order; each one lines up with quests you'll already be doing, so there's no detour.
Grab it whenNick of Time takes you to Amber Ledge. Talk to Surristrasz: he is both the flight master and your only ride to Coldarra (Transitus Shield), so this one is mandatory.
Grab it when the taunka storyline sends you to the eastern coast; you'll quest out of the village anyway. Unu'pe 77, 37 is a short ride south and serves both factions, so take it in the same trip.
Grab it when your quests route through Amber Ledge. Talk to Surristrasz: he is both the flight master and your only ride to Coldarra (Transitus Shield), so this one is mandatory.
Grab it last, when questing reaches the far north. It sits near the Sholazar Basin entrance, so it doubles as your launch point for the next zone.
Coldarra has no flight point of its own. The only way in is Surristrasz at Amber Ledge, who flies you to the Transitus Shield, and you must discover Amber Ledge before that connection unlocks. Grab it even if you're skipping the rest.
Bomb north first, then south, so you end close to the wall NPCs for turn-ins.
Do Hawthorn + shrine clicks as you move between the wall and the town to avoid backtracking.
Run the cultist unmasking later as a quick triangle: inn → docks → jail. Next main stop: Farshire (still part of Valiance Keep), then branch to hubs from your three seed quests.
Crates respawn fast, so circle the houses instead of waiting.
Hug the shoreline on the way to Karuk to chain pulls efficiently.
On Leviroth, impale first for the debuff, then burn. Kite toward the iceberg lip if needed. Next stop: Amber Ledge (Nick of Time) if you haven’t done it yet.
AMBER LEDGE → COLDARRA / TRANSITUS SHIELD · Free Evanor, unlock Coldarra, circle the Nexus
Interrogate upstairs immediately after Abduction so you don’t run up twice.
Plant Salrand’s bomb in the center of the dome, then hearth/ride back rather than waiting out RP. Next stop: Coldarra outdoor loop from Transitus Shield.
Read all four meters in one smooth loop instead of returning after each.
Spear a drake near camp for Drake Hunt so you can turn it in before timer stress hits. Next stop: D.E.H.T.A. camp south of Fizzcrank or Fizzcrank itself, depending on your chosen route.
D.E.H.T.A. · Poacher cleanup into Harold Lane finale
Do trap placements first so Ears of Our Enemies finishes passively while you loop south and east.
Swim directly to the shipwreck instead of clearing the entire shoreline.
On Kaw, open with Charge → Trample and use Roar on packs. Save Harold Lane for last to end the circuit at the questgiver. Next stop: Fizzcrank Airstrip (Distress Call).
FIZZCRANK AIRSTRIP · Mechazod, Geyser Fields, Magmoth, Pumping Station
Use the inn elevator to move quickly between Fizzcrank NPCs.
Hit sinkholes NW → NE → S so you end near Kryxix with everything ready.
Read the manual at the Pumping Station to spawn Mechazod instead of wasting time searching for him. Continue here: Magmoth & escort before leaving the hub.
Enter Magmoth from the lower pool entrance for a shorter cave route.
Clear a small pad of mobs before starting Bonker’s escort so you aren’t overwhelmed mid-event. Next stop: Winterfin (King Mrgl-Mrgl) or go straight into Bixie/Talramas if you already picked up the side thread.
KING MRGL-MRGL · Winterfin Retreat · Murloc chain + short escort
Rescue tadpoles along your main cave path. Don’t sweep every tunnel.
Hug the left wall to reach the Keymaster quickly, then clear a pocket before starting the escort. Next stop: Bixie/Talramas or straight to Death’s Stand/En’kilah, depending on where you are in level/gear.
TALRAMAS & BIXIE WRENCHSHANKER (Bixie 73, 19 · Talramas ~69, 15) · Quick XP arc feeding into Thassarian
Keep right to find Tinky. Complete Engine-Core Crystal, Magical Gyroscope (Doctor Razorgrin) and Piloting Scourgestone (Lich-Lord Chillwinter roof 69, 13), then return to Tinky.
Use Kara’s taxi to skip a long ride north.
SW entrance + “keep right” pathing gets you through Talramas efficiently while stacking Scourge kills. Next stop: Death’s Stand → En’kilah line with Thassarian.
THASSARIAN · Temple City of En’kilah (Death’s Stand 82.4, 46.7 · Ziggurat ~85.0, 42.0) · Four-step strike ending in Last Rites
Use Dusk (mount) to speed up travel to the phylactery pool and between spires.
Drop Lurid’s Bones on cooldown during Buying Some Time to let him tank.
Do towers in a clockwise loop to minimize travel. Group for Last Rites if your gear is light. Next stop: The Nexus dungeon to finish Coldarra arc.
THE NEXUS & KERISTRASZA (Dungeon) · Clean finish after Coldarra arc
Turn everything in at Transitus Shield and associated NPCs.
Only run Nexus once you’ve finished the outdoor Coldarra chain, so every quest is unlocked.
This caps the Keristrasza storyline and cleanly finishes your Borean Tundra route. Next zone: Ride/portal to Dragonblight (Stars’ Rest/Fordragon Hold path).
This hub also seeds the Farshire arc, the cultist investigation inside the docked cruiser, and hand-offs to Amber Ledge/Coldarra and Fizzcrank Airstrip.
Hub services: flight point, inn, and forge, plus a flying trainer, Maigra Keenfeather, at [58.8, 68.2].
Borean Tundra · Alliance Leveling Guide
Valiance Keep: Step-by-Step Walkthrough
Every quest in the keep in one efficient circuit: wall, ship, town sweep, Farshire, and the cultist hunt with zero backtracking. Check off steps as you go; progress saves in your browser.
Do Hawthorn + Cultists while doing Hammerhill. The ship is steps from the wall; combine with Death From Above before leaving town.
Bomb order: drop the North sinkhole 54, 64 first, as it's closer to Hammerhill, then ride a shallow S-curve to the South sinkhole 51, 72 so you re-enter town by the wall quest-givers.
Oculus trio: after picking up The Hunt is On, do Thorpe → Hegger → Mitchells in one clockwise loop (inn kitchen → docks → jail) without dismounting long. Pull Mitchells away from the guards beside him; if they land the killing blow it won't count.
Farshire mine: follow the cart tracks to the western adit first; it places you right by the evidence turn-in and the ores/targets for the follow-ups.
Kaskala & Riplash Strand
Overview & Location
Kaskala is the ruined former tuskarr capital under Kvaldir assault, while Riplash Ruins pits Kvaldir vs. Naga, with you using Azshara-blessed relics to prevent a sea monster’s awakening.
You can ride straight to either hub with no prerequisites.
The efficient path from Valiance Keep is to fly east to Kaskala (≈ 64.0, 45.8) for quick Kalu’ak rep + a daily, then sweep south-west to Riplash Strand (≈ 47.1, 75.5) for the short Trident → Emissary climax.
Worth knowing: when Veehja hands off the The Trident of Naz’jan line, she grants the Riplash Blessing, +60% swim speed for 5 minutes. Time your swim down to Leviroth’s iceberg around it.
The full Kalu'ak coastline in two clean loops: the Kaskala beach sweep and islet arc, then the Riplash blood duty down to the Leviroth finale. Check off steps as you go; progress saves in your browser.
0/0 steps
Kaskala Beach Sweep
Land, set the flight path, one tight clockwise pass
Elder Muahit's Islet
Everything here starts and ends at the elder
Riplash Strand: Karuk's Blood Duty
Southwest along the coast, hug the waterline
Riplash Ruins Finale
Trident, then the beast beneath the iceberg
Hand-Offs & Next Hubs
Hotawa, standing beside Elder Muahit on the islet, offers Travel to Moa'ki Harbor after The Tides Turn. It's the feeder into Dragonblight, so grab it before you leave.
Supply crates for Preparing for the Worst respawn fast, so snake the pier edges and hut interiors instead of circling wide on the shore.
Kalu'ak farmers: the Kaskala chain works any time; if you plan to push the reputation later, at least unlock this daily now for steady gains.
Chain-tag the strand: do Karuk's Oath hugging the waterline; Raiders and Longboatsmen come in pairs so you can clear packs quickly.
Leviroth: he's a level 72 elite, but the Trident used before aggro drops him to roughly 6% health. Top off your breath, dive from above, impale first, then burn. If it goes wrong, kite to the iceberg lip to reset safely.
Amber Ledge & Coldarra
Overview & Location
From Valiance Keep, pick up Nick of Time (Alliance breadcrumb) and ride north to Amber Ledge. This hands you straight into the Kirin Tor’s Coldarra opener with Librarian Donathan and the Beryl Point prison storyline. Amber Ledge sits at roughly (45, 33) on the cliff above the Westrift.
Borean Tundra · Alliance Leveling Guide
Amber Ledge & Coldarra: Step-by-Step Walkthrough
The Kirin Tor interrogation chain at Beryl Point, the flight to Coldarra, and the full Nexus loop through the Keristrasza arc. Check off steps as you go; progress saves in your browser.
0/0 steps
Amber Ledge Opener
The Beryl Point interrogation chain, all from Donathan
Transitus Shield Pickup & Nexus Lap
One clockwise lap covers everything on the first trip
Level 80 daily unlock: Corastrasza on the upper ring ~29.5, 24.8 offers Aces High!. Park it for later.
Shortcuts & Tips to Save Time
Do the Inquisition inside the tower. Talk to Normantis upstairs immediately after Abduction; the Needler works in place, no extra travel.
Salrand smart bomb: for A Race Against Time, plant the detonator dead center on the dome, pop a defensive, nuke Salrand, click the lockbox fast, and hearth or dragon back, which saves a full loop.
Meters lap once: read all 4 meters in a single clockwise lap while killing Spellweavers, tagging Ancients, and grabbing Frostberries; it perfectly overlaps spawn density.
The wrangle: on Drake Hunt, spear a Hatchling close to Transitus and be ready to walk it straight in. The leash window is tight, and as a daily the hatchlings get contested.
Boss pins: Goredrak patrols the western pad. Tag and kite to the edges to avoid adds.
Keristrasza on demand: if you lose the Augmented Arcane Prison, Raelorasz replaces it, and you can re-use it to turn in Saragosa's End without flying around.
A Time For Heroes
The Siege
Word on the Street
Not Without a Fight!
Karuk's Oath
Traversing the Rift
Monitoring the Rift Sundering Chasm
Springing the Trap
Part 2: D.E.H.T.A., Fizzcrank & Winterfin (70–71)
D.E.H.T.A. Encampment
Overview & Location
Fly/ride north from Valiance Keep to the Druids for the Ethical and Humane Treatment of Animals (D.E.H.T.A.) Encampment on the bluff (~57, 44). Speaking with Arch Druid Lathorius starts A Mission Statement, which immediately unlocks multiple parallel “clean-up the poachers” quests.
The full druid crusade against Nesingwary's poachers in one clockwise lap: traps, ears, the lake, the mammoth run, and the named targets that unlock the Harold Lane finale. Check off steps as you go; progress saves in your browser.
Harold Lane was once friendly to you in Nagrand, where he offered the Talbuk Mastery quests. The hunter you worked for at 65 is the poacher you're sent to kill at 71.
Shortcuts & Tips to Save Time
Batch the south first: do Unfit for Death traps as you move toward the lake so Ears completes passively on the way.
Clam Master pathing: swim straight to the shipwreck off the Abandoned Reach, kill him, and hearth or ride back to Cenius with no extra shoreline pulls.
Mammoth vehicle tech: on Kaw, open with Charge, spam Trample, use Roar to fear big clusters, then focus Kaw. Dismount to loot the halberd.
Named order means fewer flights: hit Karen ~57, 56 right after you swing past Farshire on your way back from Khu'nok and Kaw, then go straight to Harold Lane at the lake to finish in one loop.
The airstrip sits above the Geyser Fields; much of the work here involves investigating Nerubian sinkholes and retaking the pumping station from Mechagnomes.
Field note: the flight master’s name, Kara Thricestar, is a nod to Kara Thrace, “Starbuck” from Battlestar Galactica, one of those 2008 pop-culture winks Blizzard tucked all over Northrend.
Borean Tundra · Alliance Leveling Guide
Fizzcrank Airstrip: Step-by-Step Walkthrough
The mechagnome mystery, the Geyser Fields, the Magmoth snobolds, and the climb to Gearmaster Mechazod, threaded so the Scalding Pools only get crossed once. Check off steps as you go; progress saves in your browser.
0/0 steps
Hub Setup
Turn in, listen, load up
Scalding Pools Loop
Corpses, parts, and the screwdriver drop in one pass
Geyser Fields Thread
Do this while you're already out there
Magmoth & the Snobolds
On your way back
Bixie & Tailspin Side Thread
Unlocked by the Transmatter turn-in
The Gearmaster
The pumping station finale
Hand-Offs & Extras
Check in With Bixie opens the Talramas and Dens of Dying arc east of the airstrip.
Gold on the way (Engineering): use the Zapthrottle Mote Extractor on the steam clouds in the Geyser Fields for Crystallized Fire and Water, and kill Steam Ragers for Crystallized Air. See the Best Gold Farming Spots in Borean Tundra for detailed routes.
Shortcuts & Tips to Save Time
Inn elevator: turn in Distress Call and The Gearmaster upstairs without dismount tricks; use the elevator immediately inside the inn.
Sinkhole lap: run NW → NE → S in one sweep so you finish right by the Shake-n-Quake use point.
Valve patterns in Lefty Loosey, Righty Tighty are fixed, so memorize the first to skip trial-and-error at the other three towers.
Magmoth cave skip: jump into the lower pool entrance ~55, 12 to reach Bonker quicker. If he's missing, someone's on the escort; farm Crafty's Stuff until he respawns.
Lupus Pupus: drop the bait on the snobold "presents" to force the drop; for Paragraph D, don't over-loot, since the objectives are capped per turn-in.
Mechazod: the manual spawns him. Interrupt his Overload if you can and pop a defensive; he's a quick burn at quest level.
Kryxix: use the remote at the southernmost sinkhole and don't waste time at the others; the bot autopaths, and you tag the boss at the end.
King Mrgl-Mrgl and the Winterfin Murloc Chain
Overview & Location
A neutral murloc in a costume begins speaking the common tongue, and you are not imagining it. King Mrgl‑Mrgl, disguised night elf druid and D.E.H.T.A. agent, initiates a unique murloc puzzle chain in Winterfin Retreat (~43.5, 14.0).
Borean Tundra · Alliance Leveling Guide
King Mrgl-Mrgl & the Winterfin Murlocs: Step-by-Step Walkthrough
The full murloc arc: the retreat, the caverns, the escort out, the iceberg hunt, and the suit-and-white-flag finale against Claximus. Check off steps as you go; progress saves in your browser.
0/0 steps
Winterfin Retreat Pickup
Everything starts with the king
Winterfin Caverns
The keymaster, then the escort out
Island Turn-Ins
Back at the retreat
The Iceberg Hunt
Northwest water, both targets in one swim
The Spare Suit & Surrender... Not!
The suit-and-white-flag finale
Shortcuts & Tips to Save Time
Combine tadpole rescues with cave traversal; it keeps distance minimal and leveling fluid.
Urmgrgl's cave is deep but short. Hugging the left wall ensures the fastest path.
Wear the suit both ways: the walk to Claximus is peaceful in disguise, so save cooldowns for the fight itself instead of the approach.
A Mission Statement
Happy as a Clam
The Mechagnomes
Scouting the Sinkholes
A Bot in Mammoth's Clothing
King Mrgl-Mrgl
Grmmurggll Mrllggrl Glrggl!!!
Surrender... Not!
Part 3: Bixie/Talramas, En’kilah & The Nexus (71–72)
Talramas and Bixie Wrenchshanker Chain
Overview & Location
From Fizzcrank Airstrip, talk to Kara Thricestar (the flight master) and choose the special taxi to “the Dens of Dying to find Bixie.” You’ll land right next to Bixie Wrenchshanker (~73.0, 19.0), kicking off a short but efficient chain that feeds you directly into Talramas (the crashed Scourge necropolis) and then back to the Airstrip turn-ins.
This mini-arc is quick XP and dovetails neatly into Thassarian’s En’kilah line afterward.
Borean Tundra · Alliance Leveling Guide
Talramas & the Bixie Wrenchshanker Chain: Step-by-Step Walkthrough
Kara's taxi to Bixie, the plague cauldron, and the climb through the crashed necropolis to rescue Tinky, routed so the tower only gets climbed once. Check off steps as you go; progress saves in your browser.
0/0 steps
Fly-In Setup
The taxi lands you on top of the quest giver
Den of Dying
One cave trip, one click
Into Talramas
Two birds with one stone
Parts Run
One tight loop, bottom to roof
Wrap-Up & Hand-Off
Close the loop back through Bixie
Shortcuts & Tips to Save Time
Use the taxi. Don't ride from Fizzcrank; Kara Thricestar flies you straight to Bixie and lands you on top of the start NPC.
SW door, hug right. The southwest entrance ~69, 15 and keep-right pathing reach Tinky in one pass, then set you up for Razorgrin and the roof.
Razorgrin's spot: if he's "missing," you're in the wrong wing. The top of the right-hand spiral is correct.
Double-dip kills: keep Might As Well Wipe Out the Scourge active while doing Tinky's parts and it finishes naturally inside Talramas and in the pools outside.
Roof pull safety: on Chillwinter, clear a small pad first so adds don't join. He's killable solo at 70 to 72 with a defensive cooldown.
This hands you directly into the four-step En’kilah assault that ends with Last Rites on the top of Naxxanar, one of the best XP-to-flight-time sequences in early Northrend.
Borean Tundra · Alliance Leveling Guide
Thassarian & the Temple City of En'kilah: Step-by-Step Walkthrough
The zone's finale: the death knight's phylactery hunt, the three spires, and the ascent into Naxxanar itself. Check off steps as you go; progress saves in your browser.
0/0 steps
Hub Setup
The Wailing Ziggurat, just south of En'kilah
Finding the Phylactery
Ride the death knight's horse
Buying Some Time
Kill credit on the way in, not a separate trip
Words of Power
Three spires, clockwise, shortest triangle
Last Rites
The finale atop Naxxanar; three players suggested at level
Where This Leaves the Story
Pay attention to what Thassarian's confrontation reveals about a certain counselor back in Valiance Keep. The cultist infiltration you uncovered on your first day in the zone ran higher than anyone at the keep suspected, and this rooftop is where the whole Borean arc closes.
Shortcuts & Tips to Save Time
Route discipline: do Buying Some Time on the way to the first tower so you're never backtracking for kill credit.
Free DPS: Lurid's Bones is a repeatable on-use summon, so macro it and pop it on cooldown while moving between packs.
Tower order: Pain → Blood → Decay is the shortest triangle from the southern approach, and you finish closest to the orb for Last Rites.
Orb location: if you can't see the teleport orb, circle the base of Naxxanar. It's directly under the floating citadel, not in a tower.
If you wipe on the finale: release, fly back, and re-take the orbs. You don't need to redo the towers, only the final platform.
The Nexus & Keristrasza Arc
Overview & Location
After you reach Amber Ledge → Transitus Shield, speak to Raelorasz at the shielded Kirin Tor camp in SE Coldarra (33.3, 34.5) to begin the red-dragon storyline that ends inside The Nexus.
The signal fire for Springing the Trap is at 25.4, 21.8 (NW Nexus entrance). Keristrasza taxis you through the aerial event, and Malygos captures her, which sets up Prisoner of War inside the instance.
Hub services: Transitus Shield has its own flight point (Warmage Adami, [33.0, 34.4]) and basic vendor and repairs from Archmage Berinand. Set the FP before your dungeon runs, since it makes repeat Nexus trips painless.
Borean Tundra · Alliance Leveling Guide
The Nexus & Keristrasza: Dungeon Prep & Run
Four quests, one clear. How to walk into the Nexus with every turn-in loaded, and what waits at the end of it. Check off steps as you go; progress saves in your browser.
0/0 steps
Finish the Outdoor Chains First
The dungeon quests all unlock from Coldarra's surface work
Load the Trifecta Plus One
All four pickups happen at Transitus Shield
Run the Nexus
Complete each objective as you clear; no detours needed
Missing a pickup? If Berinand or Serrah won't offer a dungeon quest, its outdoor prerequisite isn't turned in yet. The chain map in step 2 tells you which one to finish.
Locked out between runs: turn in whatever's complete and re-queue; the quests don't require a single clear.
Oh Great... Plagued Magnataur!
There's Something Going On in Those Caves
Might as Well Wipe Out the Scourge
Finding the Phylactery
Buying Some Time
Words of Power
Basic Training
Springing the Trap
Prisoner of War
WotLK Player Chronicles: Borean Tundra
Vikstone faced Northrend alone. Not alone. When elite quests required allies, these heroes from Terokkar-US answered the call. From the first steps off the boat at Valiance Keep, they stood beside me. Some were guildmates from Trinity Exiles. Others were passing strangers who stopped to help. All of them mattered.
Between November 2008 and August 2009, over 50 players are documented. Every name, every screenshot, and every shared victory is preserved in the WotLK Player Chronicles main page for Vikstone’s Classic Expedition.
Cathayia
The Reaper Strain | Human Mage
Joined 1 quest
Gabe
Trinity Exiles | Night Elf Hunter
Joined 8 quests
Sikotic
Trinity Exiles | Night Elf Death Knight
Joined 5 quests
Borean Tundra is one of the best early gold zones in Northrend, no level 80 or heavy investment required, which makes it ideal for alt-farming and stockpiling while you level. The Blistering Pool offers dual Eternal Fire and Water farming, the Geyser Fields stack gas clouds with zone-exclusive Firethorn herbs, and the mammoth and rhino grounds keep skinners busy.
These are the rare spawns found in this zone. They do not share spawn timers, and each individual respawn is approximately 6-8 hours, with immediate respawn after server restart.
You can use NPCScan/SilverDragon addons to assist your hunting. Old Crystalbark tends to blend in the wilderness. Use the macro /target Old Crystalbark to find him.
Borean Tundra Rares at a Glance
Three rares, each on its own timer. All three count toward the Northern Exposure and Frostbitten achievements. Full hunting detail below.
Fumblub Gearwind
Lvl 71 Elite Mechagnome
Geyser Fields · drops Flumblub's Seat Cushion (leather chest) · the catch: flies a patrol in a mechano-copter, needs a ranged pull. Not tameable.
Old Crystalbark
Lvl 71-72 Elite Treant
Western Coldarra, patrols the Nexus perimeter · drops Crystalbark's Toenail (plate gloves) · the catch: blends into the wilderness, use /target Old Crystalbark. Not tameable.
Icehorn
Lvl 71 Elite Rhino Beast
Central Borean Tundra · drops Mammoth-Hair Crown (cloth helm) · the catch: easy solo kill, but BM hunters can tame it as an exotic pet.
Difficulty: Very easy solo for level 69+ characters
Appearance: Large rhinoceros (ironically drops mammoth-themed loot)
Hunter Information:
Tameable: Only Beast Mastery (BM) hunters can tame Icehorn due to it being an exotic pet
Alternative Spawn Locations:
Northeast of Unu’pe among elementals
West of small Alliance camp (tent with two soldiers and DK horse)
Near Temple City of En’kilah
Tips, Vendors & Shortcuts
Resource & Profession Hotspots
Goldclover – Found zone-wide, especially between D.E.H.T.A. camp and Farshire. Excellent for early stockpiling to power-level Inscription and Alchemy, remaining valuable throughout the expansion.
Firethorn (requires Herbalism 360) – Found in Geyser Fields; plants flicker with flame animation and emit a bonfire sound, making them easy to spot.
Tiger Lily – Spawns along riverbanks north of Fizzcrank (~65.0, 38.0) and at tide pools on Riplash Strand.
Cobalt Ore/Rich Cobalt Deposits – Borean Tundra offers excellent mining potential, comparable to Howling Fjord. Look for veins on cliffs near Coldarra (~22–31, 26–38) and ridges above Steam Springs (~73.5, 19.0).
Borean Leather & Chilled Meat – Mammoth herds have various spawn points in northern and central Borean Tundra; northeast of Amber Ledge (52.8, 28.8), southward from Fizzcrank Airstrip (54.8, 24.8), and north of the Geyser Fields (64.6, 14). Scourged Mammoth are located along west (77.6, 25) and south (83.6, 34) of the Temple City of En’kilah.
Crowd & Peak-Hour Tactics
If the Fizzcrank airstrip bridge is crowded, swim along the coast (from ~57 to ~63 latitude) to zone in without dismounting.
To avoid ganking in Coldarra, approach via Amber Ledge northern slope (~43.5, 35.2) instead of the main ramp.
Profession Training & Early Recipes
Grand-Master Trainers (375–450) for most primary and secondary professions are available in Valiance Keep (Alliance) and Warsong Hold (Horde).
Jewelcrafting Trainer – Alliance: Alestos is located at Valiance Keep (57.4, 72.2); Horde: Geba’li is located at Warsong Hold (41.6, 53.4).
Requires four Chilled Meat, unlocks useful recipes. Available at 350 Cooking.
Heavy Frostweave Bandage – Its manual is a world drop from humanoid and undead (Zul’Drak has high drop rates) and requires 390 First Aid to appear; use the manual and you can craft Heavy Frostweave once your skill reaches 400. For the initial Frostweave Bandage recipe:
Alliance Trainers/Vendors:
Brynna Wilson – Grand Master First-Aid Trainer Valiance Keep, Borean Tundra — infirmary tent by the docks (57, 66).
Anchorite Yazmina – Grand Master First-Aid Trainer Valgarde, Howling Fjord — inside the central keep (60.9, 62.0).
Where: Winterfin Retreat cave (42.7, 35.3) after completing the murloc quest chain. Winterfin Commerce. The vendor stands at the very back of an out-of-the-way cave; most adventurers leave as soon as the Winterfin quests finish.
Faction: Neutral to both sides once Winterfin is friendly.
Where: Horde side, Warsong Hold 2nd floor (41.8, 54.7), profession wing behind General Goods. Small stall, buried among other trainers.
Role: Grand Master First-Aid trainer (350 → 450).
Notables: Heavy Frostweave Bandage manuals, all bandage materials.
When the Zone Feels Full – Side-Hustle XP
Tag & bagSteam Rager elementals (fast respawn, drop valuable Crystallized Air).
Profession dailies in Dalaran if popped (Cooking/Fishing + 30 k XP). Dalaran Fishing dailies are straightforward and can be completed by fishing anywhere in the sewers. Fishing and Cooking dailies also reward currency which can be used to purchase recipes.
Quick BG queue – Alterac Valley win = ≈40 k XP win with Joyous Journeys active.
Following the loops & checklists above shaves 45-60 minutes off an average 68-72 push, nets lots of Cobalt and Goldclover per hour of gathering time, and leaves you Nexus-ready with all flight paths unlocked for Dragonblight.
Faction Reputation & Rewards Guide
Major Factions Overview
Borean Tundra introduces six pivotal faction relationships. Unlike later zones with more specialized factions, Borean Tundra serves up a mix of tabard-driven factions, daily-quest factions, and unique reputation mechanics that make WotLK reputation progression more worthwhile.
Tabard factions let you equip their tabard and earn reputation from kills in level-80 heroics, so the tabard purchase at Friendly is the key unlock for those
The Big Three Priority Factions
Wyrmrest Accord – The dragon faction with the guaranteed flying mount
Kalu’ak – Tuskarr villages with the best fishing pole in the game
Kirin Tor – Mage faction for casters seeking the ultimate helmet enchant
How to Grind Borean's Factions
Six factions, three different methods. Find your faction below, then read its full breakdown further down.
Tabard factions
Equip the tabard, grind level-80 heroics.
Wyrmrest Accord
Kirin Tor
Dailies & quest chains
No tabard. Earn it through quests.
The Kalu'ak
Cenarion Expedition (via D.E.H.T.A.)
Passive factions
Builds on its own as you quest.
Valiance Expedition (Alliance)
Warsong Offensive (Horde)
Borean Tundra introduces six pivotal faction relationships. Unlike later zones with more specialized factions, Borean Tundra serves up a mix of tabard-driven factions, daily-quest factions, and unique reputation mechanics that make WotLK reputation progression more worthwhile.
Tabard factions let you equip their tabard and earn reputation from kills in level-80 heroics, so the tabard purchase at Friendly is the key unlock for those
The Big Three Priority Factions
Wyrmrest Accord – The dragon faction with the guaranteed flying mount
Kalu’ak – Tuskarr villages with the best fishing pole in the game
Kirin Tor – Mage faction for casters seeking the ultimate helmet enchant
Wyrmrest Accord – The Dragon Alliance
“Unite with four dragonflights against Malygos’s magical crusade.”
Earning reputation with the Wyrmrest Accord grants you access to the only reputation-based 310% flying mount in WotLK Classic: the Red Drake. While other factions offer gear that can be upgraded later, this mount stays useful for years. The faction’s storyline also ties into iconic Coldarra quest chains.
2,000g — Flying Mount (Epic, 280%) Leather Bracers (AGI DPS) Mail Gloves (Resto/Shaman caster) Plate Legs (STR DPS)
Red Drake: 280% speed in WotLK Classic (no Master Riding upgrade in Wrath). Strong end-tier reputation rewards; mount is the marquee purchase.
The Kalu’ak – Tuskarr Coastal Villages
“Friendly walrus-people with the best fishing pole and penguin pet in the game.”
Their Mastercraft Kalu’ak Fishing Pole is considered best‑in‑slot for the whole expansion, and they drop early-access chest pieces that outpace most gear for fresh‑80s.
Pole: +30 Fishing and underwater breathing; best non-raid pole in WotLK Classic. Pet: Beloved Pengu companion follows you everywhere. Discount applies zone-wide.
Kirin Tor – Mage Council of Dalaran
“The magical authority of Dalaran with premium caster rewards.”
They offer the Arcanum of Burning Mysteries, a best-in-slot helmet enchant for casters, plus powerful enchant patterns and rings.
Borean Tundra Reputation Sources
Coldarra Mage Operations
All Coldarra quests help raise Kirin Tor reputation alongside Wyrmrest Accord.
Shared hub at Amber Ledge/Transitus Shield.
Key Coldarra Quests for Kirin Tor Rep:
Prison Break – Rescue captured mages from Blue Dragonflight
Tank gloves are a reliable mitigation piece; cloth/leather selections round out caster/healer gearing.
Cenarion Expedition (via D.E.H.T.A.)
“Environmental protection through poacher elimination.”
Completing D.E.H.T.A.’s anti-poaching quests in Borean Tundra grants Cenarion Expedition reputation and helps you progress toward the Cenarion War Hippogryph mount and The Diplomat achievement.
D.E.H.T.A. Camp – Lake Kum’uya
Location: (57.8, 44.2) – Between Fizzcrank Airstrip and main Borean routes
Key NPCs: Various environmental activists and druid representatives
Every anti-poacher quest = 250 Cenarion Expedition reputation
Reputation contributes to Cenarion Expedition’s broader progression, culminating in the Cenarion War Hippogryph at Exalted level.
Valiance Expedition/Warsong Offensive
“Your faction’s military expedition into Northrend.”
Both the Alliance’s Valiance Expedition and the Horde’s Warsong Offensive are umbrella reputation factions that tie directly into your natural quest progression in Borean Tundra. They offer some valuable rewards such ashead enchants at level 80 and the coveted Engineering motorcycle schematics at Exalted.
Reputation Sources
Reputation accumulates automatically through nearly all Borean Tundra quests. No extra actions needed.
Borean Tundra also hosts subfactions whose quests feed the umbrella Expedition reputation automatically, so there’s nothing extra to manage. The Taunka (Horde) are the most present, with quest chains like Steeljaw’s Caravan, Mammoth Hunting, and Defending the Outpost run out of Borgorok Outpost (50.2, 9.7) near the Dragonblight border.
The Hand of Vengeance (Horde Forsaken) and the Explorer’s League (Alliance) appear only lightly here, mostly through storyline and breadcrumb quests leading in from neighboring zones.
All of these share a combined reputation pool with their umbrella faction (Alliance Vanguard or Horde Expedition), so questing for any one of them builds the parent rep. Dungeon runs without another faction’s tabard equipped also feed this umbrella reputation.
Reputation Efficiency Wrap-Up
Tier 1 – Early Priorities
Wyrmrest Accord → Unlock tabard, prep for heroic dungeon grind.
The Kalu’ak → Friendly for daily quest, aim for Exalted over 2–3 weeks.
Cenarion Expedition (via D.E.H.T.A.) → For mount collectors and The Diplomat title.
Taunka (Horde only) → Storyline value and umbrella rep gains.
Tips for Efficient Reputation Farming
Reputation multipliers: The Human racial Diplomacy gives a 10% bonus to all reputation gains. Some guilds carry reputation perks as well (server-dependent). Later, Commendation Badges from Dalaran dungeon dailies grant 520 reputation each.
Travel and dailies: Learn the Walker of the Waves turtle-boat timing and grab the Transitus Shield flight path early. Both connect to daily quest hubs and save real time over a full grind.
Quest order and items: Some reputation chains must be completed in a specific order, and a few unique quest drops trigger follow-up chains, so hold onto them rather than vendoring.