Expeditions, war stories & culture

War stories, articles & game guides

Gamer

Tribute

2026

Expeditions,

War Stories &

Culture

Share

The Ancient Armor of the Kvaldir

Both Factions • Howling Fjord • Level 71 • Scalawag Point
Recover the Ancient Armor of the Kvaldir from a beached Forsaken destroyer and deliver it to Orfus of Kamagua.
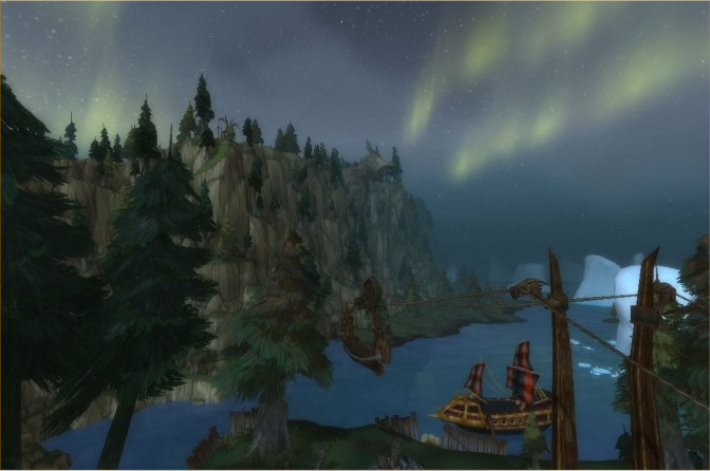
"Silvermoon" Harry at Scalawag Point [35, 81]. Talk to Alanya on the dock at [36, 82] to take Harry's Bomber to the beached ship at [81, 73]. Board the ship, take the right-hand door, go down the stairs, and loot the armor at the very back of the cargo hold. It can look like a bucket, so keep your eyes open. Important: The glowing mist on the ship deals minor damage that breaks stealth. A return bomber is waiting on the island despite Alanya warning otherwise. One of four artifact recovery quests from Harry; all four can be done in any order.
Vikstone's Classic Expedition
The Forsaken were long gone from the beached destroyer, but the Kvaldir were not. Spectral figures drifted through the wreckage as Vikstone descended into the cargo hold, and the armor in its depths seemed to drink the light around it.

“I was on the vessel that was bringing in the armor. We’d just boarded the ship and were headin’ back here when we were attacked by a Forsaken destroyer. They boarded our ship, took all the booty for themselves, and then sunk her. That was the last I’d seen of that armor. If you want, you can take my bomber from Scalawag to the dreaded isle that the destroyer be docked. Talk to my woman, Alanya, outside. She’ll get you on the bomber.

If you manage to find the stuff, don’t you dare bring it back!”

-“Silvermoon” Harry

Objective

LEVEL

71

Requires level

68

Recover the Ancient Armor of the Kvaldir and deliver it to Orfus of Kamagua in the Howling Fjord.

  • The Ancient Armor of the Kvaldir


Ship Location: Found at 81,73, southeast of Scalawag Point. 
Starting NPC: Speak with Alanya at 35,82 in Scalawag Point to take Harry’s Bomber to the ship.
“Silvermoon” Harry at Scalawag Point [35, 81]. Talk to Alanya on the dock at [36, 82] to take Harry’s Bomber to the beached ship at [81, 73].


Reward

Upon completion of this quest you will gain:
20,100 experience
250 reputation with The Kalu’ak

Walkthrough


Quest Giver: “Silvermoon” Harry — Scalawag Point, Howling Fjord [35, 81]

Turn-in: Orfus of Kamagua — Howling Fjord

Objective: Recover the Ancient Armor of the Kvaldir from a beached Forsaken destroyer and deliver it to Orfus of Kamagua.


Quick Facts


Walkthrough

Getting to the Ship

  • Talk to Alanya on the dock at Scalawag Point [36, 82] to board Harry’s Bomber. She’ll fly you directly to the ship.
  • The bomber flies at roughly double epic flying mount speed, so use it even if you have your own flying mount.
  • You’ll be dropped in the water near the ship. Swim to it and climb aboard.


Looting the Armor

  • Board the ship and take the right-hand door. Go down the stairs to the lower deck.
  • Head toward the very back of the cargo hold. The armor is at the far end of the room. It can look like a bucket at first glance, so keep your eyes open.
  • The ship is crawling with Vengeful Kvaldir ghosts. You may need to kill at least one near the armor before you can loot it.
  • Rogues and Druids: The glowing mist on the ship deals minor damage, which is enough to break stealth. Plan for combat or save Vanish/a combat cooldown.


Return Trip

  • A second bomber is always parked on the island for the return flight, despite Alanya warning that “it’s a one way trip.” She’s being dramatic.


Efficiency Tips

  • All four artifact quests unlock simultaneously after “Scoodles.” Grab all four from Harry before heading out, then knock them out in a loop: the armor (bomber flight east), the Staff of Storm’s Fury (ship off Isle of Spears), the Frozen Heart of Isuldof (Jonah Sterling’s cave), and the Lost Shield (Sister Mercy ghost ship). The shield quest has the longest chain, so start the others first.
  • If you’re grouped, only one player can loot the armor at a time. If it doesn’t respawn after your party member loots it, abandon and re-accept the quest from Harry to reset it.


Lore Context

  • The Northsea Freebooters stole four sacred kvaldir artifacts from the vrykul burial ground at Shield Hill, which awakened the kvaldir and brought their wrath down on the coast. Harry’s ship was intercepted by a Forsaken destroyer while transporting the armor. The Forsaken seized everything and beached the ship, but they’ve since moved on, leaving the kvaldir ghosts to claim it.
  • Harry’s terror of these artifacts is genuine. His actual words: “If you manage to find the stuff, don’t you dare bring it back!” The pirates know the cursed relics destroyed everyone who touched them, including “Mad” Jonah Sterling, whose sanity shattered from contact with Isuldof’s Frozen Heart.
  • Returning all four artifacts to their graves at Shield Hill is the only way to calm the kvaldir and protect the Kalu’ak tuskarr, who are caught in the crossfire.


Cross-Expansion Connections

The Kvaldir Beyond WotLK

  • Legion: The kvaldir’s true origin is revealed in Stormheim. They are servants of Helya, the corrupted titan-forged who created Helheim as a twisted mirror of Odyn’s Halls of Valor. The mist-shrouded raiders players encounter here are an early taste of the Helarjar forces that play a major role in the Maw of Souls dungeon and Trial of Valor raid.


“Silvermoon” Harry and Alanya

Battle for Azeroth: Both Harry and Alanya resurface at Fort Victory in Nazmir, still together and still pirating. For a pair of scoundrels who were terrified of ghost armor, they’ve done well for themselves.


Explore Howling Fjord’s hidden easter eggs, lore mysteries, and connections across Warcraft history in Vikstone’s Howling Fjord Chronicles, along with the complete quest storyline.

You will be able to choose one of these rewards:

You will receive:

2 Gold

40 Silver

Upon completion of this quest you will gain:

10,050 experience
75 reputation with Valiance Expedition

Warrior IconVikstone's War Journal

Vikstone Portrait Act 1
Illustrated by Christian DiBari and Simon Gough.

“I was on the vessel that was bringing in the armor,” Harry said. “We’d just boarded the ship and were headin’ back here when we were attacked by a Forsaken destroyer. They boarded our ship, took all the booty for themselves, and then sunk her.”

What he didn’t say: they ran. East, away from Scalawag, away from any hope of reinforcement. The Forsaken ran them down anyway.

“That was the last I’d seen of that armor. If you want, you can take my bomber from Scalawag to the dreaded isle that the destroyer be docked. Talk to my woman, Alanya, outside. She’ll get you on the bomber.”

His voice turned hard.

“If you manage to find the stuff, don’t you dare bring it back!”

Alanya was waiting outside Harry’s tent. She told me more than I needed to know about his blood elf obsession while preparing the bomber, but she got me airborne. The flight took me southeast, over open water, to a rocky island where the beached destroyer listed against the shore.

The Forsaken were long gone. But the Kvaldir were not.

Spectral figures drifted through the wreckage. I could feel their attention turn toward me as I moved through the ship’s broken hull, the temperature dropping with each step toward the cargo deck. They didn’t attack. They watched, waiting to see if I was foolish enough to claim what they guarded.

The armor lay in the hold’s depths, ancient metal that seemed to drink the light around it. Windan’s curse echoed in my memory: ten thousand years of anguish for any who dared wear it.

I wrapped it in canvas without touching the metal directly.

The bomber was still waiting on the shore. The Kvaldir let me leave. Perhaps they wanted the armor returned to its grave. Or perhaps they simply wanted it gone from their sight.

Either way, Orfus would have his artifact. One of four.


Near Scalawag Point a man they called Mad Jonah Sterling still had The Frozen Heart of Isuldof, and whatever it had done to his mind had not worn off.

Share

Share this:

The Making of the Guide

Solo PvP Guide

The Guide to SWGEmu

>