Expeditions, war stories & culture

War stories, articles & game guides

Gamer

Tribute

2026

Expeditions,

War Stories &

Culture

Share

The Staff of Storm’s Fury

Both Factions • Howling Fjord • Level 71 • Isle of Spears
Recover the Staff of Storm's Fury from the abandoned ship at Iskaal and deliver it to Orfus of Kamagua.
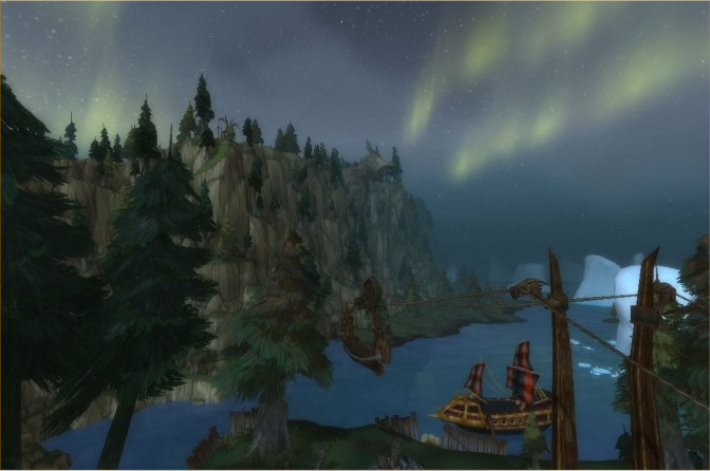
"Silvermoon" Harry at Scalawag Point [35, 81]. The ship is moored at Iskaal [35, 64] on the coast of the Isle of Spears, visibly crackling with lightning. Important: Do not fight Abdul the Insane (level 72 Elite, 96k HP). He respawns within seconds of dying. Wait on the gangplank, watch his patrol, and slip below decks when he walks to the upper rear of the ship. The staff is at the very back of the lowest cargo hold. Jump off the far side of the ship into the water if he catches you on the way out. Pair with Avenge Iskaal from Elder Atuik, which targets Slavers in the same area.
Vikstone's Classic Expedition
Abdul the Insane paced the deck above, laughing at nothing, while Vikstone slipped into the rotting hold below. The staff hummed with something he felt in his chest rather than heard, and Rodin's curse echoed in the air around it.

“Those artifacts are cursed and you’d be crazy to go looking for them, Night Elf. I know for certain that anyone that’s come into direct contact with any of those items has either gone mad or been killed. Take that staff, for example. Last I heard the ship that held it was abandoned and left to rot on the coast of the Isle of Spears, north of here. If you want that thing, check the ship’s hold.

Whatever you do, don’t bring that staff back here! And steer clear of Abdul! He’ll tear your heart out.”

-“Silvermoon” Harry

Objective

LEVEL

71

Requires level

68

Recover the Staff of Storm’s Fury and deliver it to Orfus of Kamagua in the Howling Fjord.

  • The Staff of Storm’s Fury


Ship Location: Found at 35.26, 64.83, off the coast near Scalawag Point.
Staff Location: On the bottom deck of the ship, at the very back of the cargo hold. 

Tips for Completion:
Navigating the Ship:
Avoid Abdul the Insane: Wait for Abdul to patrol to the top deck before entering the ship. Once he's out of sight, head straight down to the bottom deck and retrieve the staff.
“Silvermoon” Harry at Scalawag Point [35, 81]. The ship is moored at Iskaal [35, 64] on the coast of the Isle of Spears, visibly crackling with lightning.


Reward

Upon completion of this quest you will gain:
20,100 experience
250 reputation with The Kalu’ak

Walkthrough


Quest Giver: “Silvermoon” Harry — Scalawag Point, Howling Fjord

Turn In: Orfus of Kamagua — Ancient Lift, Howling Fjord

Objective: Recover the Staff of Storm’s Fury from the abandoned ship at Iskaal and deliver it to Orfus.


Quick Facts


Walkthrough

Getting to the Ship

  • Head to the abandoned ship moored at Iskaal [35, 64], on the coast of the Isle of Spears northeast of Kamagua. The ship is visibly crackling with lightning energy from the cursed staff.
  • Abdul the Insane, a level 72 Elite, patrols the ship’s decks. He has 96,100 HP but relatively low damage output. Despite this, he’s a long fight to solo at-level and respawns within seconds of being killed, so fighting him gains you nothing.


Retrieving the Staff

  • Wait on the gangplank and watch Abdul’s patrol route. When he walks to the upper rear portion of the deck, run onto the ship and head immediately below decks.
  • Go all the way down to the lowest level of the cargo hold. The staff is at the very back.
  • Loot the staff, then head back up. Check Abdul’s position before exiting onto the main deck. If he’s nearby, jump off the side of the ship into the water (the side facing away from shore) and swim clear.


Efficiency Tips

  • Don’t fight Abdul. Even if you can kill him, he respawns almost instantly. Stealth or avoidance is the intended approach.
  • Mages: Use Invisibility to walk past Abdul entirely. The spell lasts long enough to reach the hold. Note the 3-minute cooldown if you need it again on the way out.
  • Rogues/Druids: Stealth trivializes this quest.
  • Everyone else: Abdul’s patrol is predictable. Patience beats bravery here. If he catches you on the way out, just jump overboard.
  • Quest Pairing: Pick up Avenge Iskaal from Elder Atuik in Kamagua before coming here. The Crazed Northsea Slavers you need to kill are in the same area around the ship, so you can clear both objectives in one trip.
  • Artifact Route: Do all four artifact quests in a single loop from Scalawag Point: cave for the Frozen Heart → Iskaal ship for the Staff → coast for the Ancient Armor → ghost ship (Sister Mercy) for the Shield chain.


Lore Context

  • The Staff of Storm’s Fury is one of four vrykul artifacts stolen from the burial ground at Shield Hill by the Northsea Freebooters. The grave robbery awakened the kvaldir, undead vrykul spirits that now terrorize Northrend’s coastlines.
  • Abdul went mad specifically from proximity to the cursed staff. His ranting (“Its power courses through me! I AM A GOD!”) echoes what happened to the Freebooters’ leader, “Mad” Jonah Sterling, who was driven insane by the Frozen Heart of Isuldof.
  • Returning all four artifacts to their graves at Shield Hill (in A Return to Resting) concludes this chain and earns significant Kalu’ak reputation toward the faction’s rewards.


Easter Egg

  • Abdul the Insane is likely a reference to Abdul Alhazred, the “Mad Arab” from H.P. Lovecraft’s Cthulhu Mythos. Alhazred is the fictional author of the Necronomicon, a forbidden tome that drives its readers insane.
  • The parallel is fitting: both Abduls are driven mad by contact with an artifact of terrible power. This isn’t the only Lovecraft nod in Howling Fjord; the crazed dwarves in Whisper Gulch chant “Shur’nab… Yogg-Saron!” (a reference to Lovecraft’s Shub-Niggurath).


Cross-Expansion Connections

Kvaldir in Later Expansions

Legion (Stormheim): The kvaldir, awakened here by the Freebooters’ theft, become major antagonists in Stormheim. They serve Helya, the corrupted titan keeper who rules Helheim. Players face kvaldir throughout the zone and ultimately confront Helya in the Trial of Valor raid.


Explore Howling Fjord’s hidden easter eggs, lore mysteries, and connections across Warcraft history in Vikstone’s Howling Fjord Chronicles, along with the complete quest storyline.

You will be able to choose one of these rewards:

You will receive:

2 Gold

40 Silver

Upon completion of this quest you will gain:

10,050 experience
75 reputation with Valiance Expedition

Warrior IconVikstone's War Journal

Harry’s warnings had grown familiar by now, but the fear underneath them hadn’t faded.

Vikstone Portrait Act 1
Illustrated by Christian DiBari and Simon Gough.

“Those artifacts are cursed and you’d be crazy to go looking for them. I know for certain that anyone that’s come into direct contact with any of those items has either gone mad or been killed.”

He gestured vaguely north.

“Take that staff, for example. Last I heard the ship that held it was abandoned and left to rot on the coast of the Isle of Spears, north of here. If you want that thing, check the ship’s hold. Whatever you do, don’t bring that staff back here! And steer clear of Abdul! He’ll tear your heart out.”

The ship had run aground near Iskaal, listing against the rocks. The Freebooters had abandoned it entirely, fleeing whatever the staff had done to them. Only Abdul remained.

I heard him before I saw him. Muttering, laughing at nothing. The sounds of a mind that had cracked open and let something else in.

Abdul the Insane paced the deck above, his movements unpredictable. I slipped into the hold through a gap in the rotting hull, moving by touch in near-darkness. The smell of brine and decay thickened as I descended. At the far end of the hold, the staff waited.

It hummed. Not a sound I could hear with my ears, but something that resonated in my chest, behind my eyes. Rodin the Reckless had cursed the land: The storms will never cease. I could feel that promise in the air around the artifact.

I wrapped it without touching the metal and climbed back out the way I came. Above, Abdul’s laughter echoed across the water.

Orfus accepted the staff with the same grave composure as before. “We must return all of the artifacts. When all four are gathered, you will put them back in their graves.”


Three recovered, and The Lost Shield of the Aesirites had found its way onto a ghost ship, which meant waiting for the Sister Mercy to put in.

Share

Share this:

The Making of the Guide

Solo PvP Guide

The Guide to SWGEmu

>